
Protar’s founder, Tarquinio Provini, passed away on this exact day 20 years ago. As an automobile scale model enthusiast, allow me to take a moment to reflect on Provini’s legacy and his contributions to the world of plastic models through Protar in this post.
Now, if you are scratching your head wondering what Protar is – yep, you are very unlikely to find their products at your local Hobby chain stores. But if you go visit a hobby store where you easily get the vibe that this store has been around for decades, with aged owners who might not be around forever – you might just be able to discover some Protar’s offerings in dusty, worn-out boxes. There, you’ll spot Protar’s iconic pear green logo.
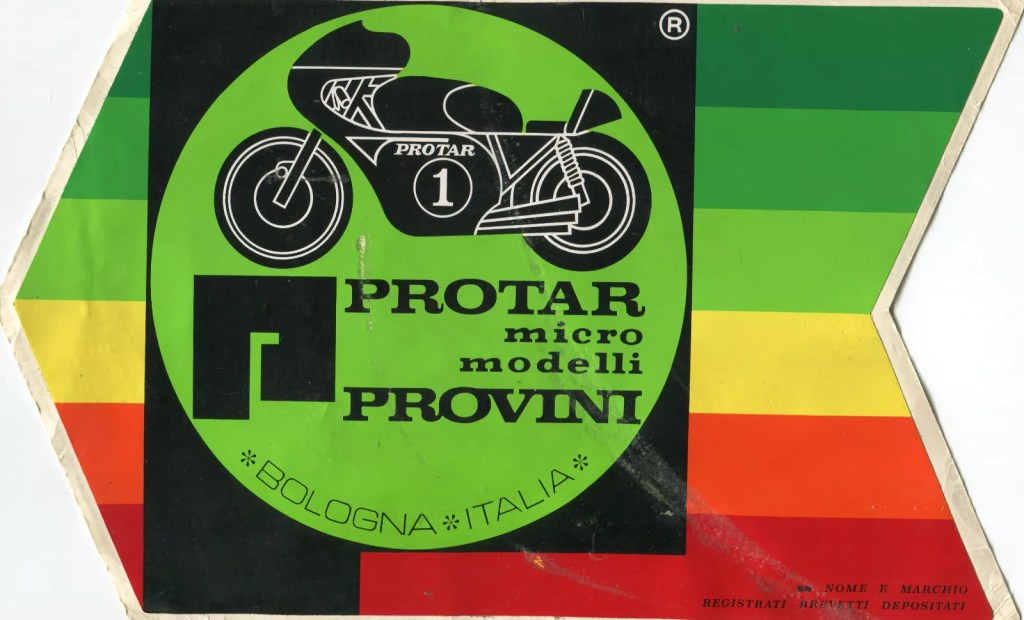
(Photo Credit: Art & Movie Gallery, eBay)
So…Protar must’ve made a lot of bikes, correct? Very sharp observation here, I must say so. One cannot really miss it – do you see how big the proportion that racing bike takes on the logo?
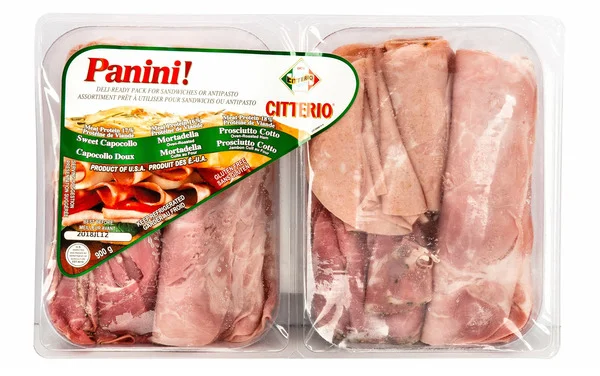
I guess it’s safe to say that everybody is somewhat familiar with Bologna. For me, it is because of the Mortadella I placed on my sandwich bread every day.
What you might not know is that the city gave birth to two well-known scale model companies – one is, of course, Tarquinio Provini’s Protar, and the other one is, well, you must have heard (sh)Italeri, huh?
One thing I learned while growing up building scale models is to avoid Italeri kits if possible. They earned the name “shitaleri” because of poor kit qualities, particularly if compared to the Japanese manufacturers. Recent years have seen a significant bump up in the quality of Italeri’s offerings, which, to me, have definitely taken off that shitty hat. Italeri has become one of the major scale model companies over the years, with a wide production line covering military vehicles, automobiles, aircraft, ships, and figures. Their 2021 product, 1/12 Lancia Delta, is mouth-watering!
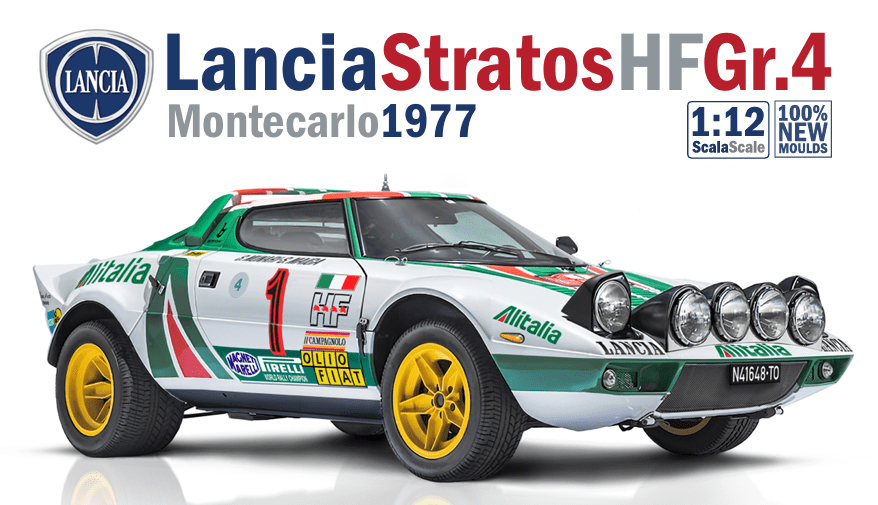
(Picture Credit: Italeri Newletter October 24, 2024)
Ah, praise the Italeri gods for saving us from pursuing the holy grail of the Doyusha Stratos. Absolutely no thanks to you, Canada Post gods! (still not available in Canada, can you believe that eh).
The twin brother of Italeri, Protar, shared a very similar reputation, especially for many of their 1/24 vehicle kits. Unfortunately, we won’t be able to see any improvements from Protar, as it is a brand that no longer exists today.
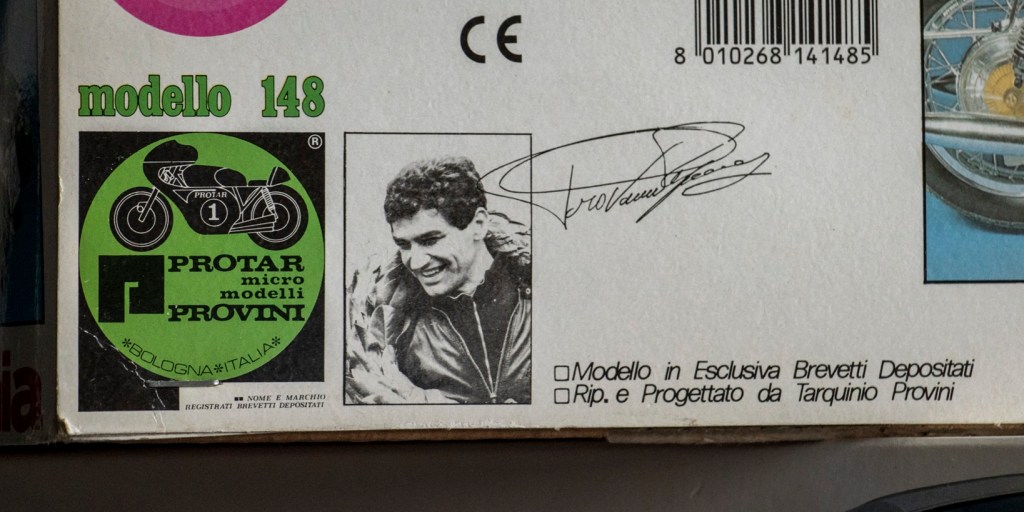
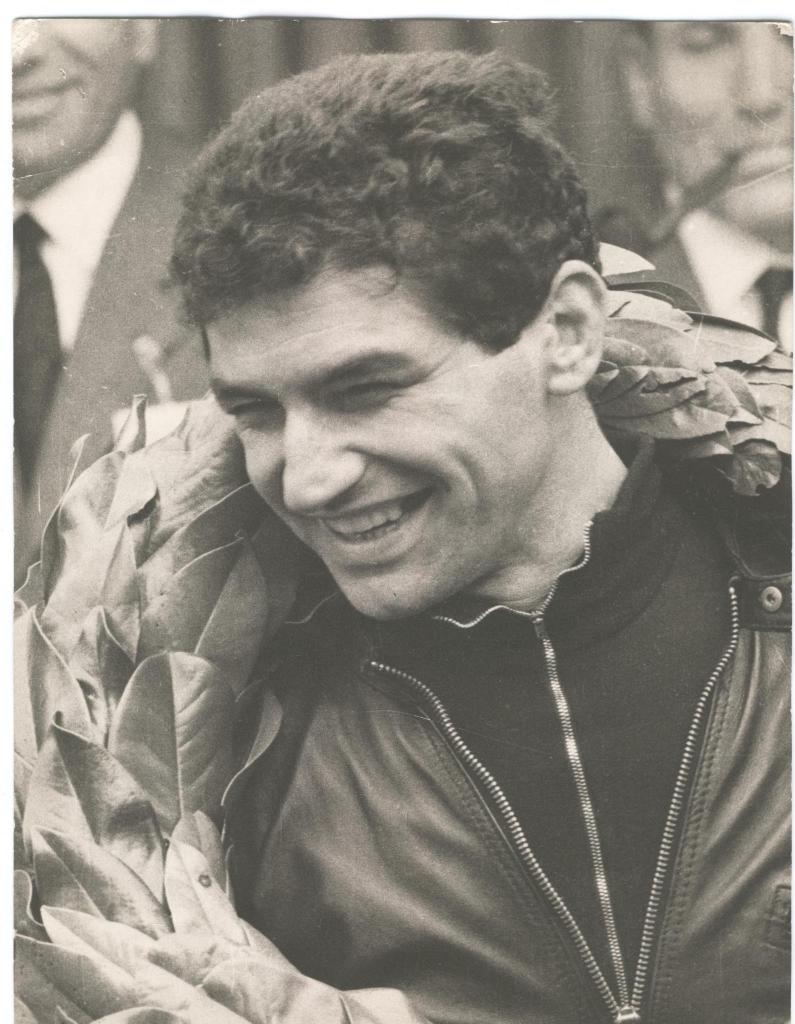
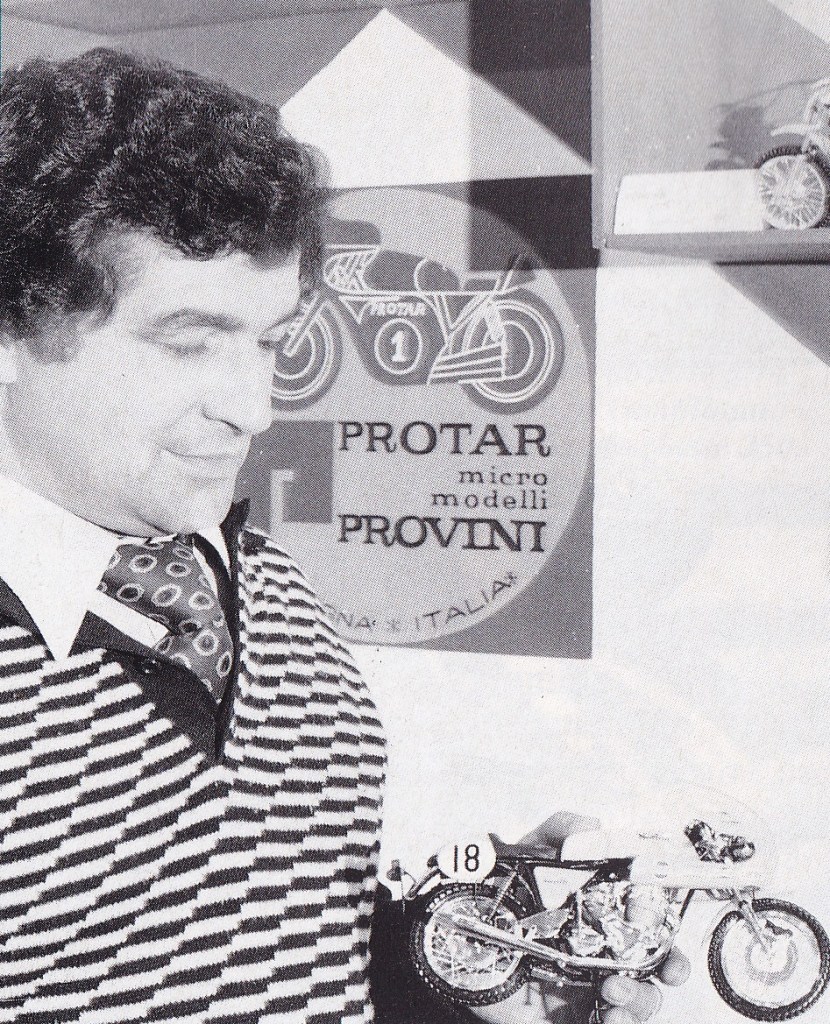
Although not on all Protar boxes, you’ll often find this small portrait next to the green logo. Sometimes, it’s also accompanied by a classy signature!
(Photo Credit: Tarquinio Provini, Facebook page)
And that smiling guy is none other than the founder of Protar, Tarquinio Provini. Unlike the two young entrepreneurs who started their own scale modeling businesses out of dissatisfaction with the existing offerings, Tarquinio Provini was already a well-known name before Protar.

(Photo Credit: ITALERI FIFTY YEARS PARTY)
The two boys of Italeri, Mr. Giuliano Malservisi and Mr. Gian Piero Parmeggiani.
Provini was born in 1933 in Cadeo, Italy, about 130 kilometers northwest of Bologna. From a very young age, he was around his father, a garage owner, and played with engines and machinery. Almost naturally, at the age of 16, Provini began racing on two wheels (said used his uncle’s license, according to Wikipedia).
Provini had a quite successful career before 1966. He quickly moved up to the Grand Prix level and achieved his maiden win in his second Grand Prix race, taking 1st place in the 125cc race at the 1954 Spanish Motorcycle Grand Prix. He went on to claim his first world champion title in the same class in 1957 with Mondial and a second world title in the 250cc class in 1958 with MV Agusta. In 1959, Provini raced and finished in second place in both classes. From 1960 to 1962, there was a decline in his Grand Prix victories, although he remained successful in the national races in Italy. In 1963, Provini once again finished second in the 250cc class while pursuing the world title, this time with Morini. He continued with Benelli until the end of his career, although the cooperation didn’t go smoothly at first, as the four-cylinder Benelli wasn’t particularly competitive.
Things slowly but gradually got back on track in 1965, and both the team and Provini were looking forward to a more fruitful season—until the notorious, deadly Tourist Trophy held yearly on the Isle of Man. According to many articles I’ve read, sunlight was blamed for Provini’s near-fatal accident. It’s fair to say that he wasn’t entirely unlucky to survive a crash at over 200 km/h…

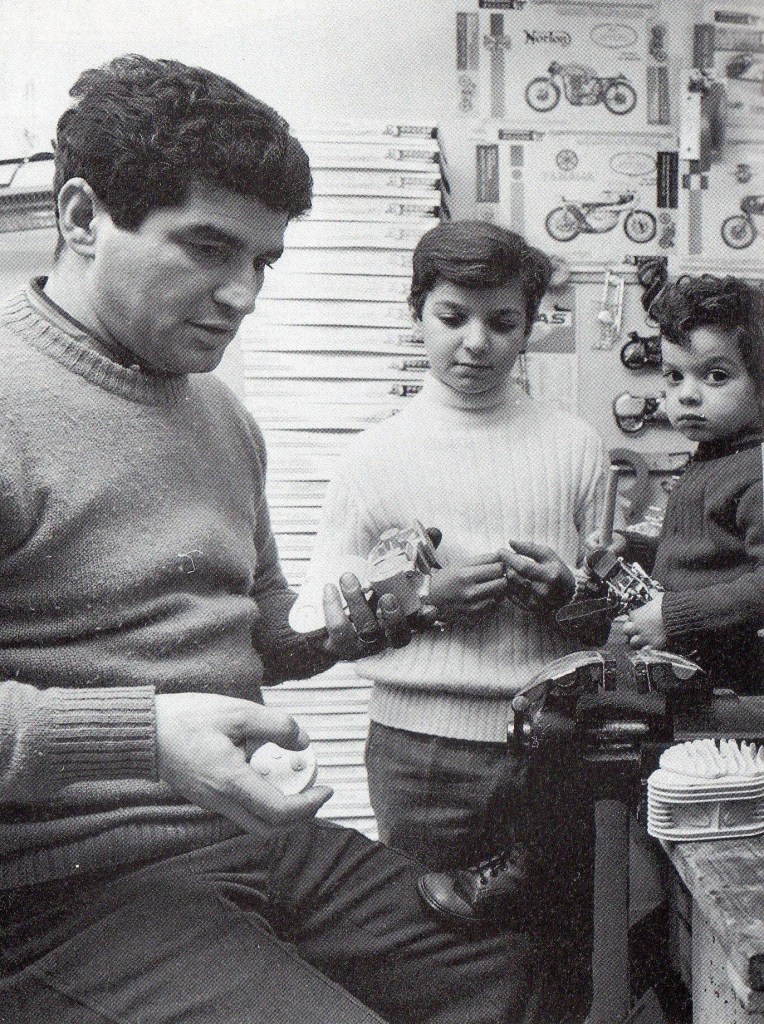
(Photo Credit: Satoshi Yoshizawa, Bad Toys for Speed)
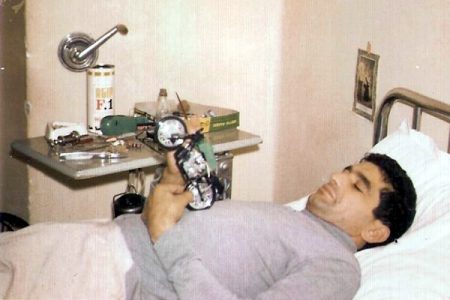
Provini, during his rehabilitation in 1966. Doctors made it clear that he would never walk again, but like all the heroes you’ve read about in books, Provini would eventually get back on his feet. However, there was no chance of returning to what he truly loved—motorcycle racing.
(Photo Credit: Satoshi Yoshizawa, Bad Toys for Speed)
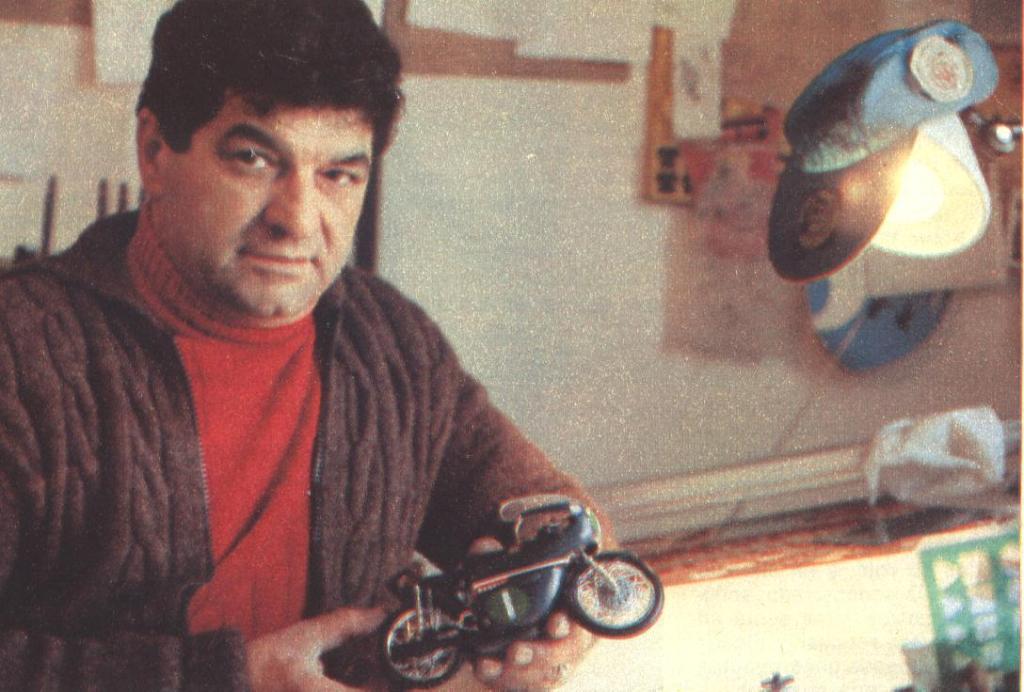
It is said that Provini was deeply impressed by a motorcycle model he received during his hospitalization, which eventually led him into the scale modelling business. I’m sure someone as sharp as you has already realized that PROTAR comes directly from Tarquinio Provini’s name. And, given the founder’s background, no wonder there’s a huge bike featured on the Protar logo.
I mentioned earlier that the fate of Protar has unfortunately been sealed. Fortunately, however, it was Italeri, Protar’s twin brother, that absorbed the company in 2003 (maybe 2005). Thanks to this, Provini’s legacy didn’t just fade into the annals of history. Italeri has been reissuing Protar’s products over the years, and some of the molds even seem to have been acquired by Revell.
Before its discontinuation, Protar mainly focused on producing motorcycle model kits in the unique 1/9 scale. While their production line expanded to include four-wheel vehicles, bicycles, and even boats, it never ventured beyond civilian vehicles. Satoshi Yoshizawa from Bad Toys for Speed has compiled a list of all Protar products, complete with high-resolution box art, here.
We are only one third of my writing here. I am pretty ashamed to say that I’ve yet to try one of the 1/9 kits, but boy, do they look stunning!
(Photo Credit: Yahoo Auction)
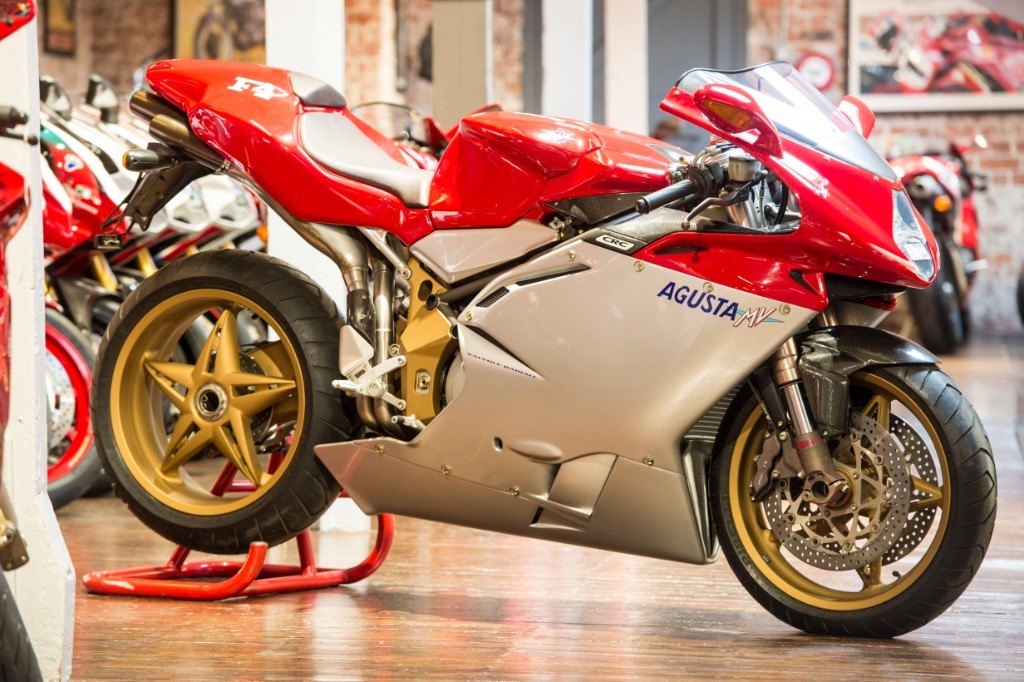
(Photo Credit: The Bike Specialists)
For example, this red-hot Agusta is currently on my watch list! You just wait, Yahoo Auction! Boy, that star-shaped wheel!
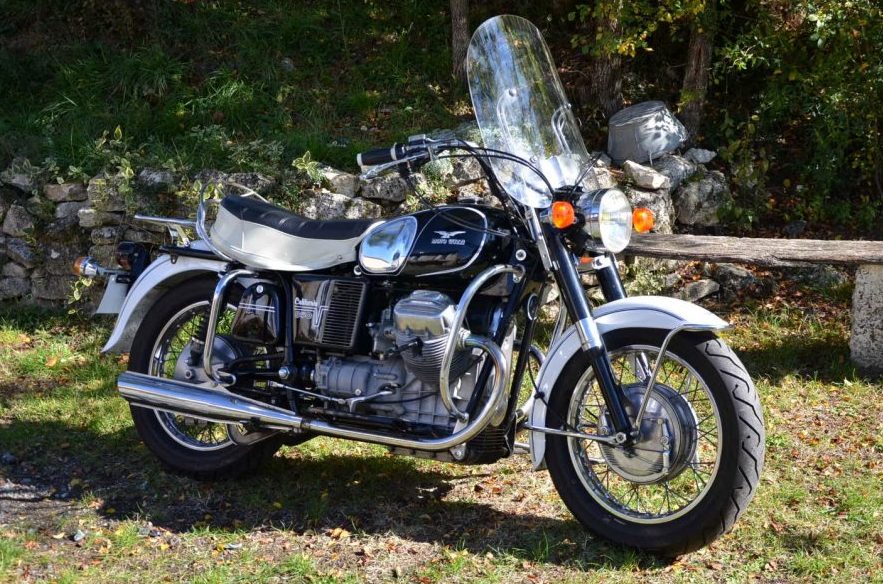
Protar made many, many more extraordinary-looking bikes, like this Moto Guzzi 500cc inline—dang, this thing looks like a spaceship!
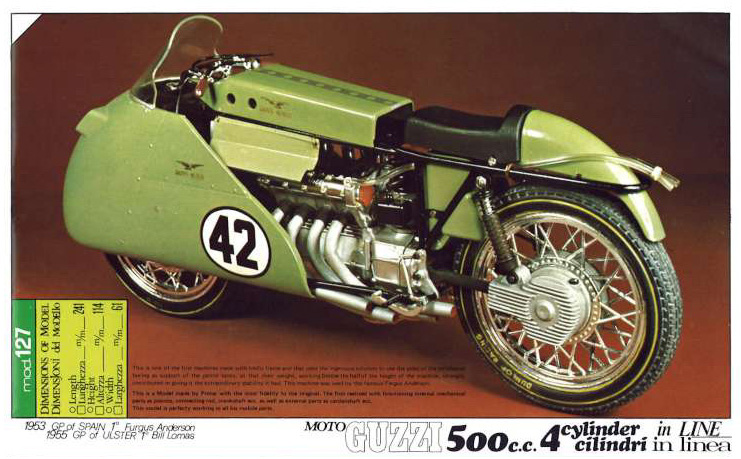
(Photo Credit: Satoshi Yoshizawa, Bad Toys for Speed)
Or this unique, very cool-looking BMW 500 sidecar…so streamlined, so futurstic, so steampunky…
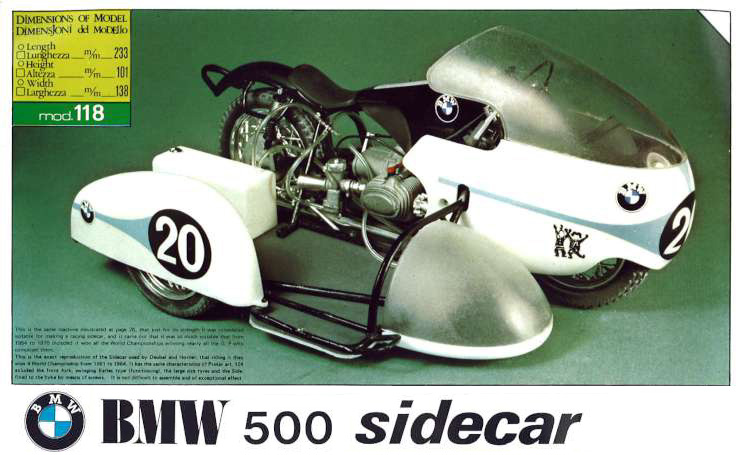
(Photo Credit: Satoshi Yoshizawa, Bad Toys for Speed)
Aside from the 1/9 motorcycles, Protar also made some great 1/12 scale models, just like my old friend, Tamiya! The only difference is that Protar’s 1/12 lineup is almost entirely Italian-made (almost). For example, I’ve had my eyes on their 312T series for a long time, especially because their 312T collection is COMPLETE (but for the T and T4, I’d recommend going with Tamiya) –
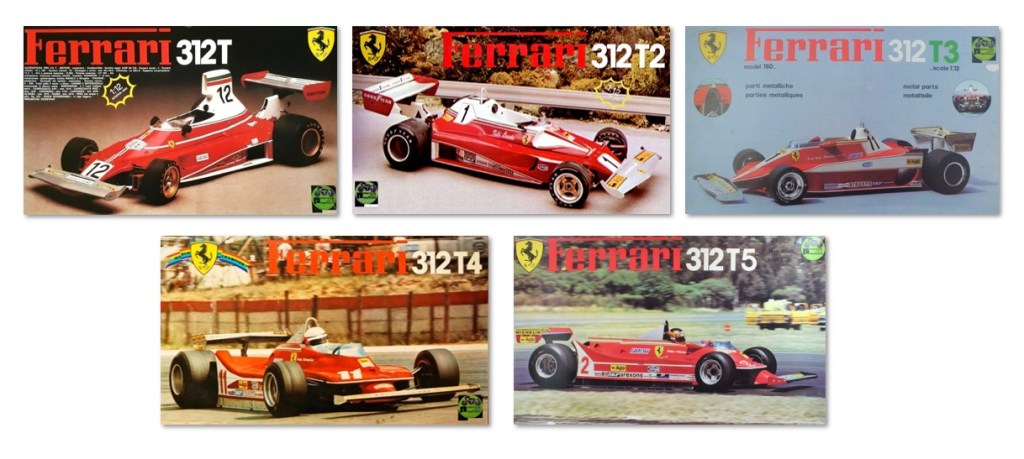
(Picture Credit: Scalemates)
Yep, even the T5!
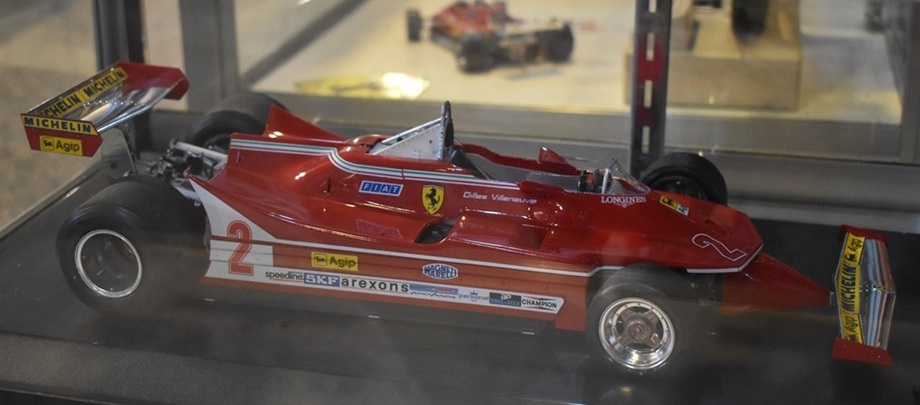
I saw this finished Protar 1/12 312T5 on display at the Musée Gilles Villeneuve in Quebec in 2019. It looked fabulous! Despite a miserable machine, I’ve always loved the middle fin behind the cockpit on the T5.
(Photo Credit: eBay)
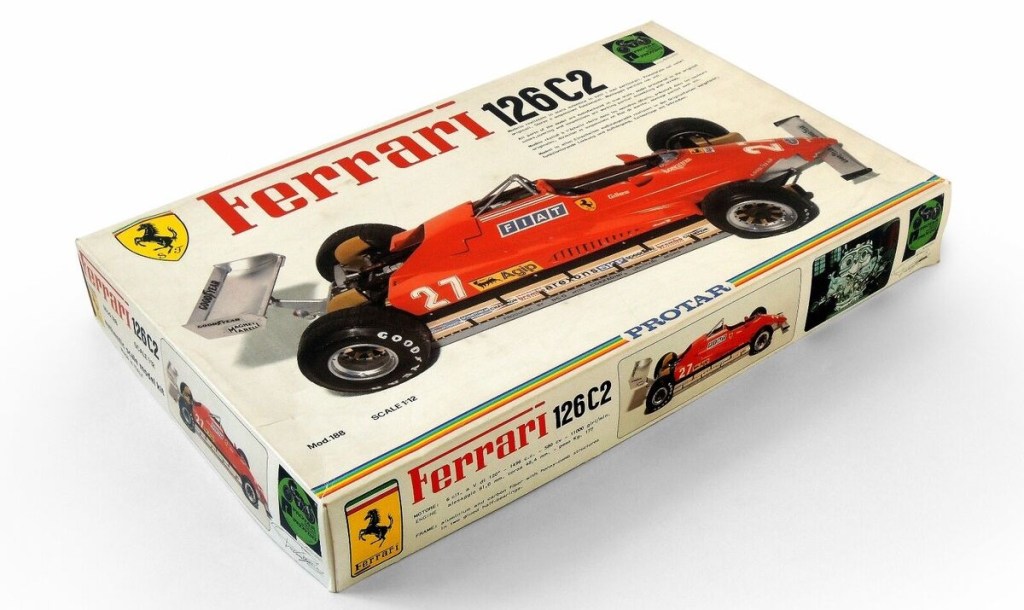
And of course, their long-sought 1/12 126 C2, a gourgerous kit!
(Photo Credit: Amazon)
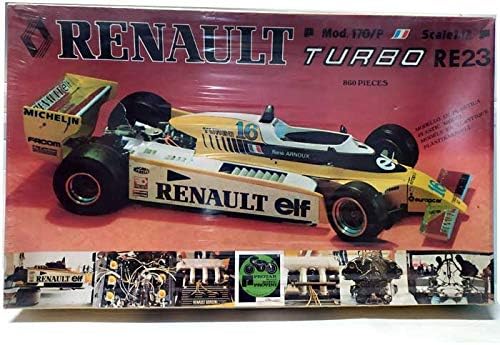
The 850+ (my lord) parts 1981 Renault RE23 – a slightly updated RE20. Dang, isn’t this car popluar? Tamiya, Heller, and Protar all made versions! My Heller copy is on its way to Canada now. Once I get an original Protar one, I can write a comparison review on all of them. Spoiler alert: Tamiya wins – but I’m curious to see how Protar and Heller handled this iconic French car.
Are these 1/12 models the same quality as the Tamiya ones in the same scale? The answer is NO, but they are far from bad either. In addition to their above-average quality, the topics chosen by Protar were just the cherries on top. The real problems arise with their 1/24 models.
Here’s my not-so-charming-looking 1/24 Lancia LC2 – which I’ve written a review article about some time ago, read it here – a very rare metal version I am proud to own (not for the quality). The shape of the front windshield is just off.
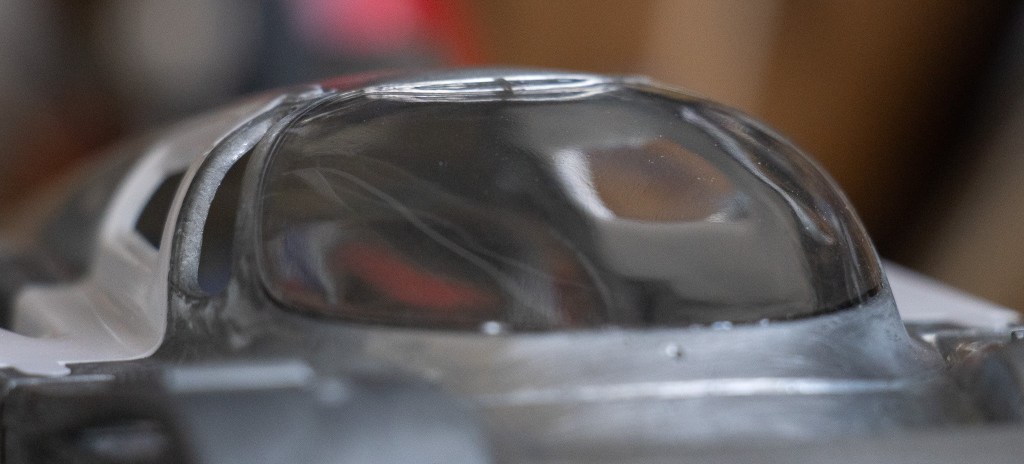
I’ll be honest, at least the fitment here is really, really good. I consider this a victory, 100%!
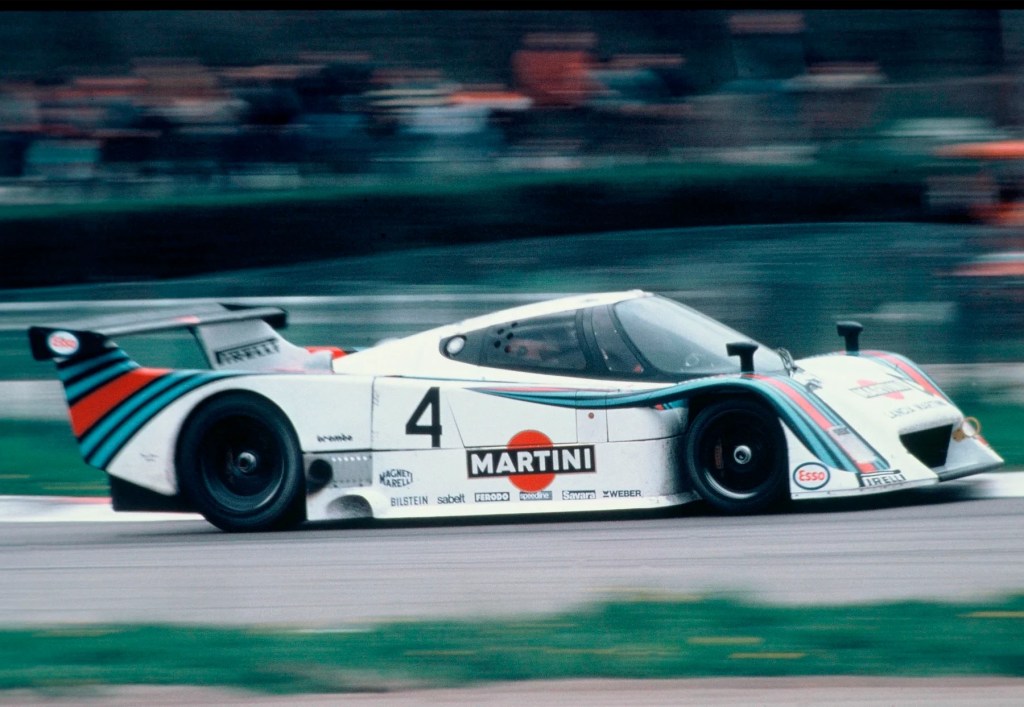
(Photo Credit: Lancia Archive, Dyler)
Buuuut, the real car would disagree with the shape…
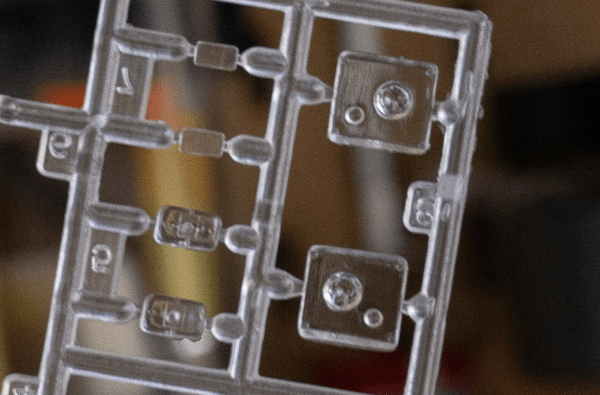
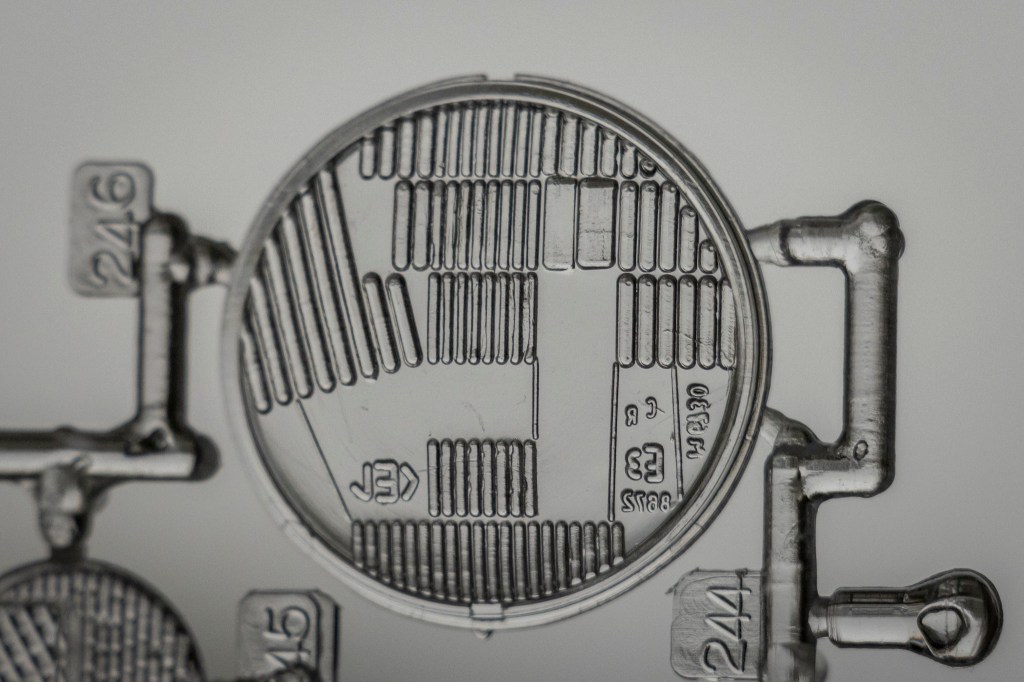
Front light glass with embedded headlight and turning light lenses will leave you speechless. Go on, buy a recent release from Italeri and you’ll see. Yep, that was a hundred-percent nothing-changed re-reissue by Italeri.
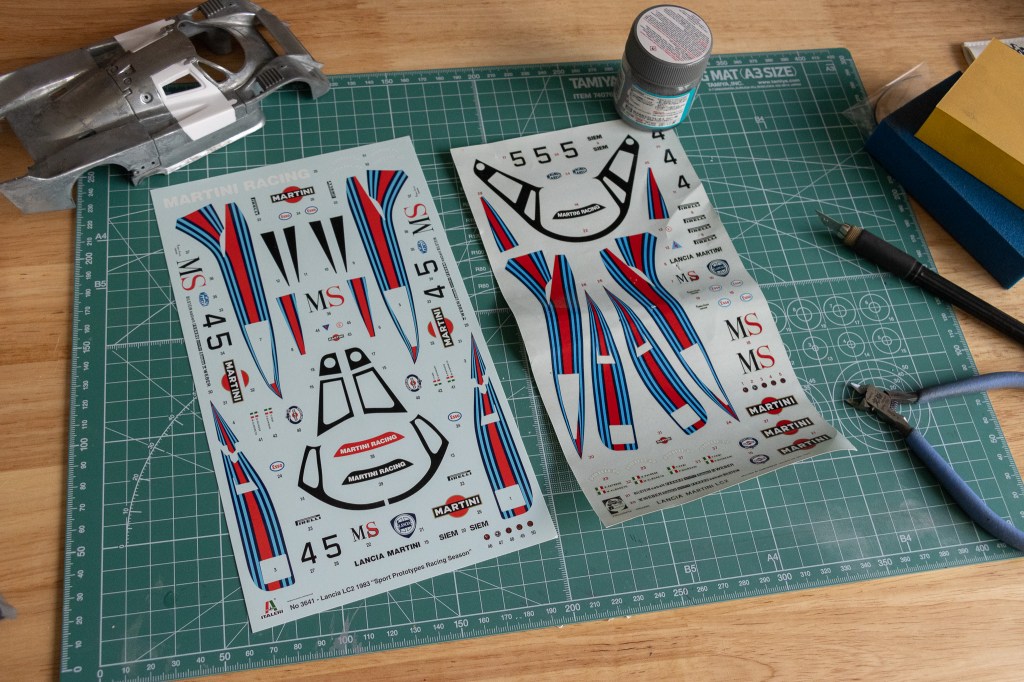
You could probably trust Protar’s decals, though! They seem like they’ll never turn yellow. Since these are all Italian companies, wouldn’t it make you wonder if Cartograf printed those? I can’t be sure, but judging by the thickness of the Protar decals, I’m afraid I might be right…
Nevertheless, this is the only Lancia LC2 you can cheaply buy today – Modeler’s resin LC2 is just too expensive and nearly impossible to find. Hey, it’s a car worth having if you’re into Group C monsters — the only real rival to the mighty 956! Oh… speaking of the Porsche 956, Protar once released the short-tail version…
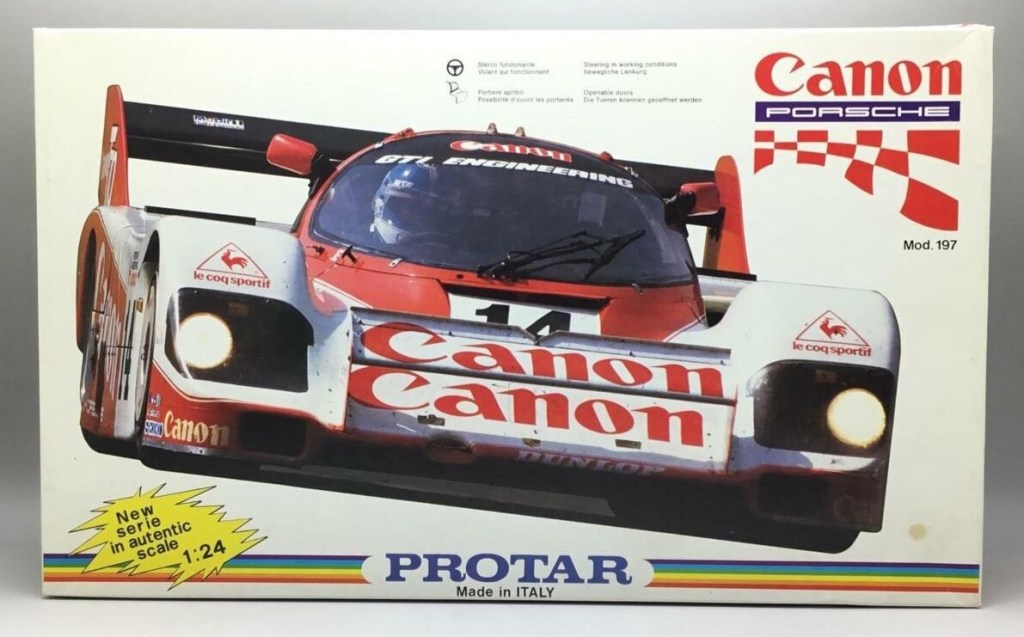
(Photo Credit: eBay)
I don’t own this one, but here are some comments by Domingos from alphamodelismo.pt:
(GPTed) As a miniature, I never understood why Protar-Provini made spectacular and correctly scaled motorcycles, but rarely got cars right—except for the 1/12 scale Ferrari 126C, which is fantastic. However, this 956 has several flaws: the rear tires are too small in diameter, even though the BBS rims are among the best for the era. The front windshield is too wide, giving the car a squat appearance, and the headlight covers are too narrow… Well, despite all these shortcomings, I remember that when I built it, it turned out to be quite an attractive miniature—perhaps because of the front wing or the ‘Made in Cartograph’ decals, which were spectacular.
Let’s be fair with Protar’s kits:
- Can they be built? Yes, check!
- Are they easy to build? Nuh-uh, No!
- Do they look good after being built? Ye…Yes?
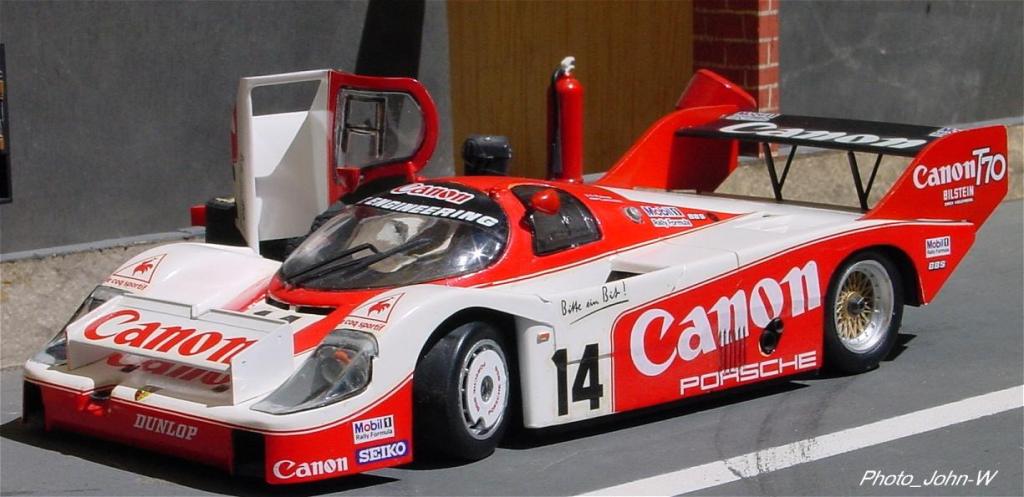
(Photo Credit: John-W)
I’m not lying, see – this exact same kit built by John-W looks fabulous (not to mention his super realistic diorama background, making the photo look like it was taken at the pit)! And let’s not forget the openable doors that come with the kit, a feature not found on Tamiya’s long-tail 956s released around the same time.
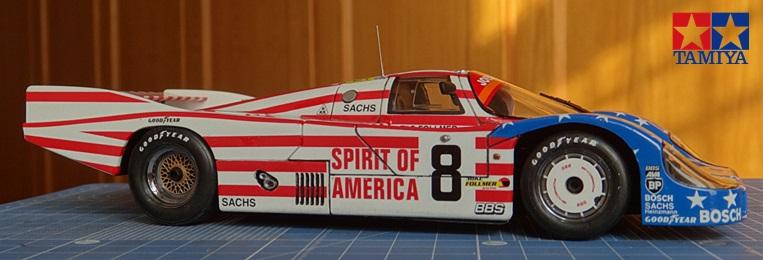
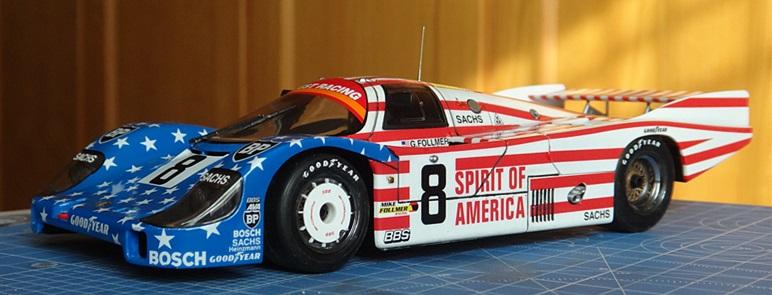
My Tamiya “Spirit of America” (Studio27 Decal) 956 long tail, built about 10 years ago. As a 956 die-hard fan, I would love to get a short tail one!
So, now you see – Protar was much like their twin brother, Italeri. The quality of their kits was almost always hit-or-miss. While it’s true that the Japanese giant, Tamiya, produced much higher-quality kits around the same time Protar was flourishing, it wouldn’t be reasonable or fair to label Protar’s contributions as garbage.
The flaws – wonky proportion, questionable fit, head-scratching or even speechless design – are submissive to Protar’s charm. Their 1/9 motorcycle series made it possible for those vintage and unqiue bikes to come back alive on modeler’s workbenches. Japan, for example – the country with the richest scale modelling culture – harbours a loyal Protar fan group. And while researching this Japanese fan group, I learned so much about the subject we are going to review today – the holy grail kit – 1/6 Moto Guzzi V-850 California.
Let me tell you this – This 1/6 Moto Guzzi V-850 California is THE BEST kit made by Protar, designed by Tamiya (Kinda). Allow me to explain below.
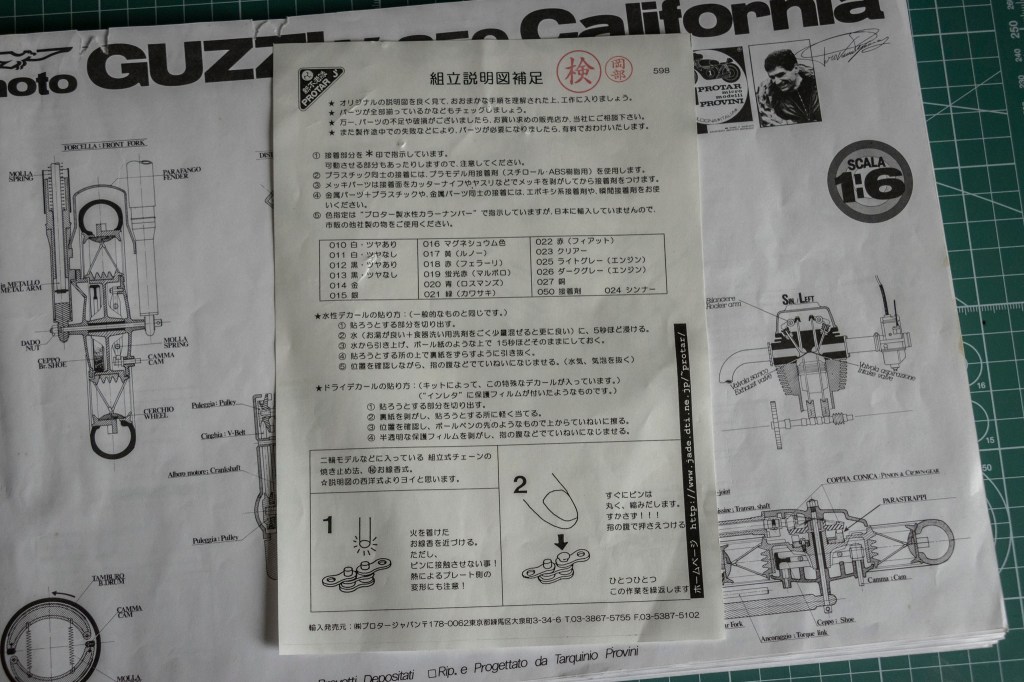
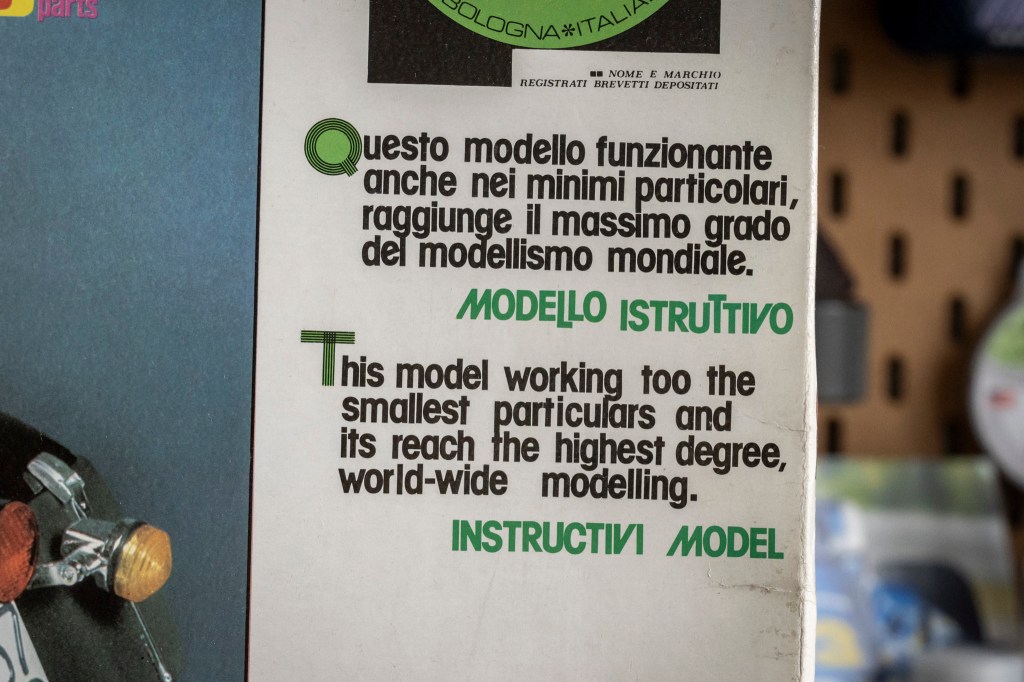
I have to start from where I got this kit. Yahoo auction! Not until I received the actual kit I learned that there was a “Protar Japan” in the past. This explains why I found this kit on a Japanese auction site. Interestingly, Protar Japan included an additional instruction manual with the kit, which I’ve shared here. The original Protar manual is printed in three languages: Italian, English, and French.
The president of Protar Japan was Kazuo Okabe (岡部和生), and you can spot his personal stamp (the smaller one with the kanji 岡部) next to the title on this additional manual. He’s not just any company president—this is THE Kazuo Okabe, once a respected designer from Tamiya. Some of his most notable works include these three:
(Photo Credit: Automobile Web Museum)
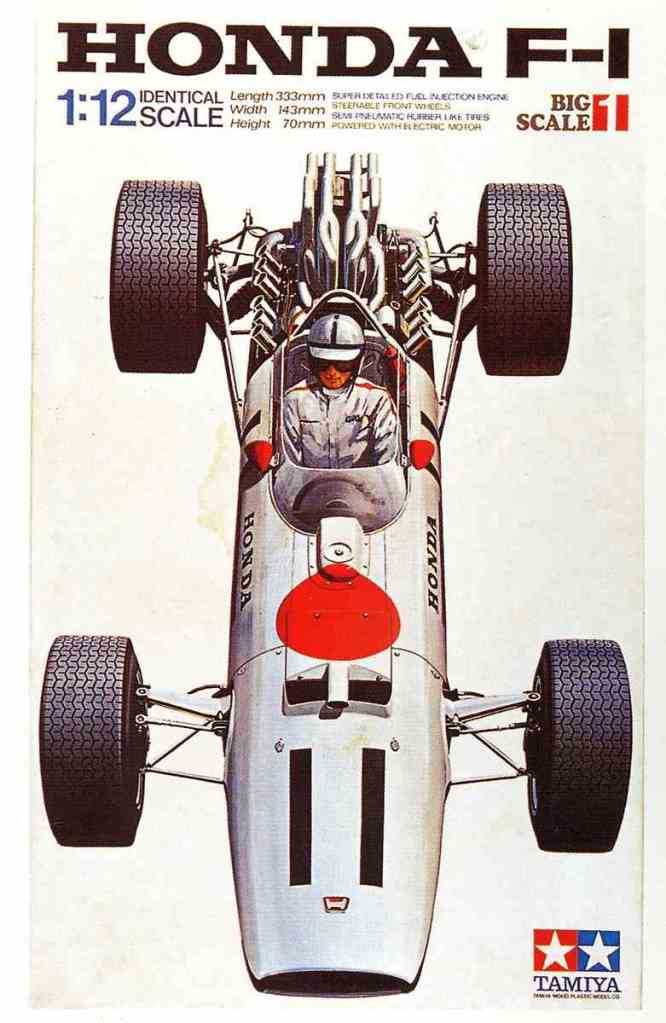
- The legendary Honda RA273, the first of the 1/12 Big Scale models! First released in November 1967 – This model made a huge impact at the 1968 Nuremberg International Toy Fair, marking the first time Tamiya’s name was heard and talked about worldwide.
(I got one! May 13, 2025)
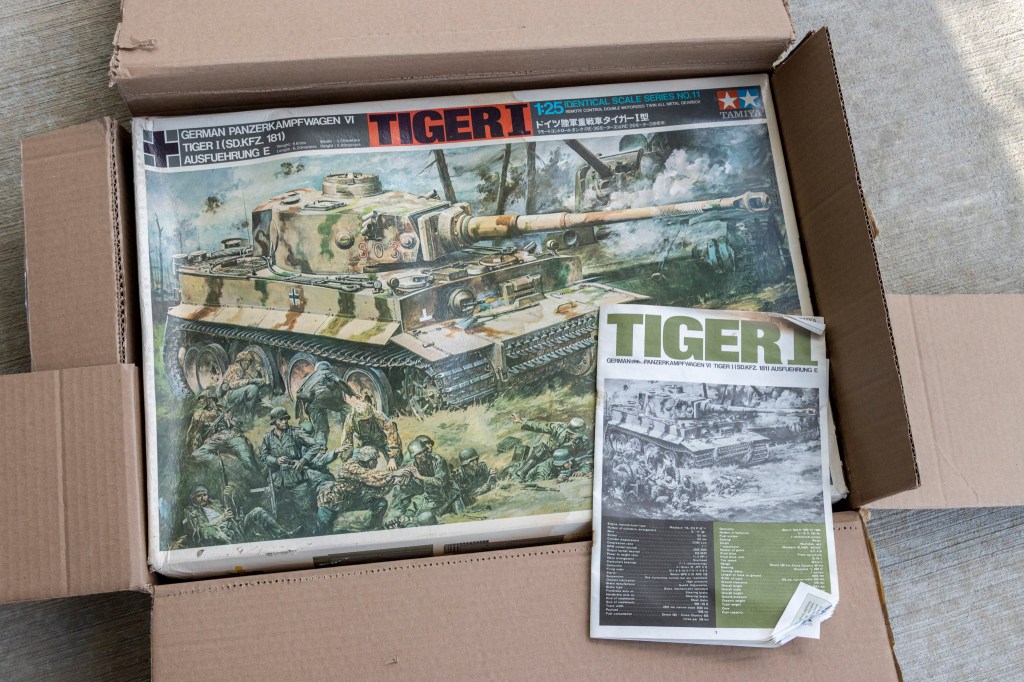
2. The 1/25 Tiger 1. A 1/25 Tiger 1 from 1969! The kit itself might seem okay by today’s standards, especially because EVERYBODY is making kits out of the Germany zoo, but boy – let’s rewind that clock 56 years – I bet you couldn’t even dare to dream for a big stunning tiger with almost full interiors and guess what, at the same time could be radio controlled! This big cat MOVES!!
(Photo Credit: Scalemates)
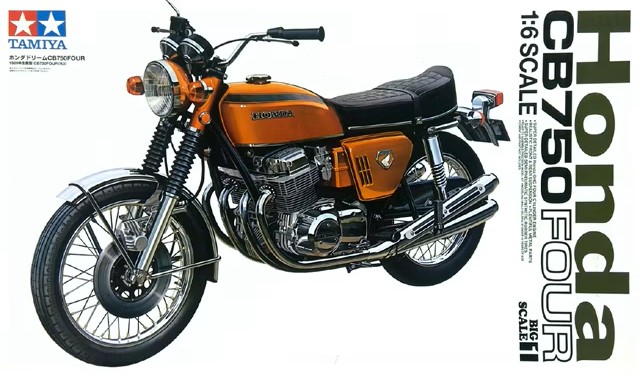
And the third one is probably the most relatable to this post – the first ever 1/6 big scale bike from Tamiya, released in year 1970 – the Honda CB750 Four. This is a kit that went down to the very extent that it even replicated the internal structure of the bike’s lead-acid battery.
I think it is safe to assume that Okabe almost single-handedly helped Tamiya establish its name in the early 70s with these three incredible, ahead-of-their-time model kits. While we often know too little about the designers behind the kits, it’s clear that Okabe would have held a highly respected status at Tamiya.
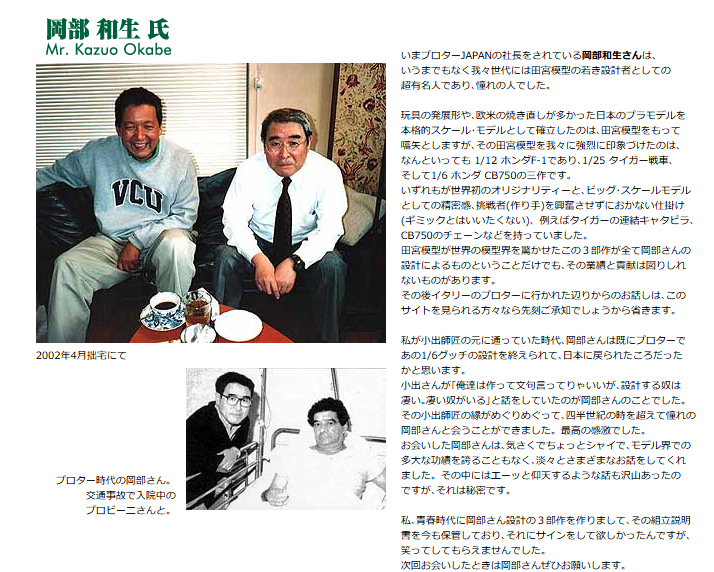
(Photo Credit: Kim’s House Garage)
If it wasn’t for Kinichi Karube, the owner of Kim’s House Garage – a precious motorcycle models blog, I would never have the opporuntity to see what Okabe looks like. Here in the top photo, the gentleman in the white shirt wearing black tie and galsses is THE Kazuo Okabe. The lower photo is interesting – it shows Okabe alongside Provini!
But it took me to another model ethuastis’s personal blog to learn what happened to Okabe, Tamiya, and Protar. The blog site is called F1 Modeling Corner, where the owner CJ posted abundant stories about model comapnies and designers that pretty much you won’t find anywhere else (and in English, whoa!). In the article Ebbro Interview Part 2, On the Road to being a Model Designer, it is said that
“…he (Okabe) suddenly said “Hey, I’m going to Italy!” and went off to Protar.”
Ha! I guess I’ll never know what really made Okabe leave Tamiya – nor am I really interested in that. What I do see now, 50ish years after, is that if this had not happened, the 1/6 Moto Guzzi V-850 California may very likely not have existed.
Okay – before you judge me, I’ll confess – I don’t have much experience with Protar’s kits, other than the abovementioned Lancia LC2. I’ve studied the sprues of their products, though, and I have seen many beautiful builds posted online. Though, this 1/6 V-850 seems a bit unrealistic to me…that came from Protar. But, if the man behind this big bike is the same person who designed the legendary 1/6 Honda CB750 Four at Tamiya – it all makes perfect sense now. All these, I tell you, has been such a learning process!
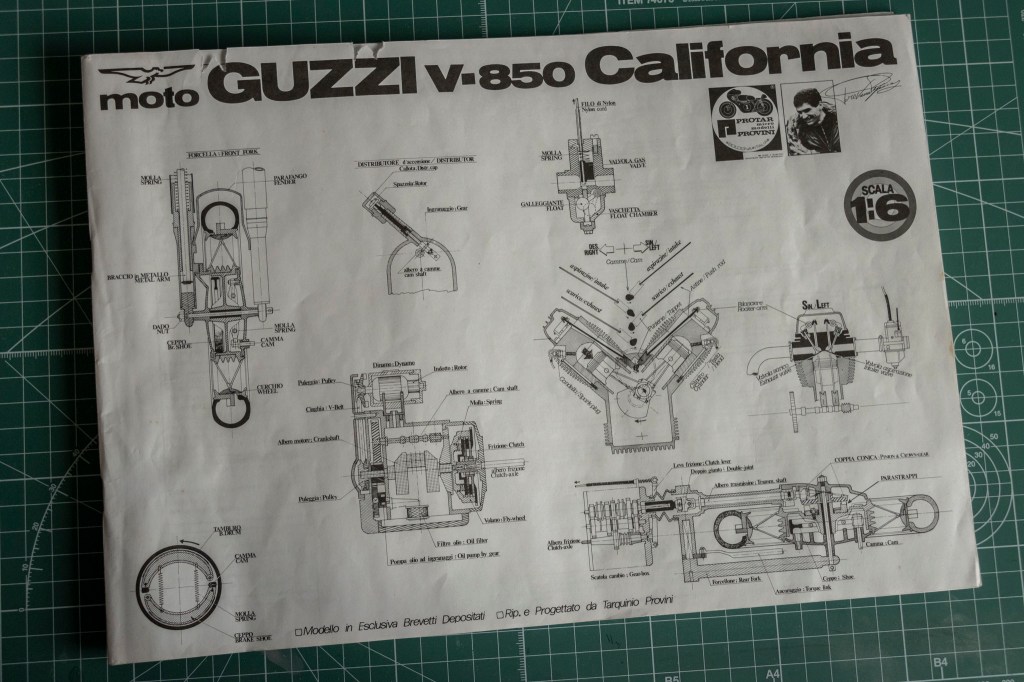
That was quite a long writing, I must say. Why don’t we take a peek at what is inside the huge (but very soft) box of this 1/6 Moto Guzzi V-850 California?
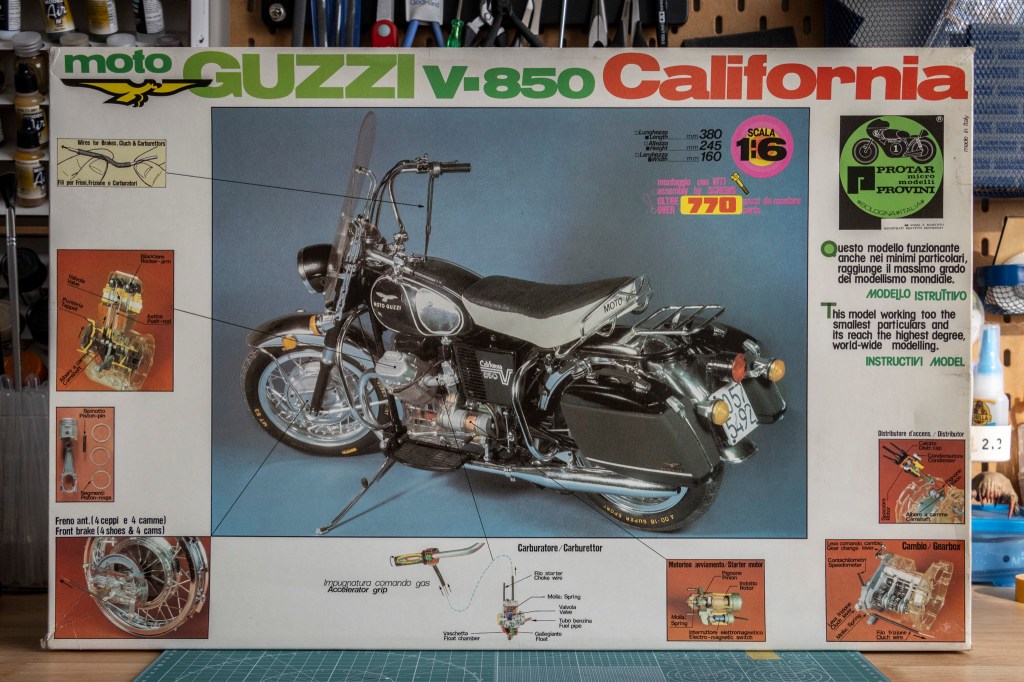
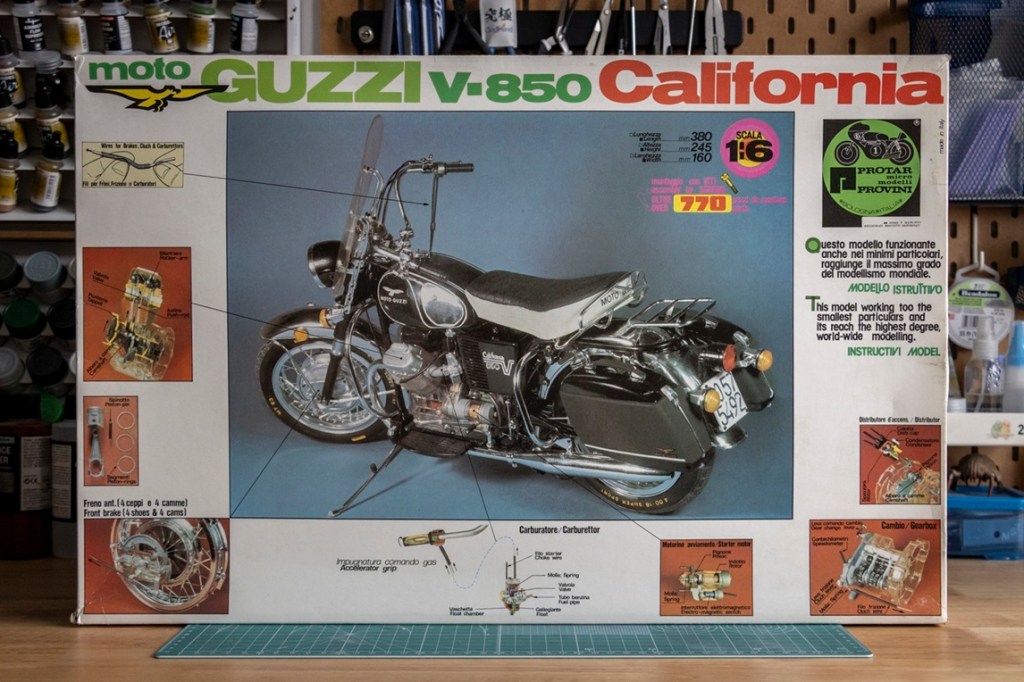
I don’t know where to start commenting on this box art. I guess the best thing I can say is that… it’s different? In the middle, we get a ‘professional picture’ of the finished model. In my opinion, this is the best part of the entire box art. Thanks to the big scale and the very artistic blue backdrop, this finished model looks extremely realistic – am I really not looking at the real bike? Stunning! The other elements – those orange-red background pictures are placed around like sticky notes. I asked my wife, who was an art student, about the design of this boxart, she said, and here I quote –
I see really a lot of contrasting colours everywhere and I love the techical explanation of parts. The main subject in the middle clearly stands out. Hmmm…the layout and fonts seems a bit messy and arbitrary.
And I agree with her – the box art of this V-850 definitely has some kind of vintage magic that I just find fascinating. Italeri re-issued this kit in 2013, featuring completely different box art –
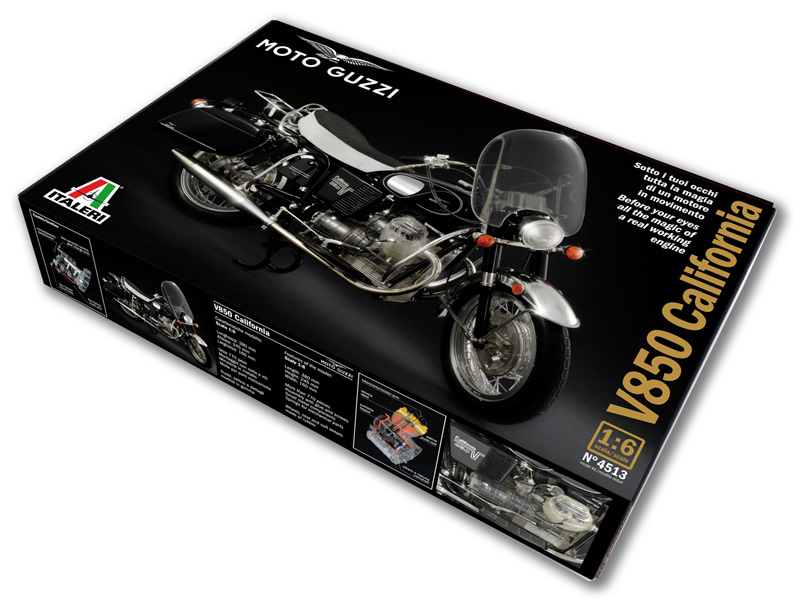
(Photo Credit: Italeri)
Just a photo of the finished model from such a meh angle? Sorry, BORING.
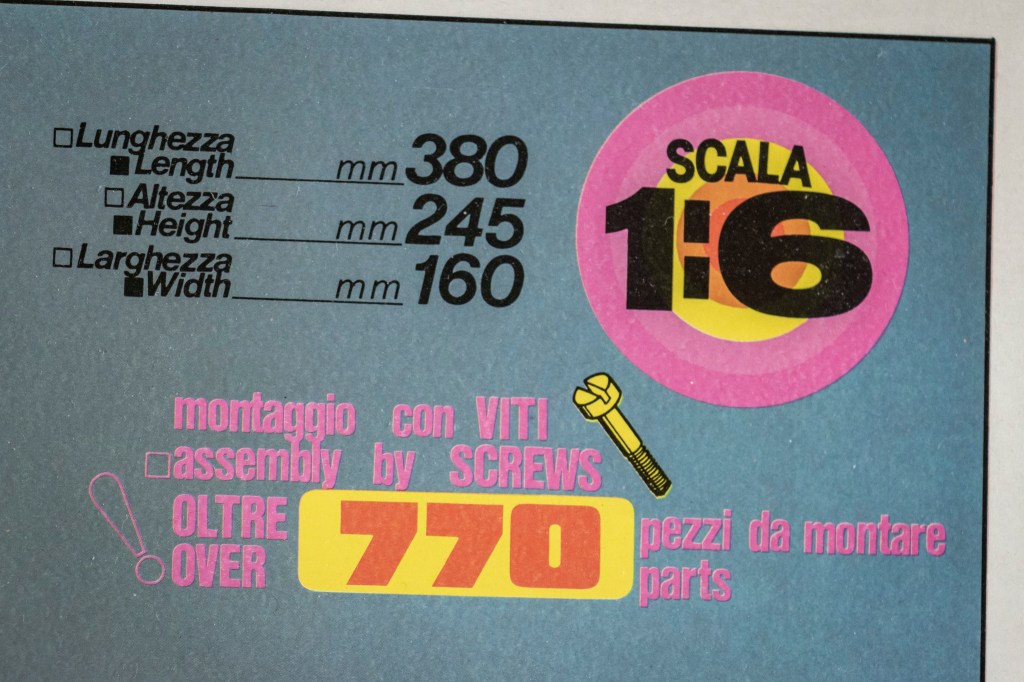
Out of absolute nowhere, a touch of pink is added to the boxart. Hmmm… I would use white, but pink is eye-cathing, guaranteed. The finished bike is 38cm long, 16cm wide, and 24.5cm tall. And a jaw-dropping 770 parts! Another massive project to begin!
Guess who else had a hard time with grammar?
Guess who else had a hard time with spelling?
Provini’s unfamilarity with English language is recorded in some blogs I have read. For example, in Enrico Zani‘s writing he mentioned that
Provini’s language ability did not go beyond ordering at restaurants and basic human communication. This is fun to read, but it’s essentially not a real problem – when I was way younger, I barely understand a single word in Tamiya’s Japanese instruction manual! English is not my first language either, and I understand the pain of not having Grammarly around 😦
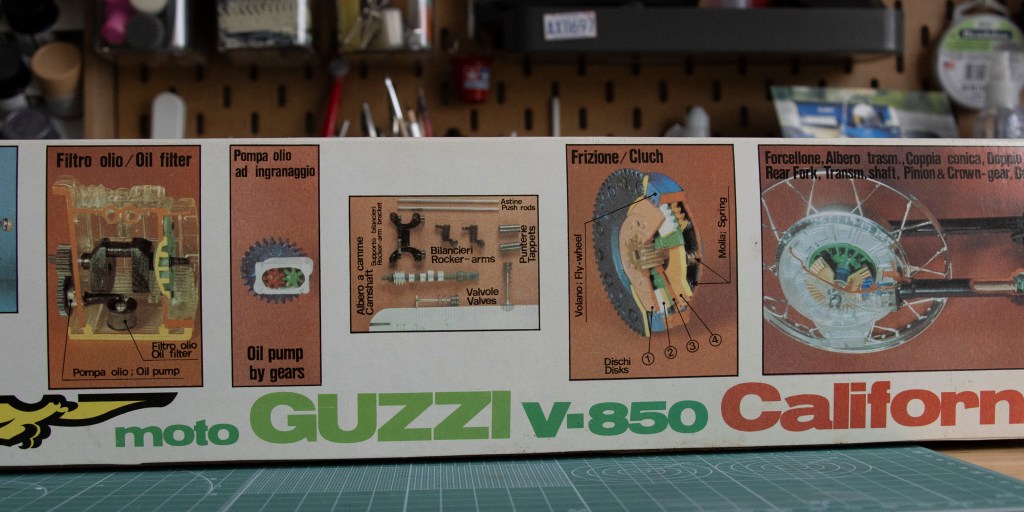
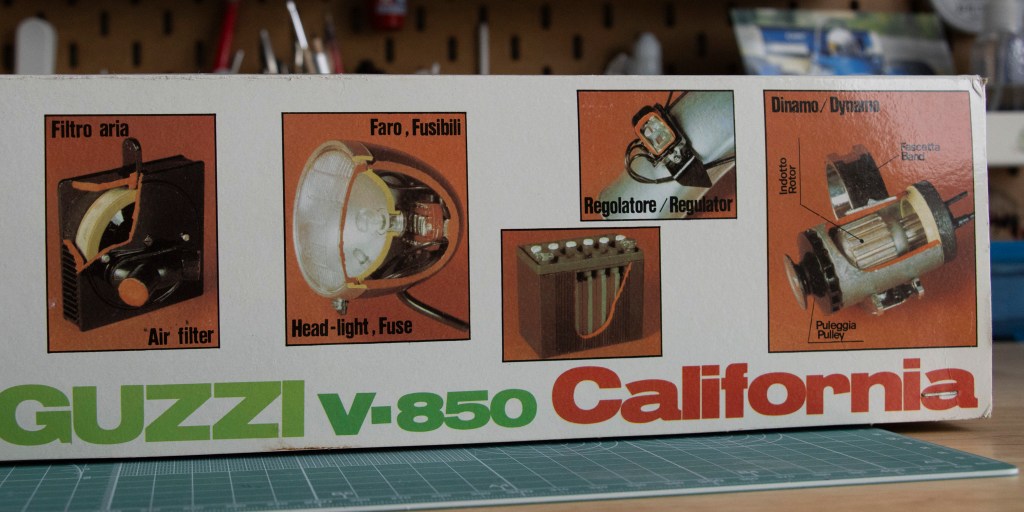
More sticky notes around the box. They do seem to serve their purpose well, though. I mean, of course, I want to know what to expect from this kit if I’m staring at it in a hobby shop. Also, it’s really showing off at the same time – this kit offers some of the most complete and complicated internal mechanism recreations in the world of scale models (please impress me if I’m wrong)!
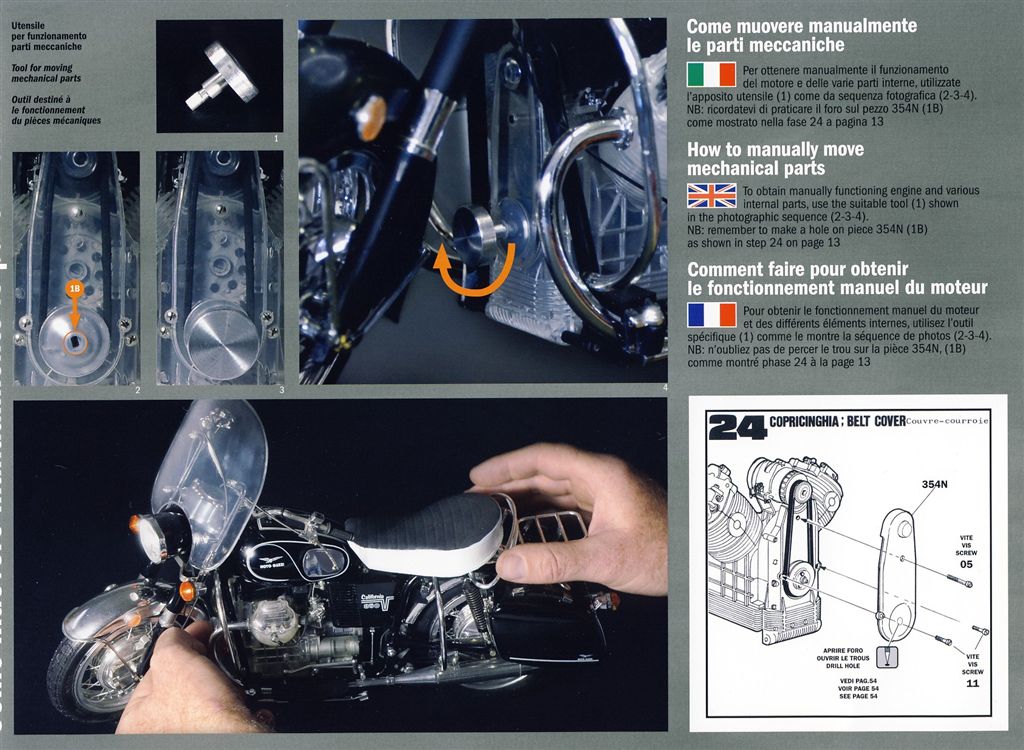
The reason this kit has become a holy grail is its incredible fidelity to the original bike design. Unlike Tamiya’s big bikes, which also faithfully recreate different subjects down to the shape of a bolt, Provini and Okabe went one step further – they replicated how each part actually works on the real bike through all the gimmicks and functional details that bring the model to life.
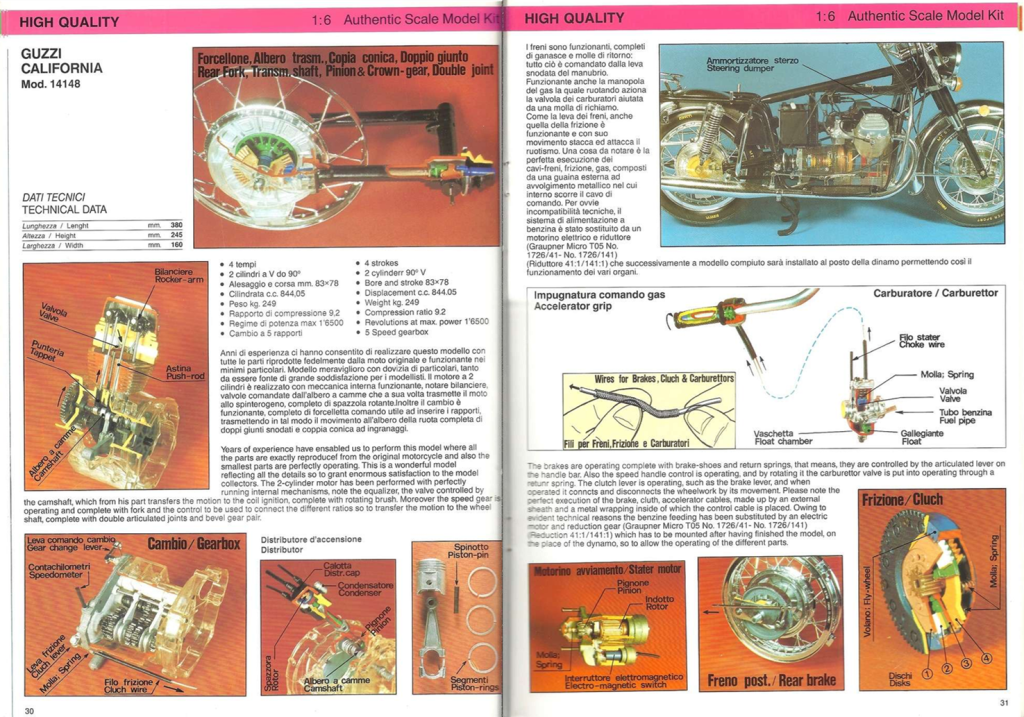
Protar used these words to describe this model in thier 1998 Catalogue:
Years of experience have enabled us to perform this model where all the parts are exactly reproduced from the original motocycle and also the smallest parts are perfectly opearting. This is a wonderful model reflecting all the details so to grant enormous satisfaction to model collectors. The 2-cylinder motor has been performed with perfectly running internal mechanisms, note the equalizer, the valve controlled by the camshaft, which from his part transfers the motion to the coil ignition, complete with rotating brush. Moreover the speed gear is operating and complete with fork and the control to be used to connect the different ratios so to transfer the motion to the wheel shaft, complete with double articulated joints and bevel gear pair.
The brakes are operating complete with brake-shoes and return springs, that means, they are controlled by the articulated lever on the handle bar. Also the spedd handle control is operating, and by rotating it the carburettor valve is put into operating through a return spring. The clutch lever is operating, such as the brake lever, and when operated it connects and disconnects the wheelwork by its movement. Please note the perfect execution of the brake, clutch, accelerator cables, made up by an external sheath and a metal wrapping inside of which the control cable is placed. Owing to evident technical reasons the benzine feeding has been substituted by an electric motor and reduction gear (Graupner Micro T05 No. 1726/41 – No. 1726/141) (Reduction 41:1/141:1) which has to be mounted after having finished the model, on the place of the dynamo, so to allow the operating of the different parts (not qualified to help with Grammar here, but I did fix many spelling mistakes when typing)
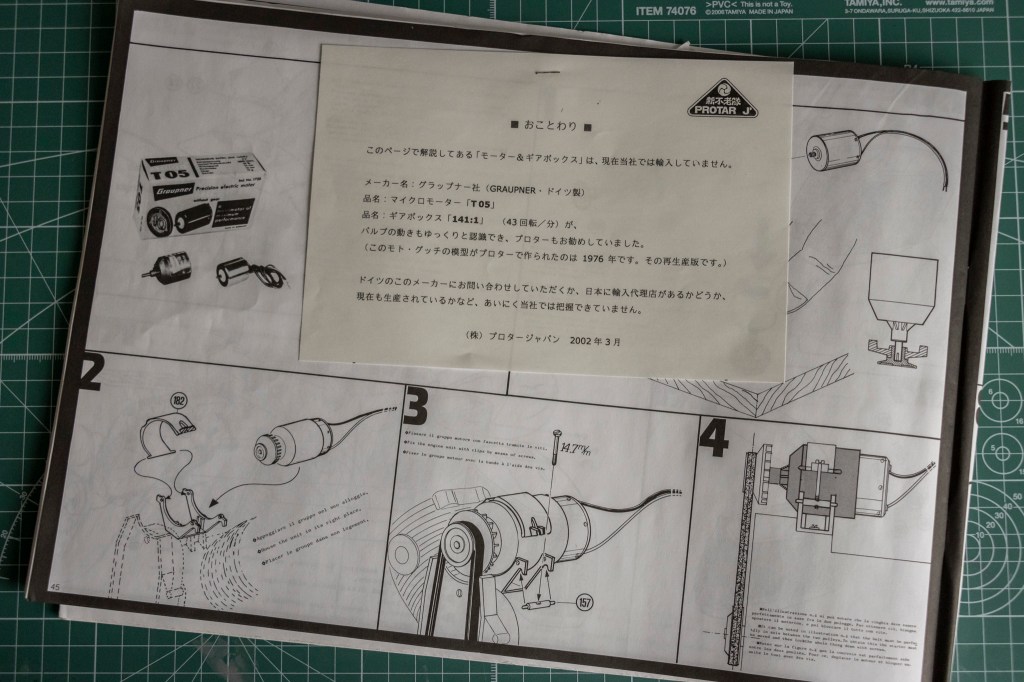
Okabe and his Protar Japan also very considerately included information on what and how to purchase the electric motor, as it wasn’t included in the kit. Using the motor means losing the entire dynamo’s internal structure. In exchange, everything else gets to roll!
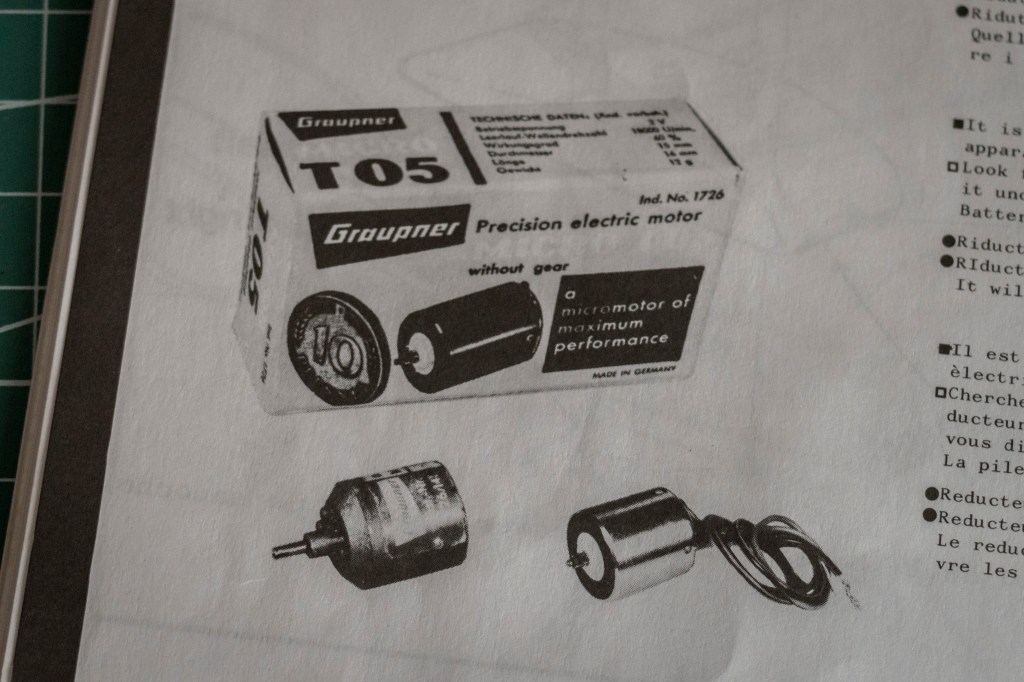
Thanks to Canada Post’s Christmas-month strike, I still haven’t received this motor. Even better, it shows as “delivered” on eBay. I’ll keep waiting, but honestly, I might need to buy another one… Or any tiny motor works, right? It’s 2025 now – there must be way more options…
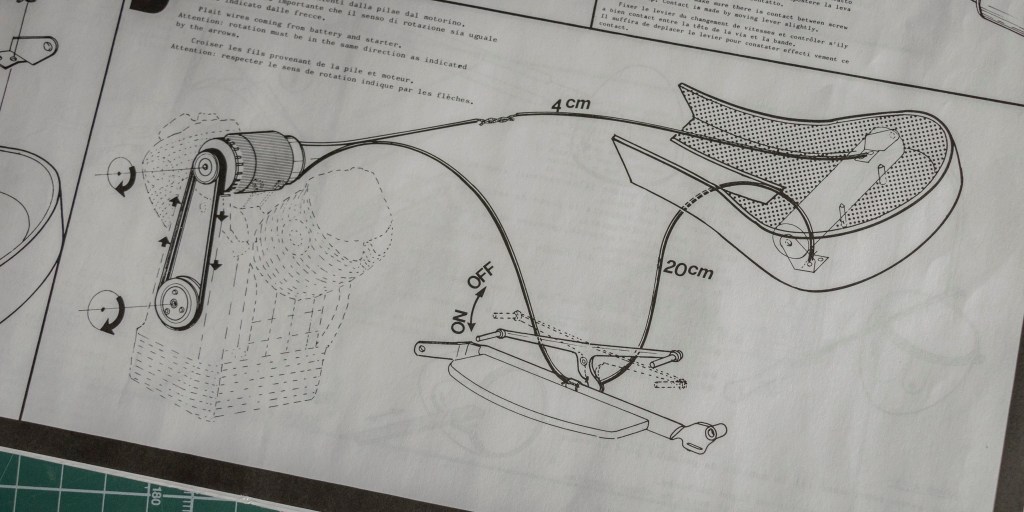
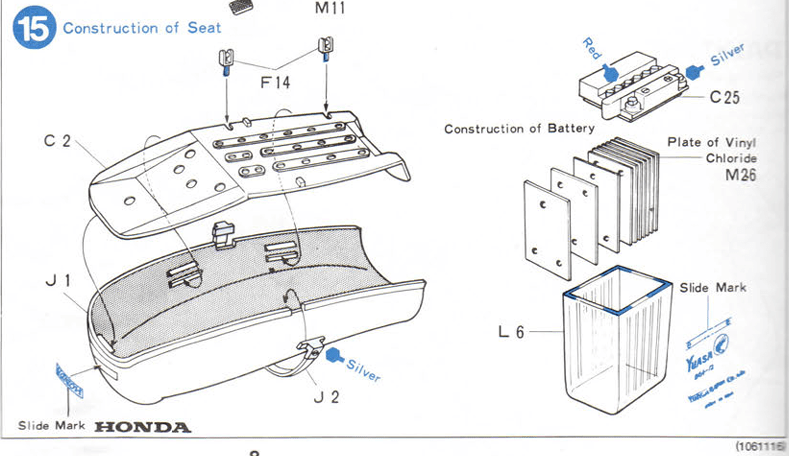
By the way, the battery is placed under the seat, and the shifting pedal serves as the switch.
Before we focus on the moveable sections on this model – Let’s take a quick look at what is in the box.
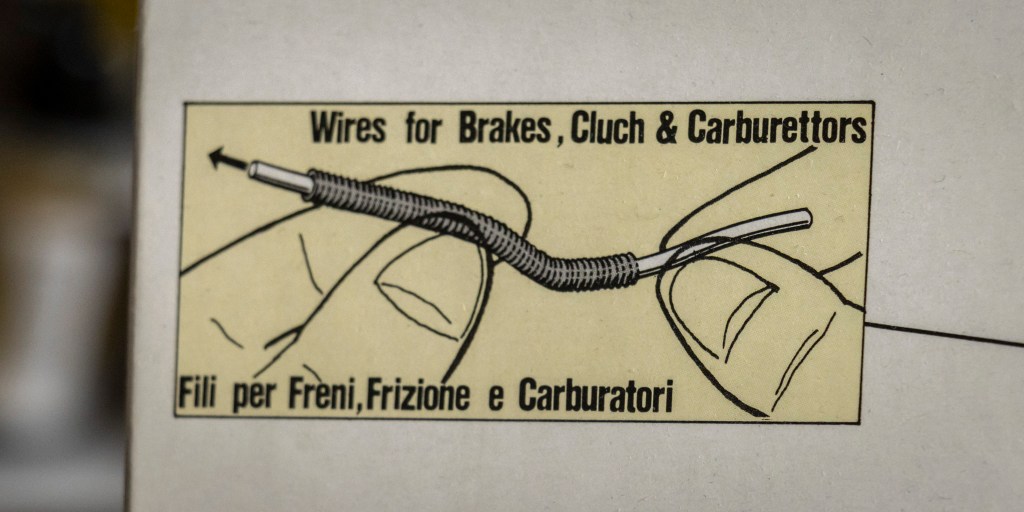
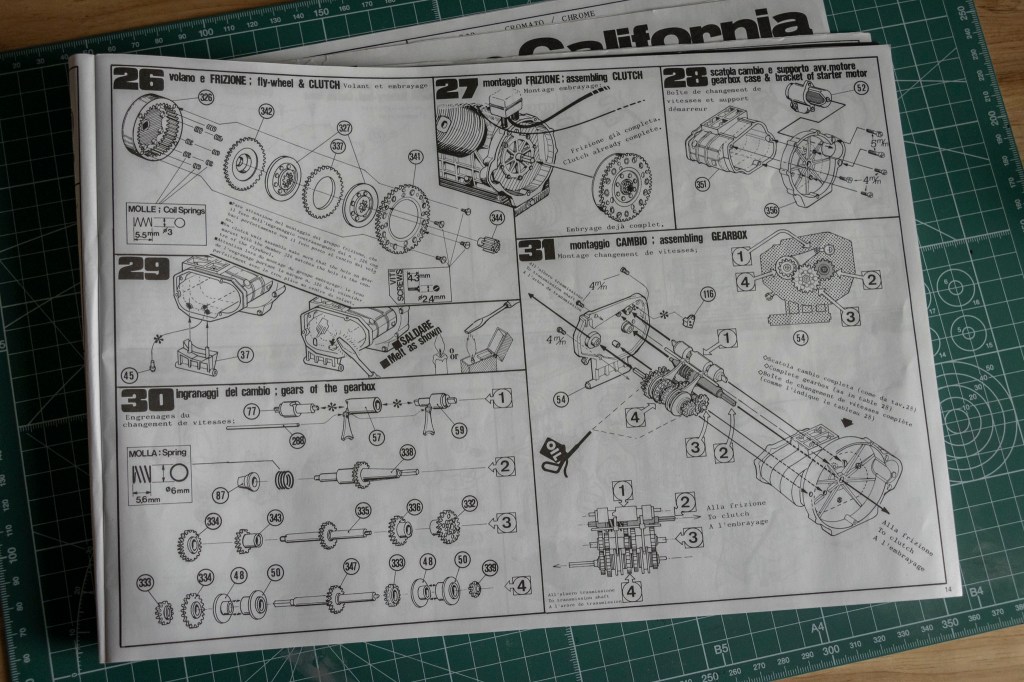
Speaking of the instruction manual – this is another highlight of the kit. The printing quality is meh, but the content of this 53-page book is prestigious. Right on the front cover, you’ll find blueprints of several mechanical parts.
Extremely delicate hand-drawn illustrations are used throughout the entire manual.
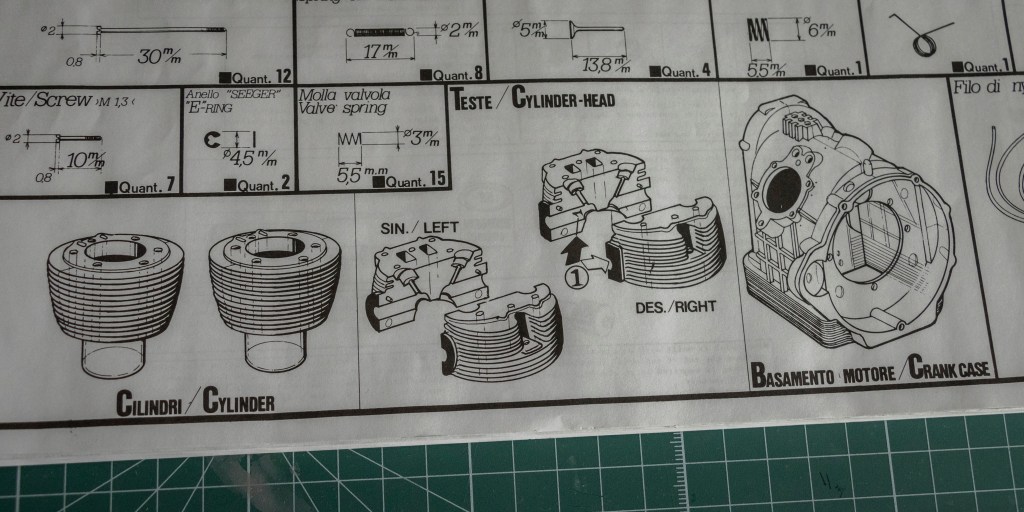
Which makes reading the manual feel like browsing an old technician’s textbook. The drawings faithfully capture every inch of detail! Pure engineering…
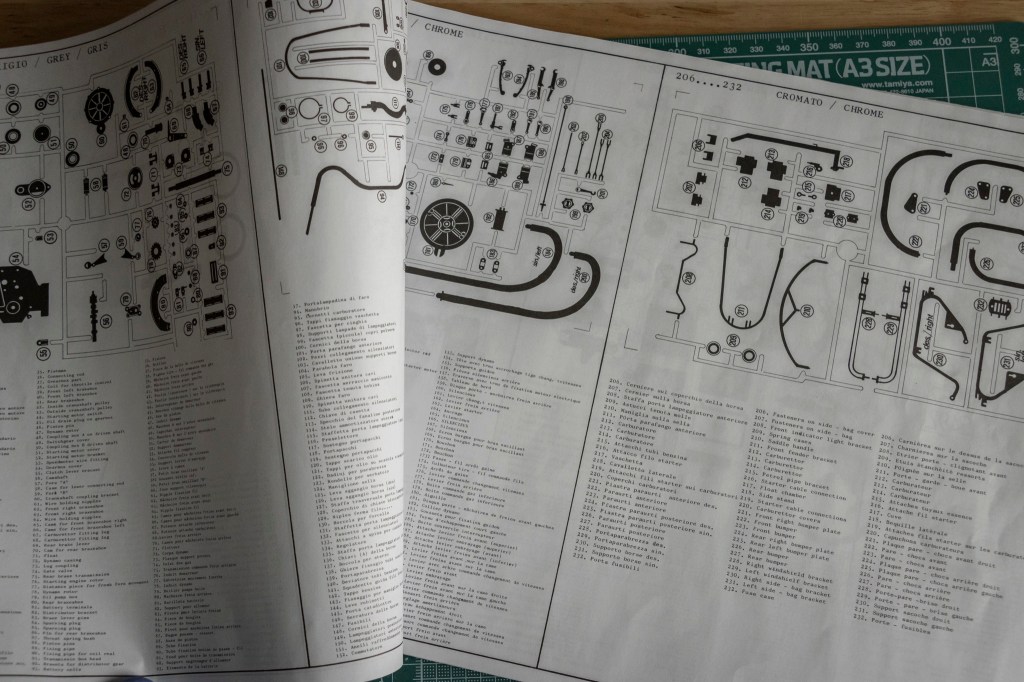
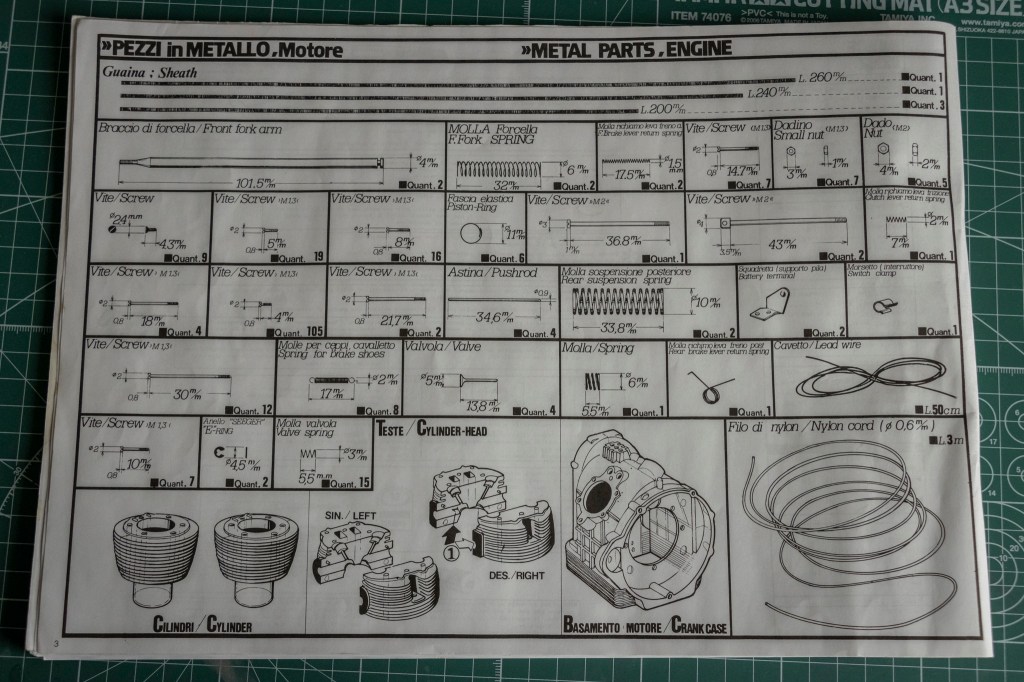
In addition, the parts list makes someone like me – who loves cars but has little to no engineering knowledge – feel so relieved while writing. No more head-scratching to figure out what is what!
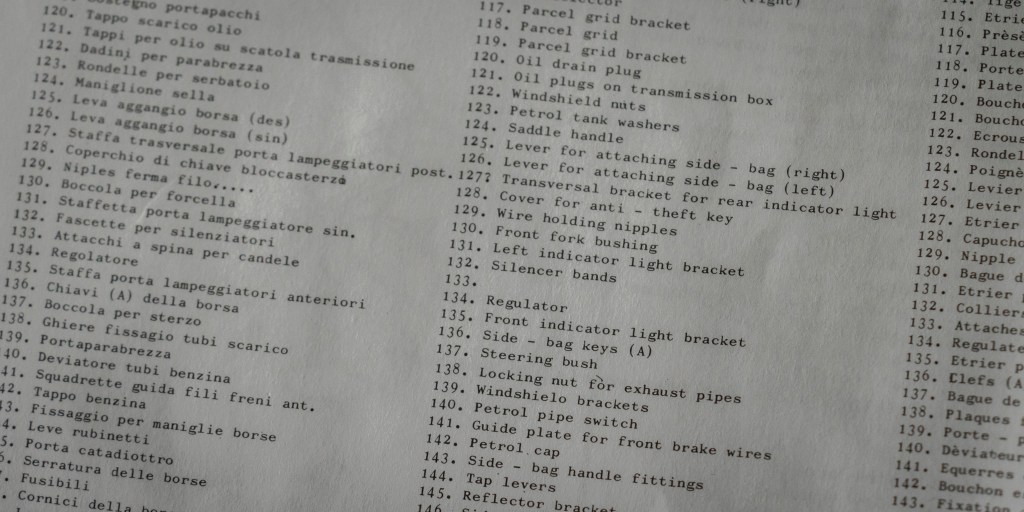
The entire manual is printed in three languages: Italian, English, and French.
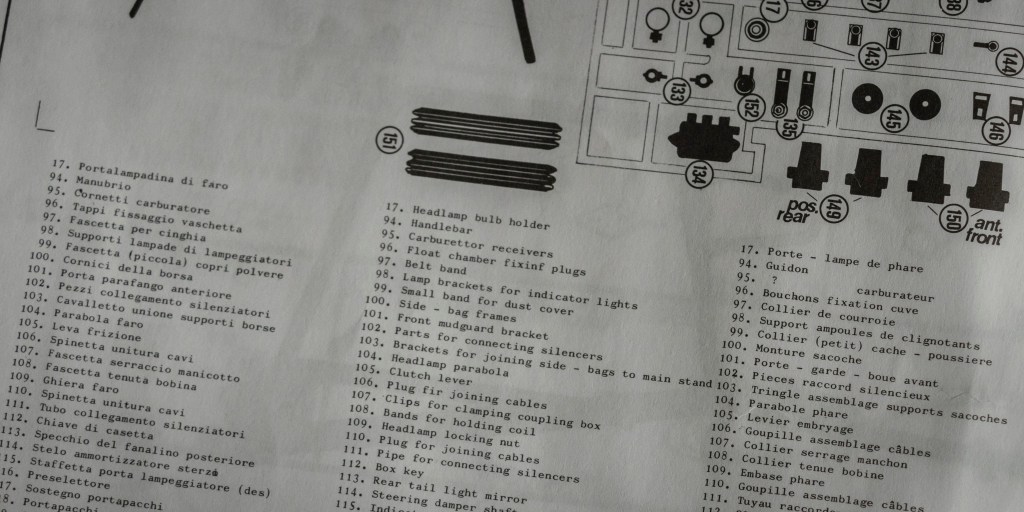
Protar had no problem with Italian, as expected. As for English and French, other than the often awkward spelling and grammar, sometimes you also get a blank (#133) or even a question mark (#95). Haha! This is (at least to me) quite entertaining. I apologize if I’ve complained about language too many times already – this is probably because I’m a PhD candidate in Curriculum Studies, and our sister department is – guess what – Applied Linguistics, so – sorry!

Then again, the quality of the illustrations here is top-notch. Moreover, Protar made it very clear in each step what the modeller is creating, sometimes with additional explanations – this is better than Tamiya’s instruction manuals. Protar rewards curiosity!
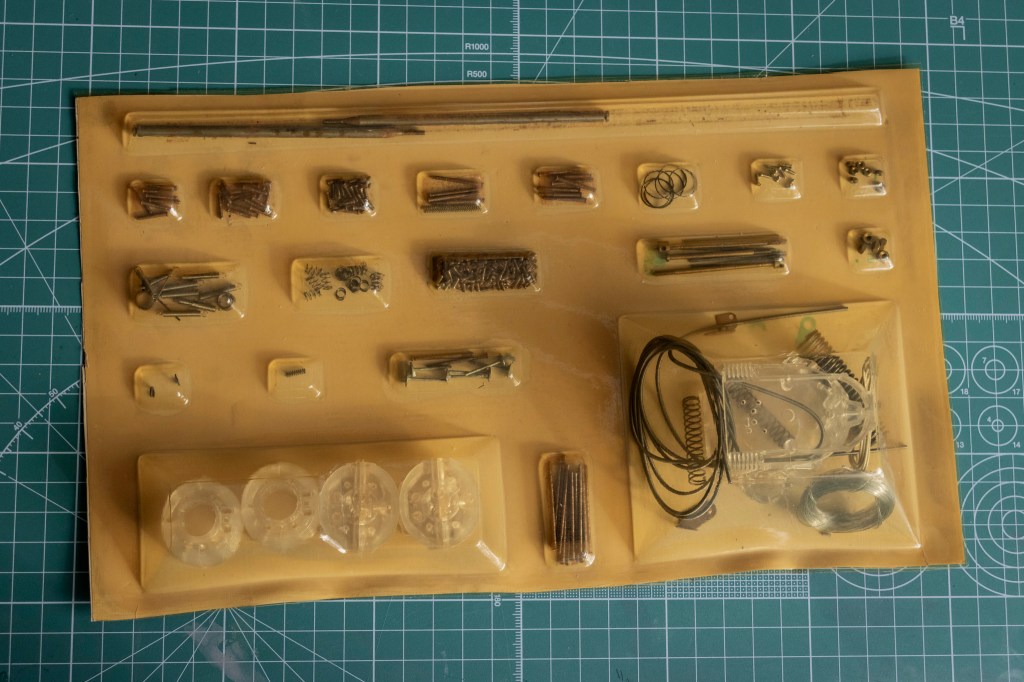
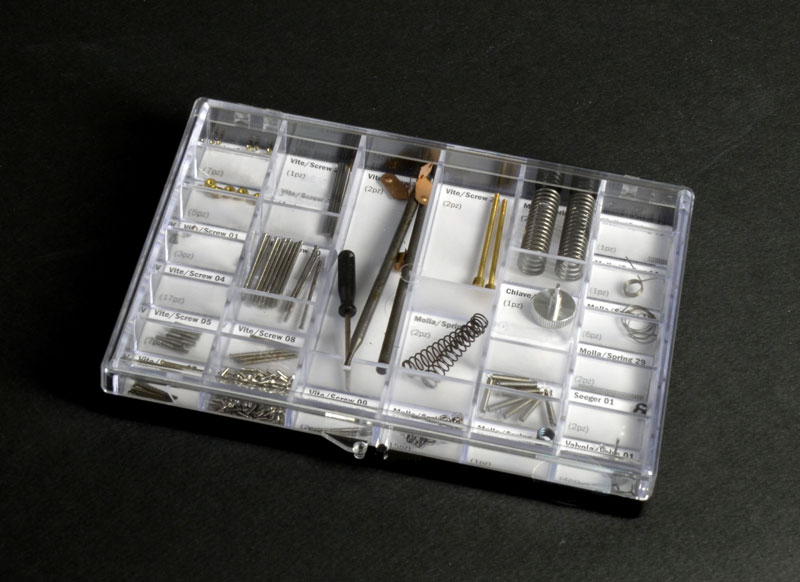
Metal parts are generously used in this kit.
(Photo Credit: Italeri)
Luxury box divided into compartments with special trays for the accessories.
This is an excerpt from the web page of Italeri’s 2013 re-release. They seemed to be very proud of this, huh?
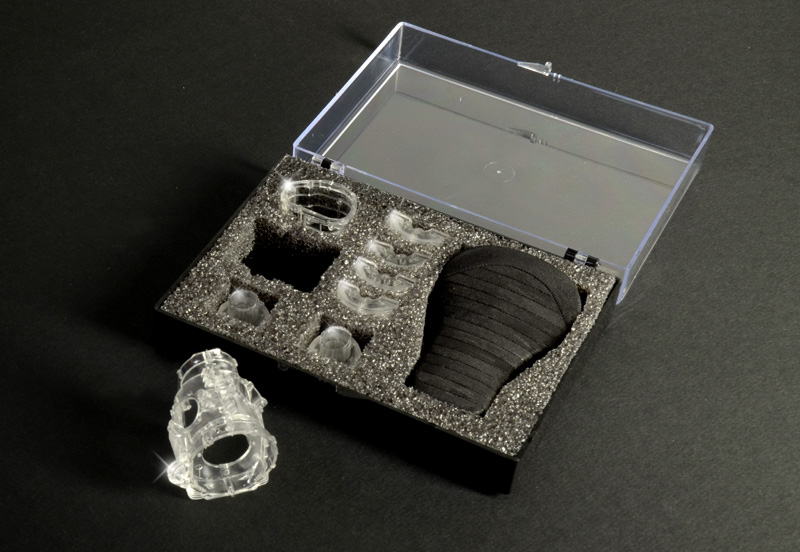
(Photo Credit: Italeri)
The second box from the 2013 re-release. Foam insert, huh?
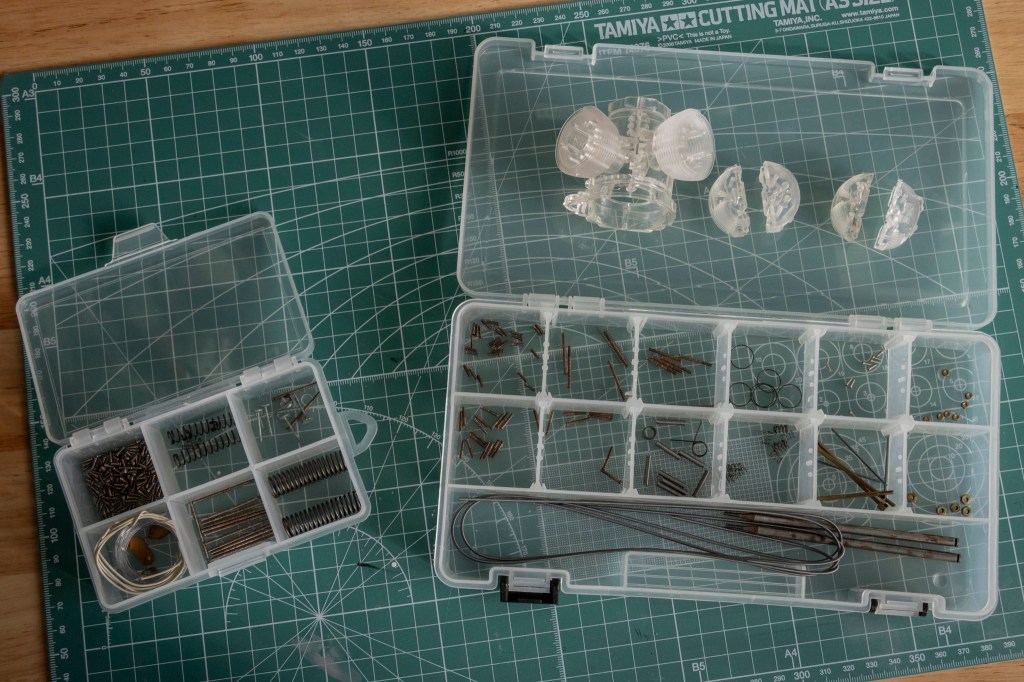
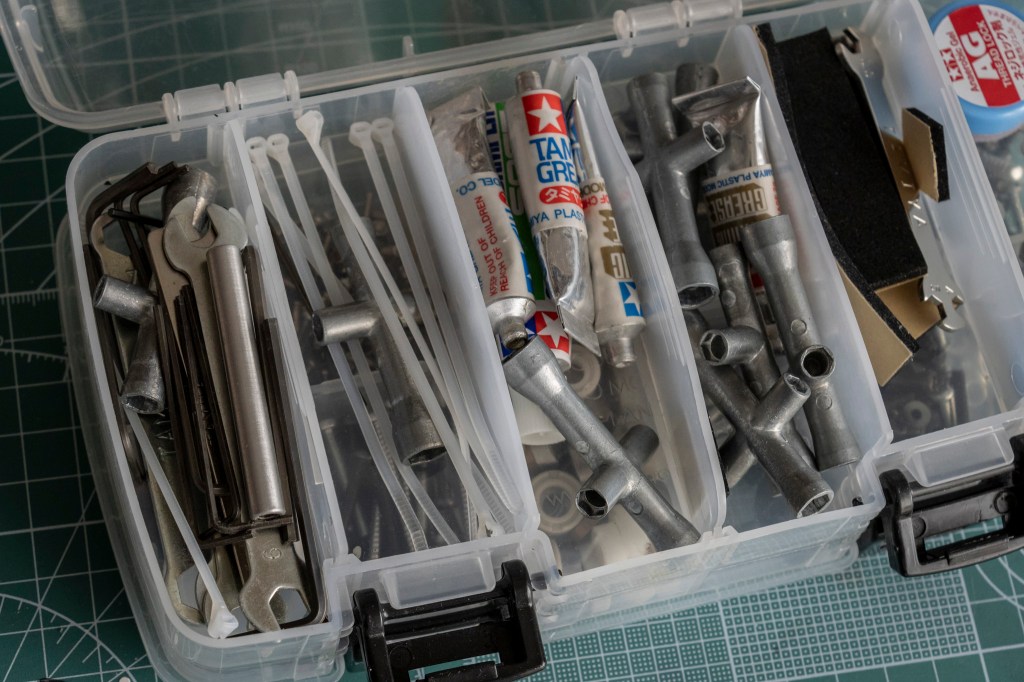
Here come my cheap-ass substitute boxes. They work!
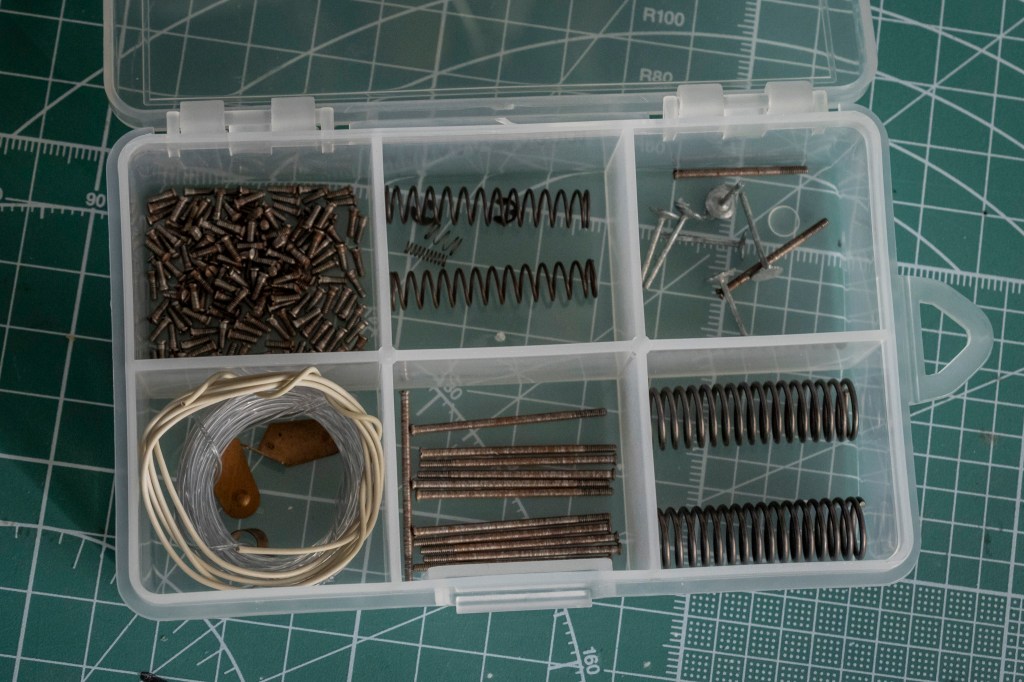
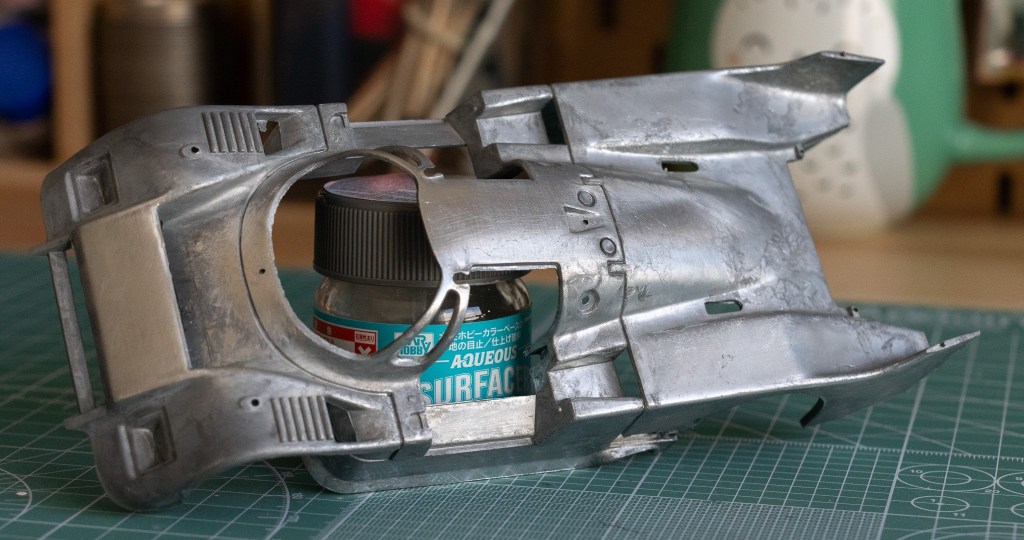
After 23 years, these metal parts must be cleaned before use. Maybe WD-40? The majority of these parts are made of iron-based metal – not the expert of Materials Science here, but they did react strongly to a magnet.
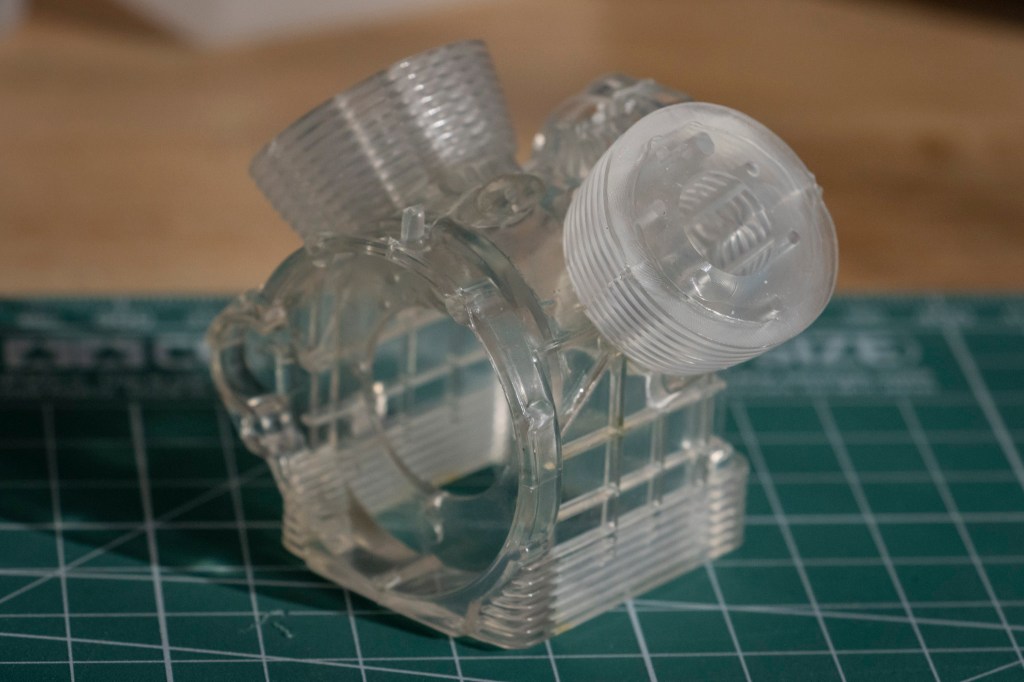
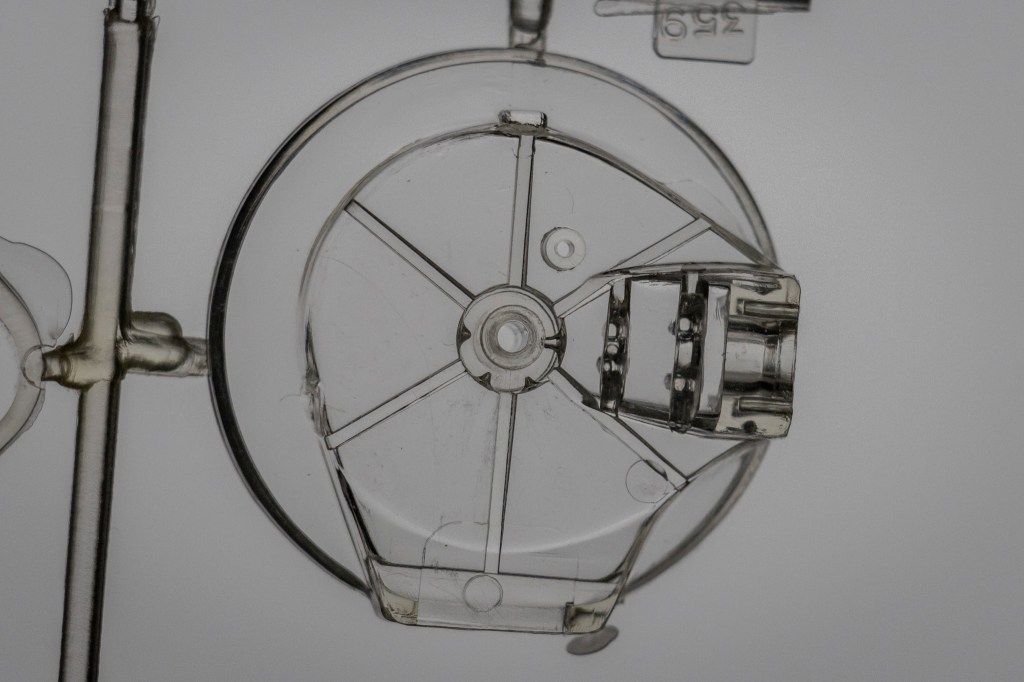
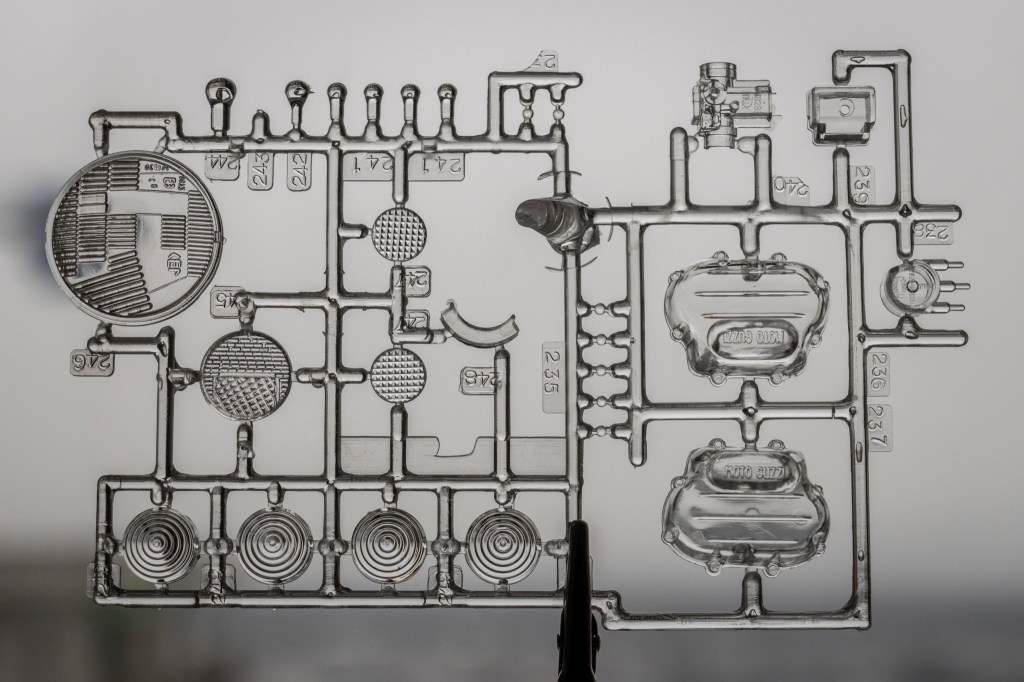
There are many more transparent parts in this kit, allowing you to observe how the bike operates.
The quality of MOST of the clear parts is not bad. My plan is to paint and weather one side – so the other side can still do its job – showing off.
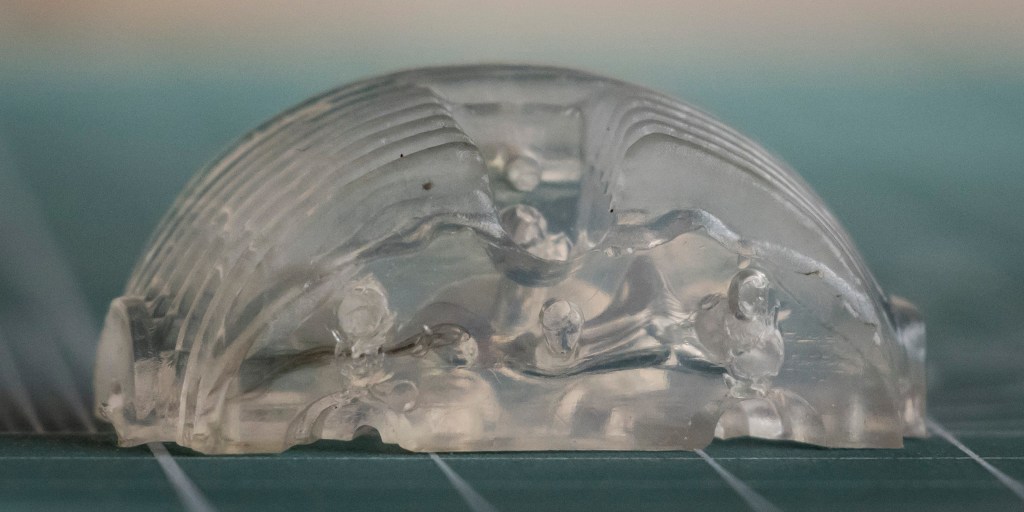
I only found bubbles in one of the four cyclinder heads. And a black stream of god knows what in it as well – this will be installed on the painted side for sure.
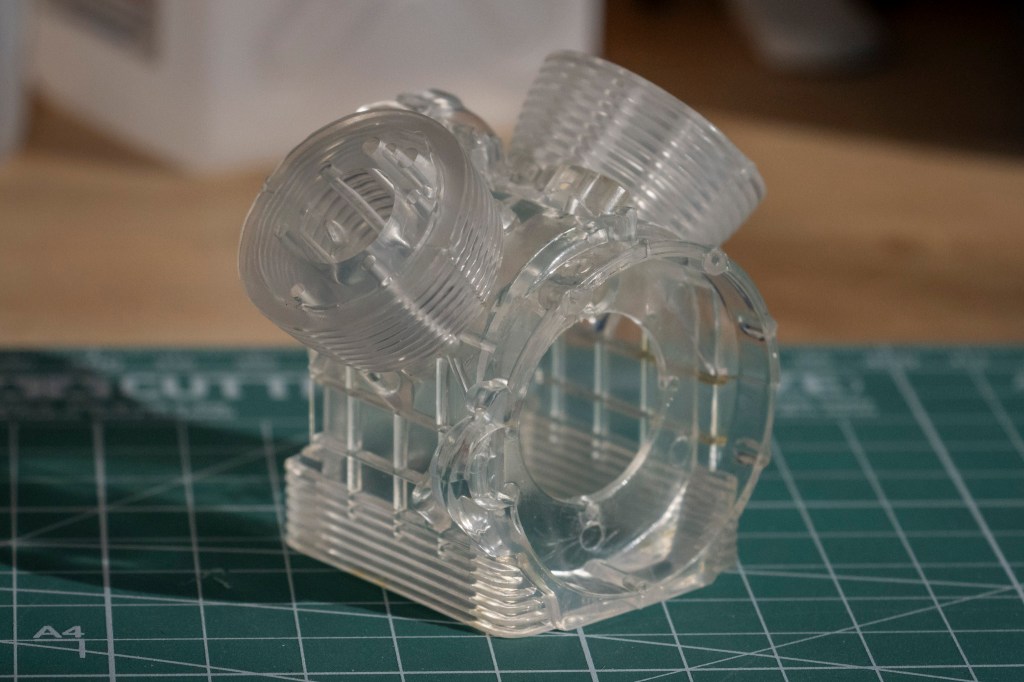
The kit comes with two sprues of clear parts.
Front brakeshoe disc, right side.
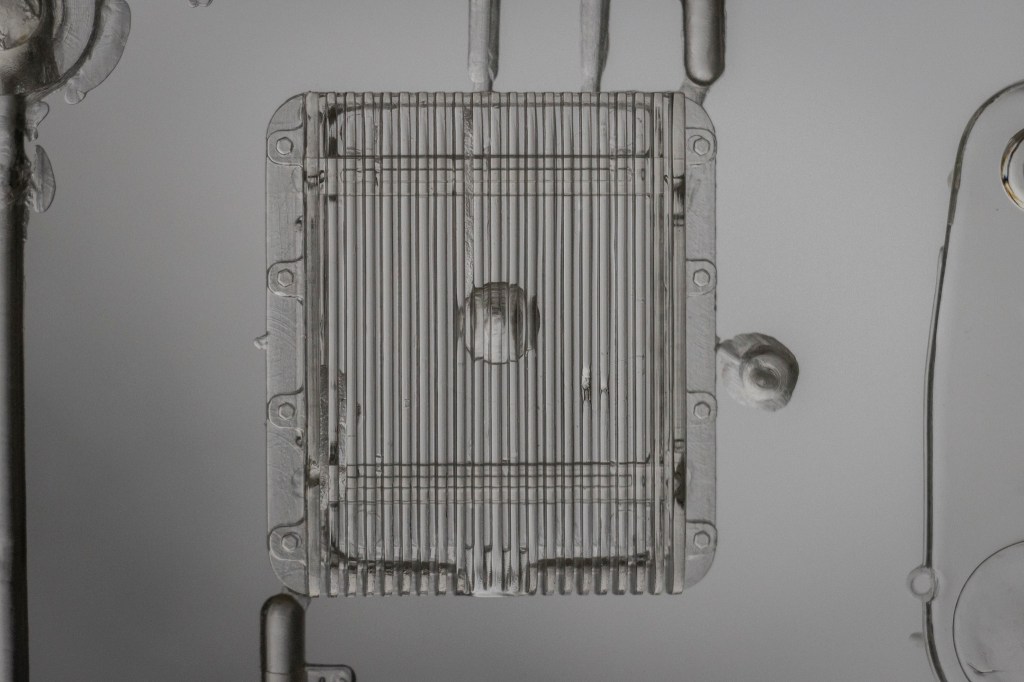
Transparent oil pan.
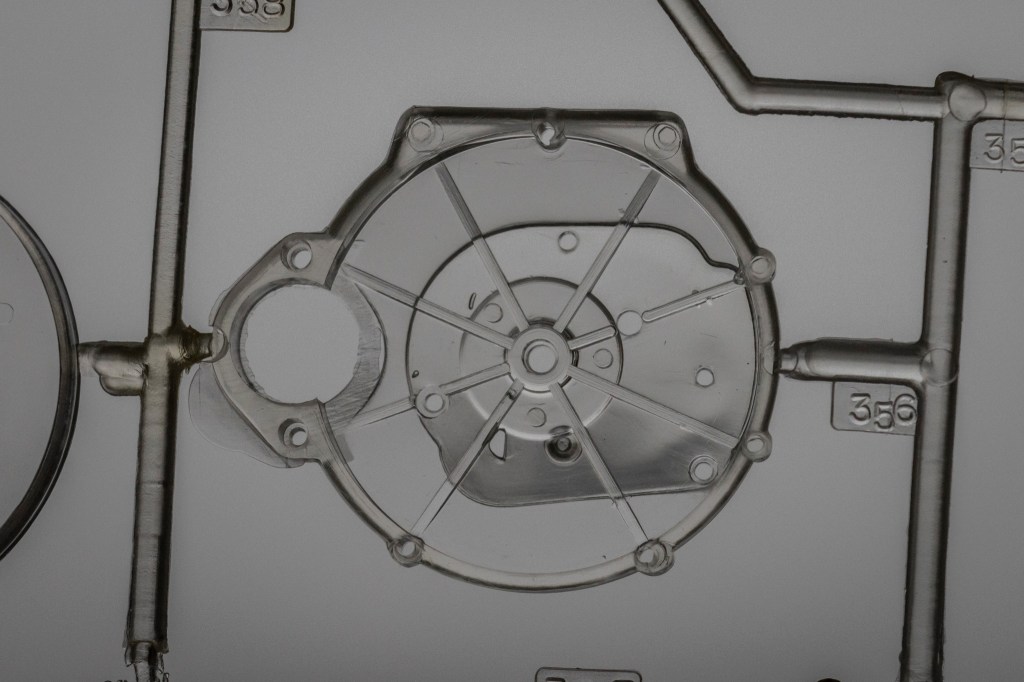
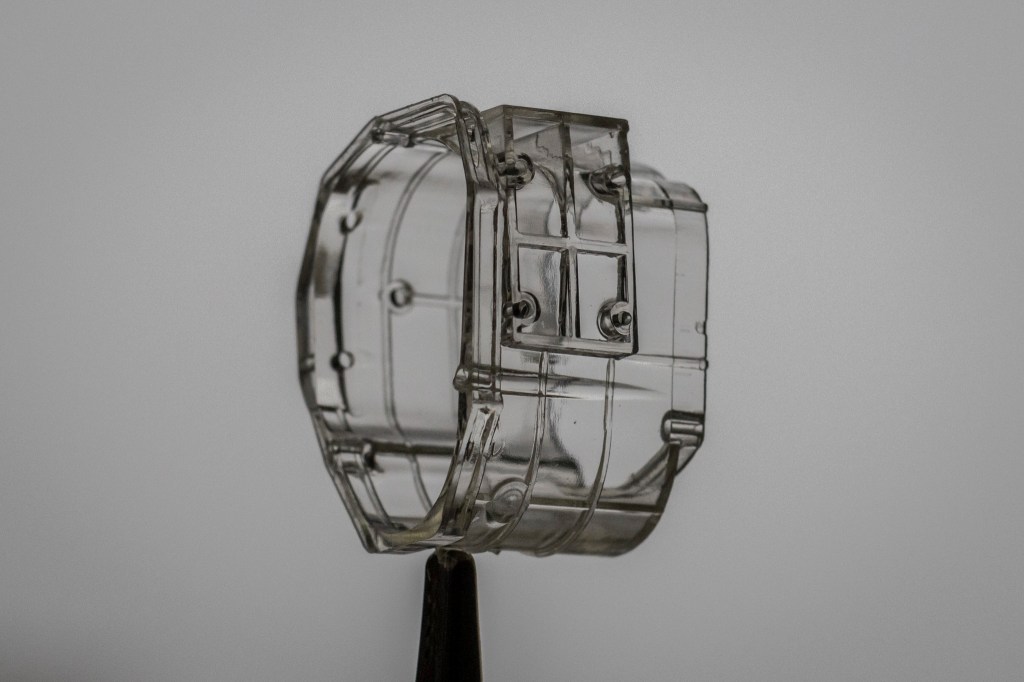
Fly wheel cover.
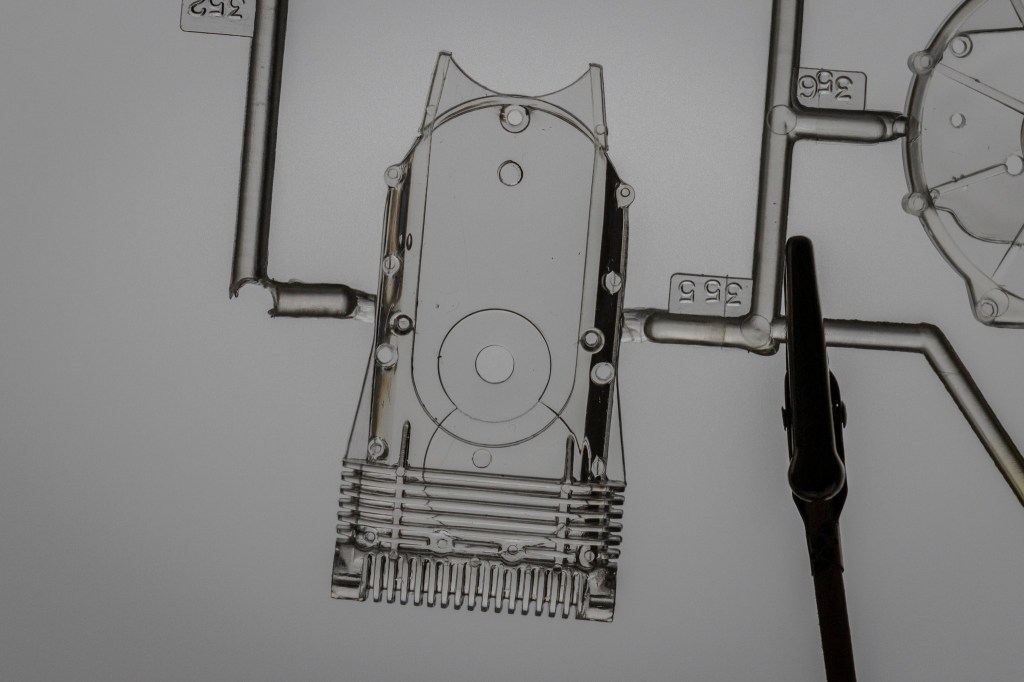
Timing gear cover.
(Photo Credit: Andreas Eichendorff, IPMS Deutschland)
Italeri did not include the micro motor in their 2013 re-release; instead, a metal knob is installed on the transparent belt cover to manually move all the engine and gearbox mechanical parts.
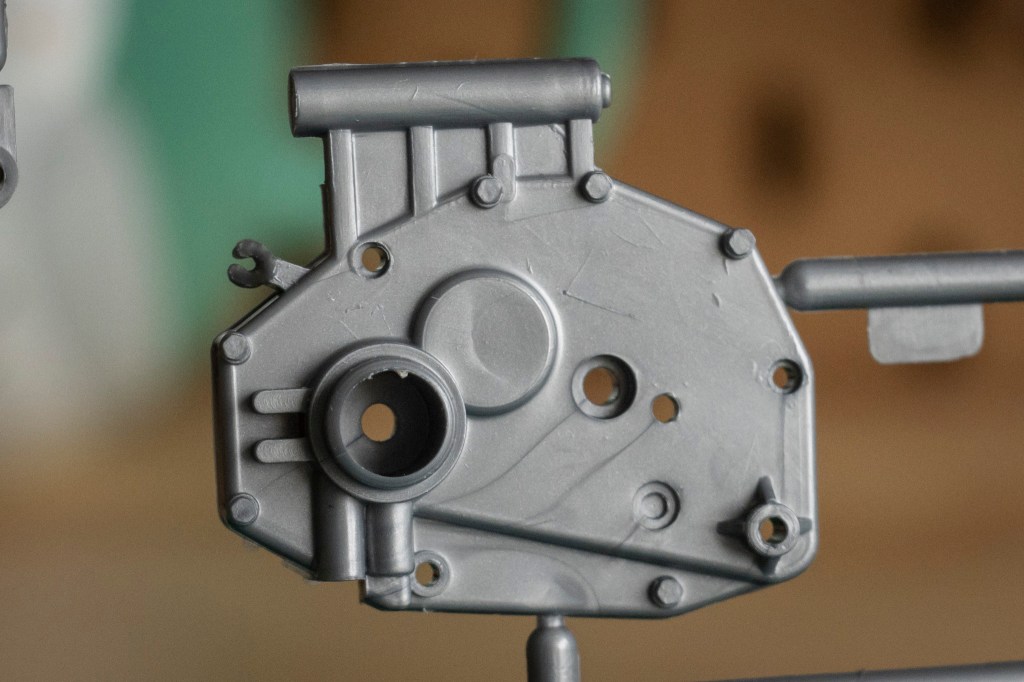
Transmission cover.
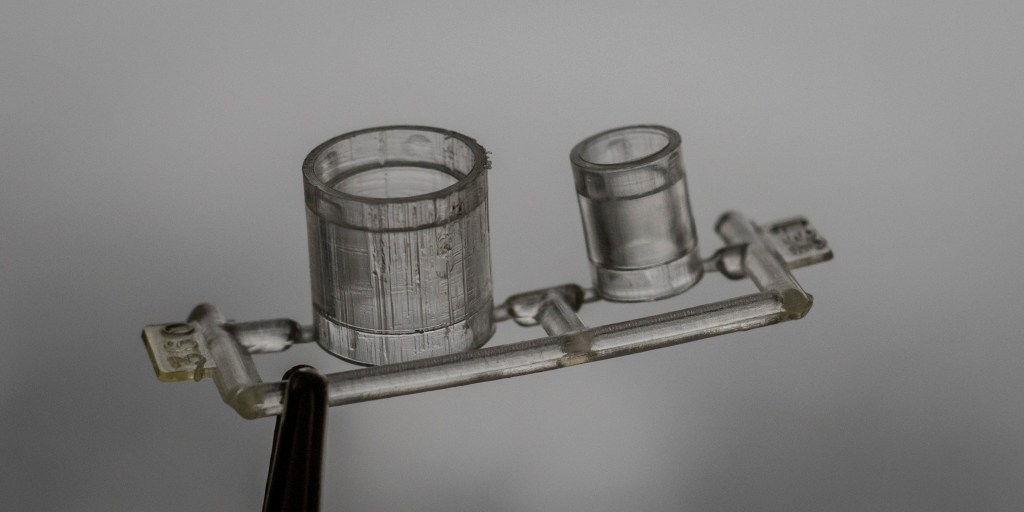
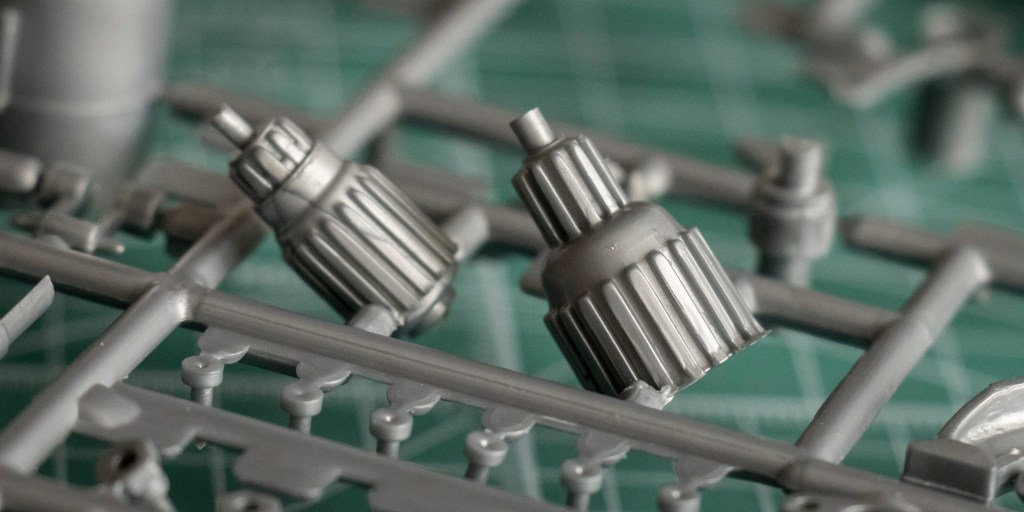
Starter casings.
Gearbox housing.
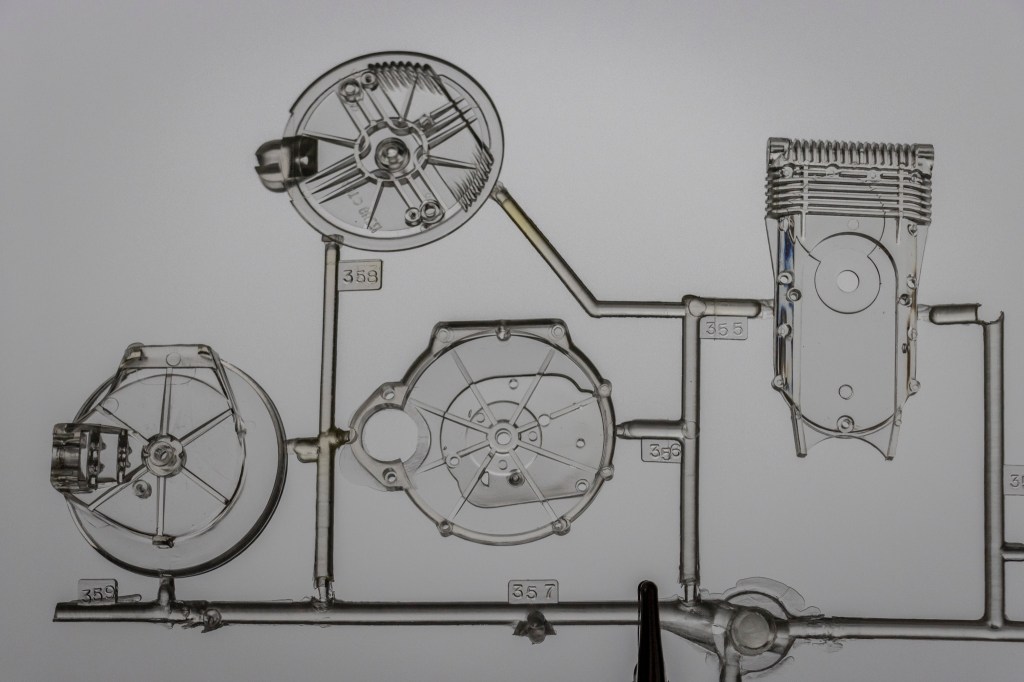
The second clear part sprue.
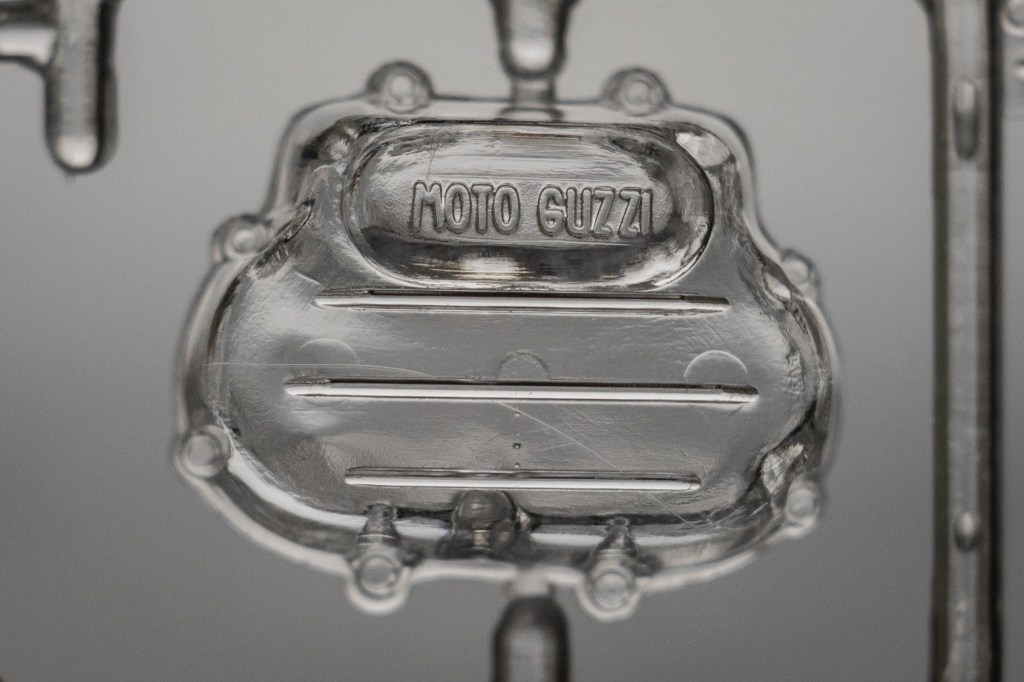
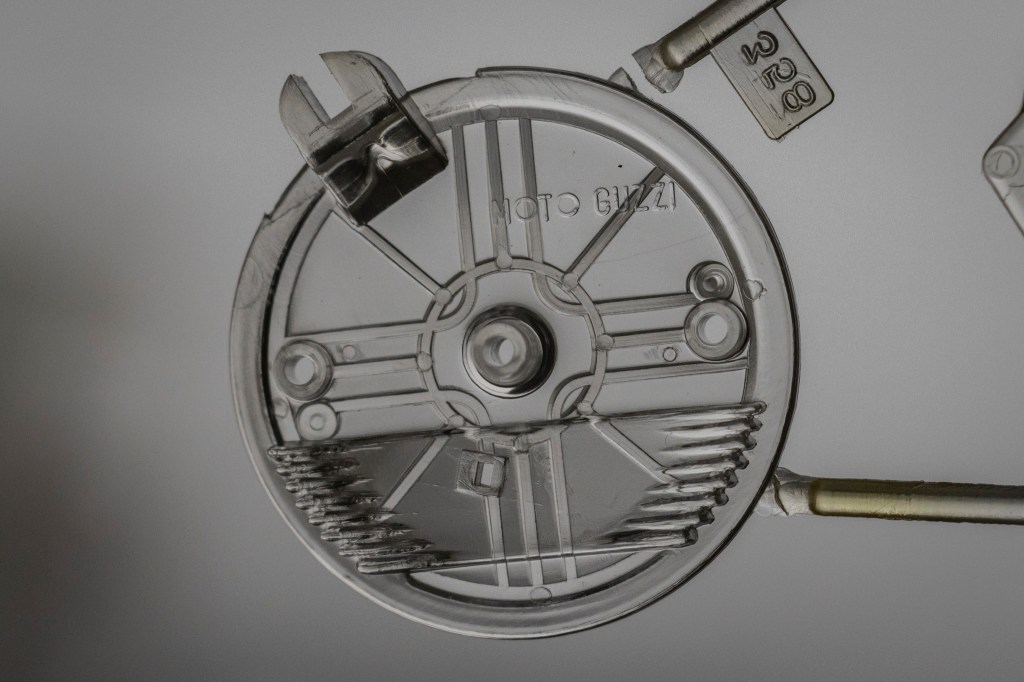
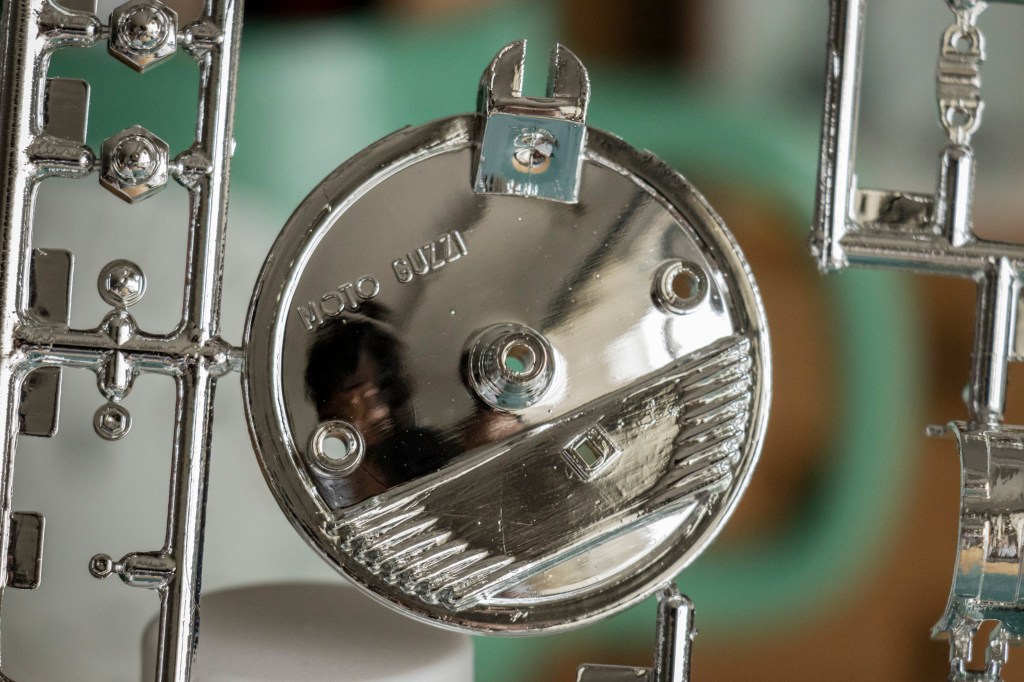
Rocker arm cover – MOTO GUZZI! The letters here should be carved in rather than raised above the surface and are a bit too thin compared to the real bike. But otherwise, they look alright.
I am, however, very impressed by how sharp these raised letters are. The internal mechanisms of the carburetors are visible and operable as well. Of course, you’ll need to imagine fuel going through them…
Awwwe, stop bitching about the flashes. You are a pro and you know what to do…
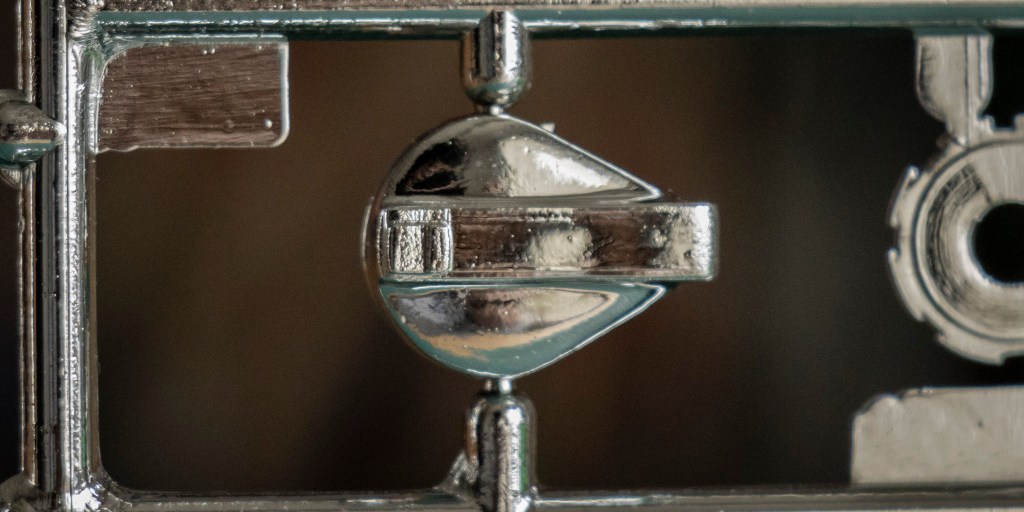
Not sure if the patterns are complete or even historically accurate here…
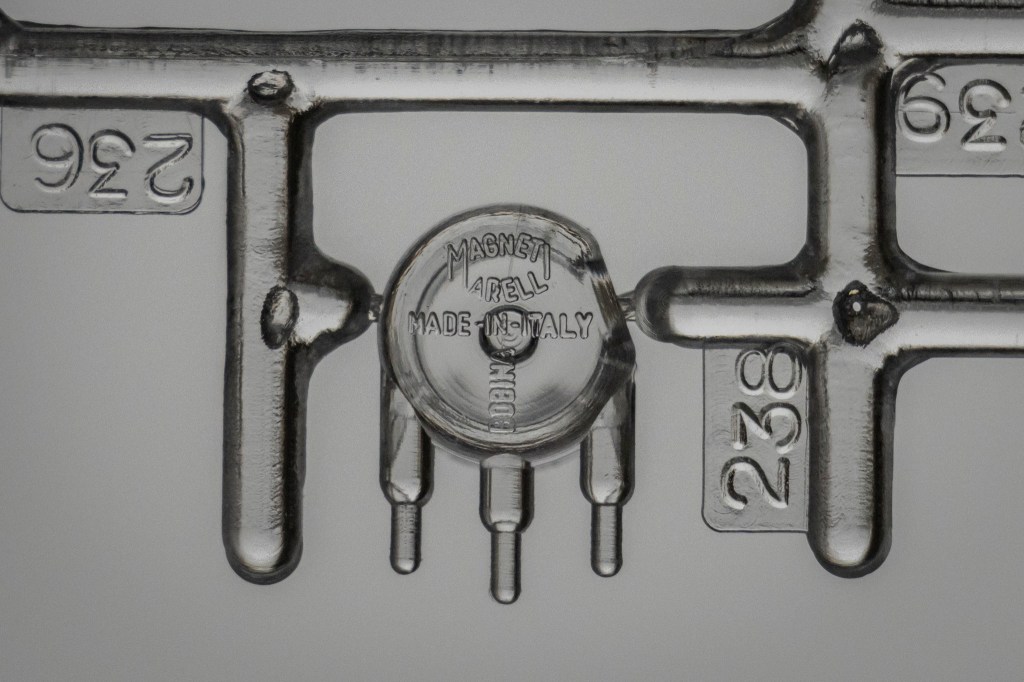
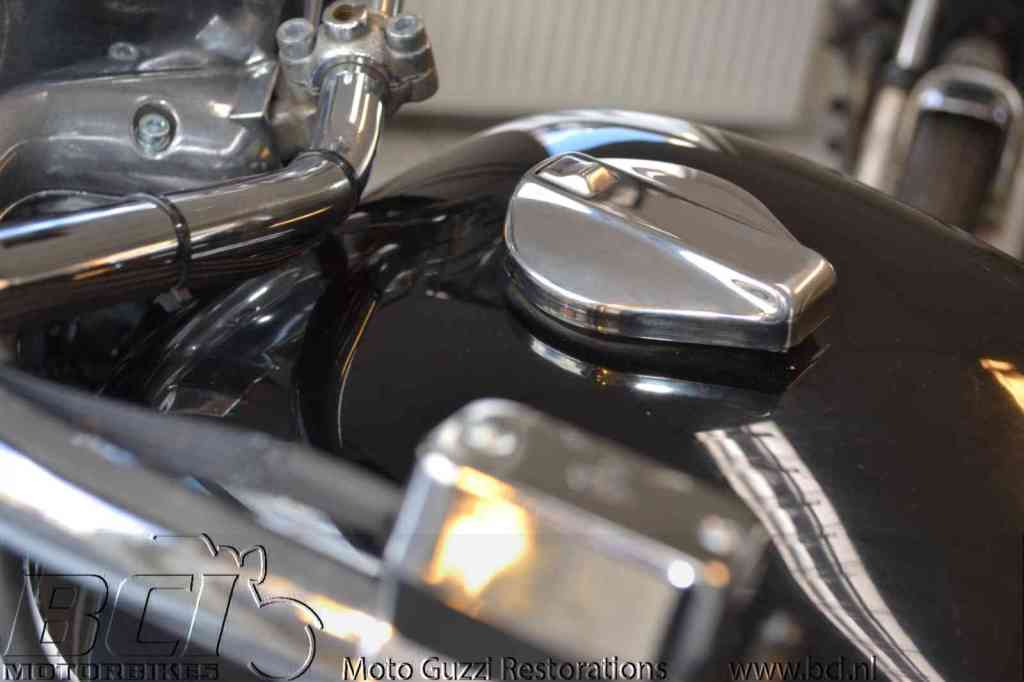
I admire the sharp embossed letters on this distributor cap—but I’m not sure why there’s a cut on the top right. I swear I saw a photo of a real bike with this exact cap—dang it—I just can’t find that link anymore. The shape of the Magneti Marelli logo looks quite compressed…
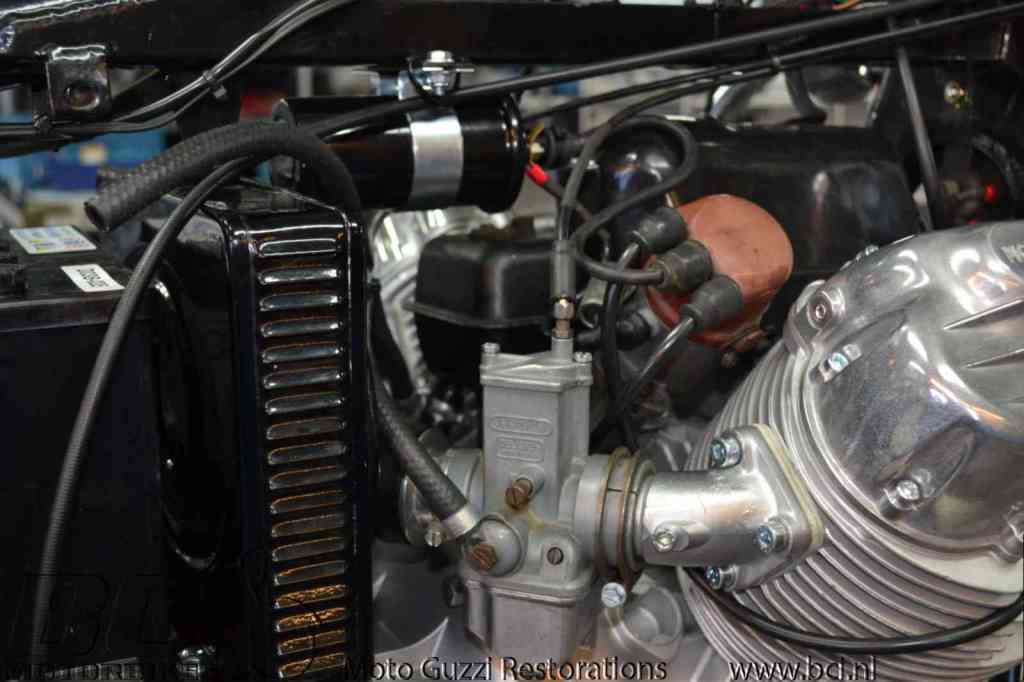
(Photo Credit: Moto Guzzi 850 GT California 1973 Restoration Project, BCI Motorbikes)
Here’s a reference photo from BCI Motorbikes. Rbmotion makes those very nice rubber distributor cap boots, which I used on my P34.
Hmm…maybe the 1/8 scale ones will work fine on this 1/6 bike? These cap boots do look huge on the actual V850, though.
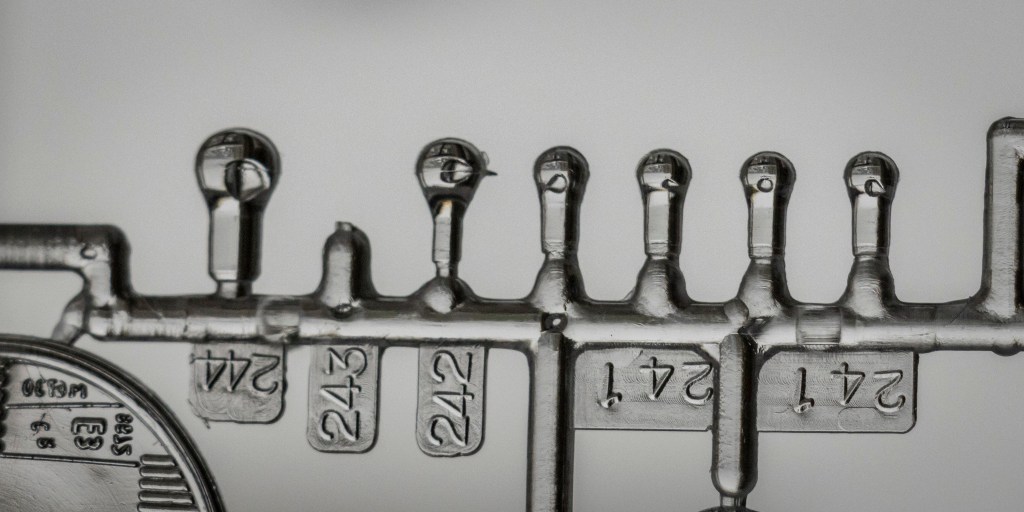
Protar made sure that all the lightbulbs were included in this kit. However, almost all of them come with a factory air bubble… Good thing they’re tiny and not very noticeable…
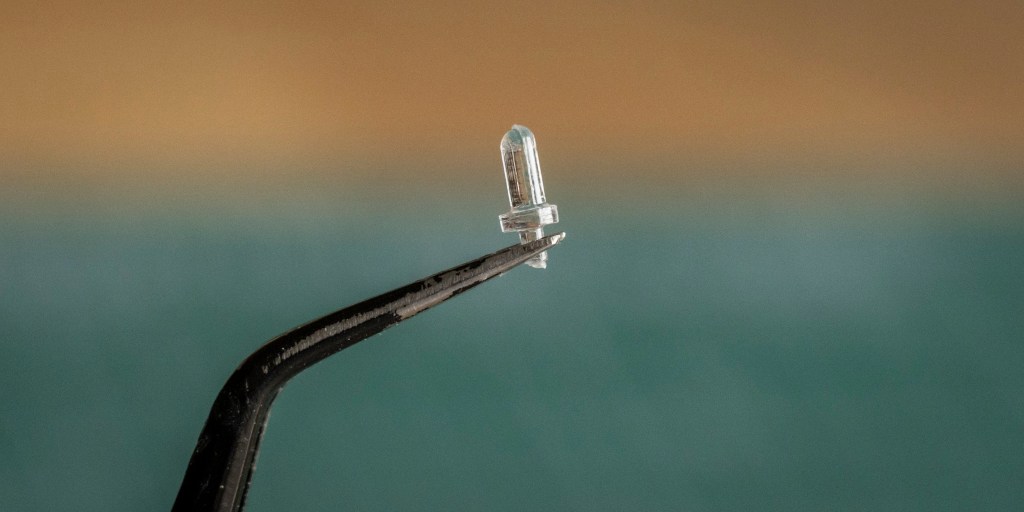
The exception is here – the position light bulb. Don’t panic! Please double-check the bag if you don’t see it on the runner.
The light cannot be turned on – yes, you can replace it with a real LED bulb. But even if you choose not to, the wire and bulb base are all included in the kit, something that is often ignored in kits from other brands. Again, Okabe and Provini really went all in on the level of detail.
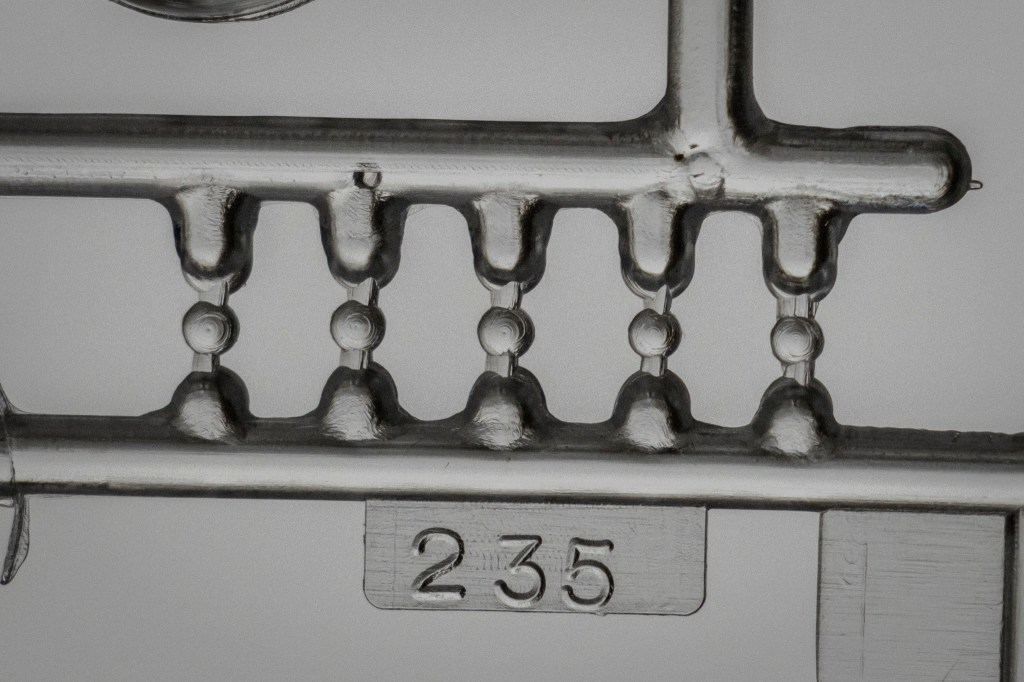
These small warning lights require careful handling. Gigantic gates on CLEAR parts…My worst nightmare has come true…
(Photo Credit: Hemmings.com)
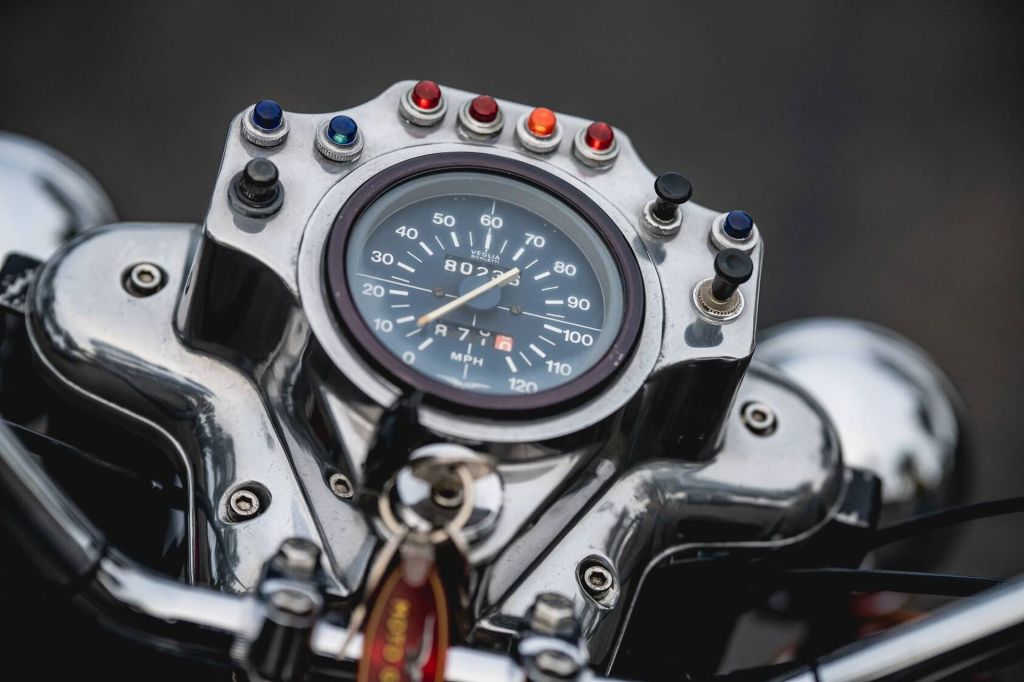
Yep, these lights are colourful. Note that the courtesy light switch is pushed in this photo.
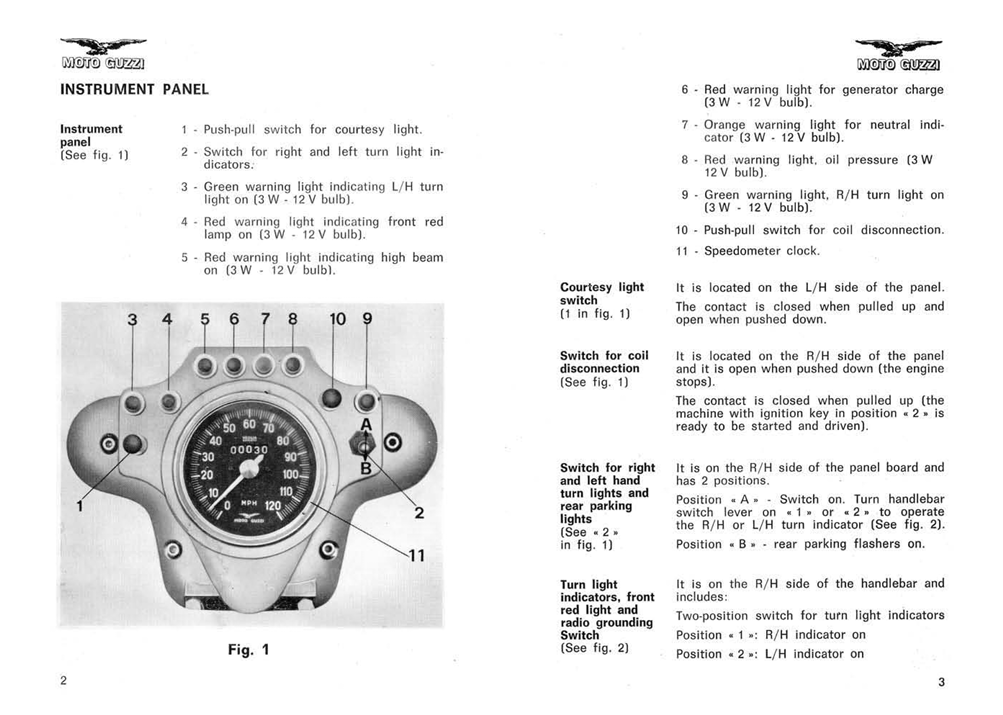
(Picture Credit: Moto Guzzi rider’s handbook – Police Supplement to the V850 Eldorado, downloaded from Gregory Bender, This Old Tractor)
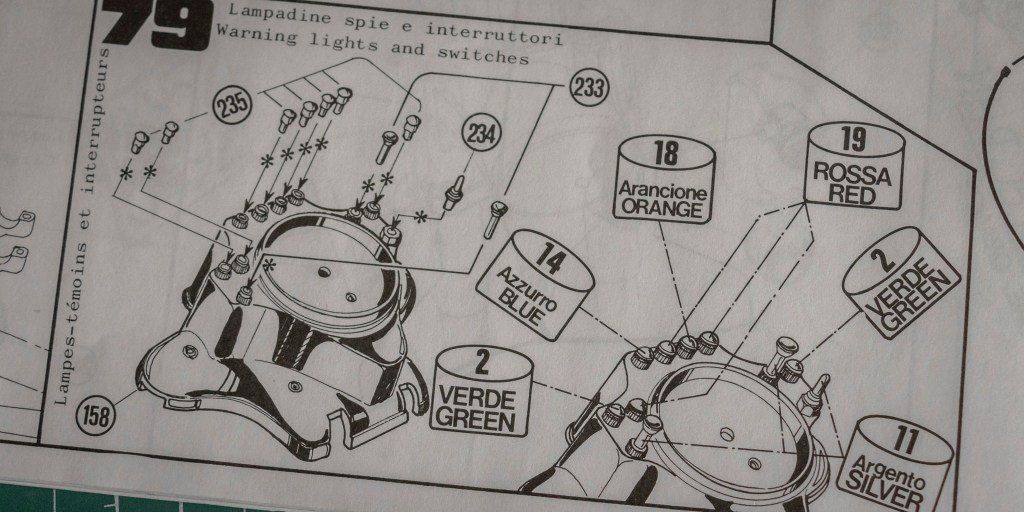
Here’s a page explaining all the lights and switches on the instrument panel. Seems that the colours of certain lights, for example – 5 and 9 – can vary depending on versions and model years.
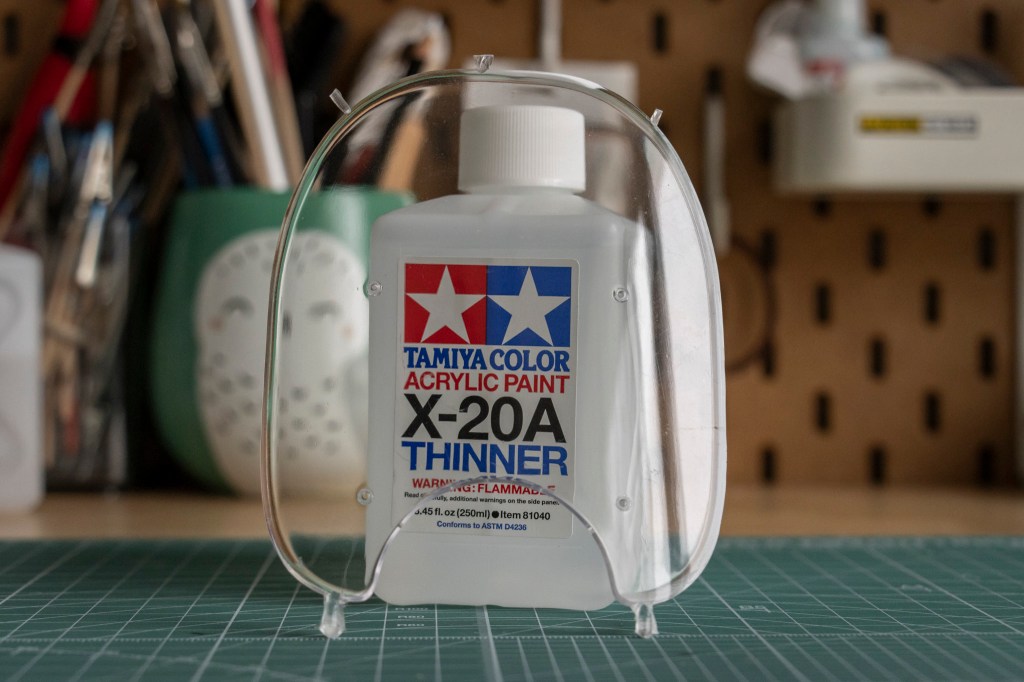
The only clear part left is the huge windshield. Hmm, it is not so good comparing to Tamiya’s big Harleys and Z1300B.
Left: Harley-Davidson FLH w/ Sidecar Right: KZ1300B
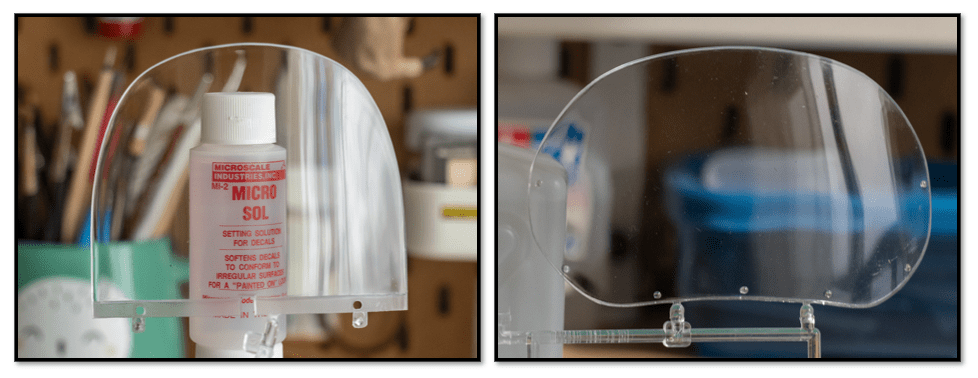
The problem is that Protar’s windshield is horribly thick, and of course, you get thick gates – pay attention to the two big gates at the bottom.
(Photo Credit: Freeride Motos Racing)
Perhaps it is not too hard to cut one from a slightly bent polycarbonate film? The material found commonly on RC car bodyshells. I’ll give it a try 😀
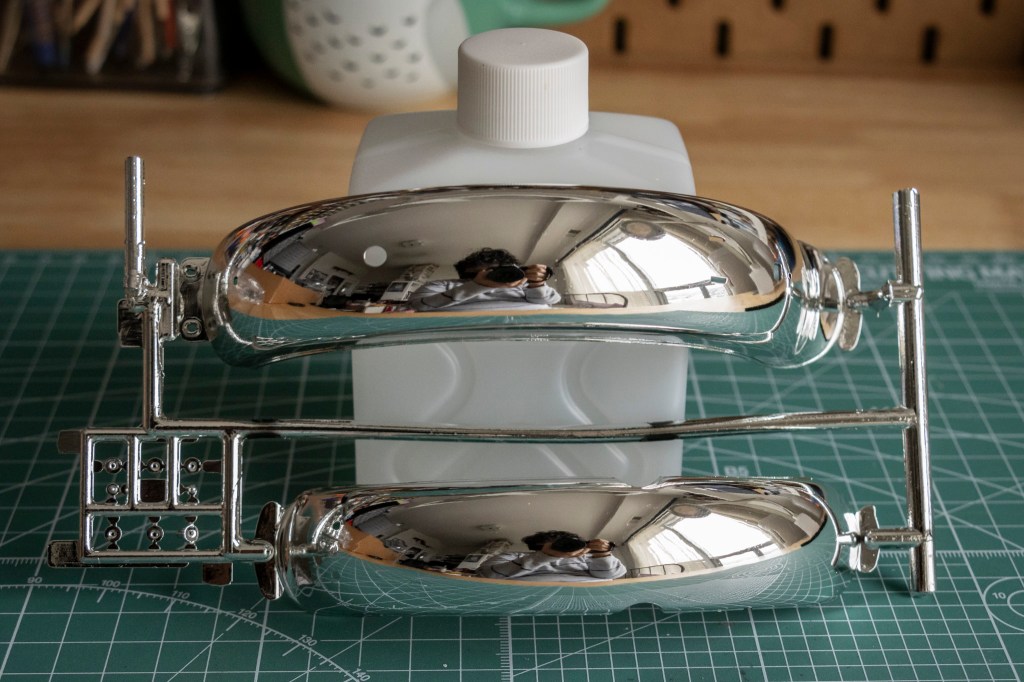
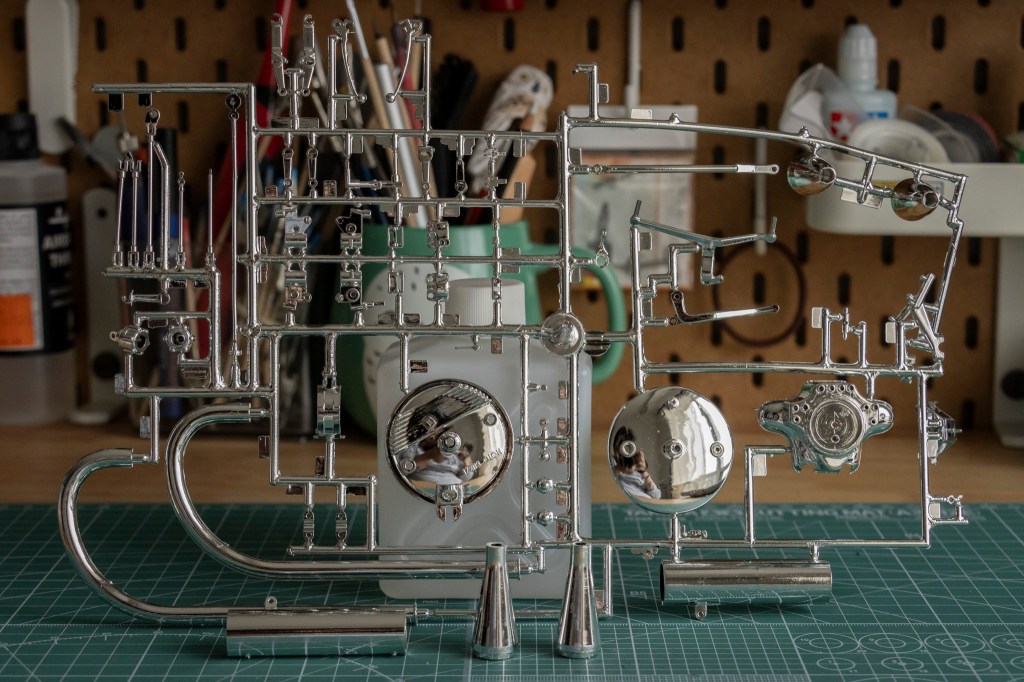
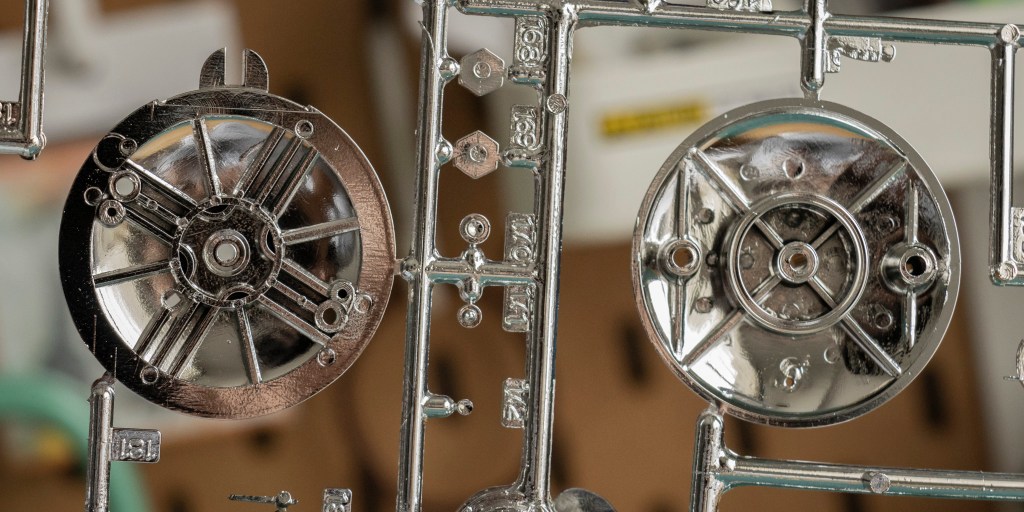
The quality of chrome-plated parts is even better than Tamiya’s. Smooth, gorgeous finish on these two enormous fenders.
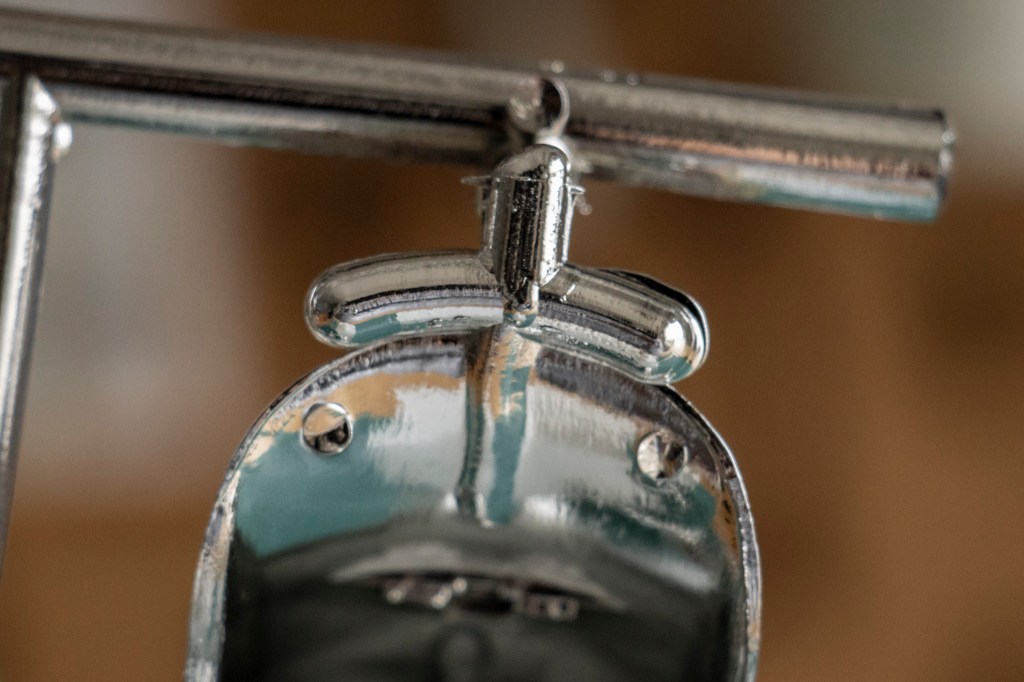
But…this IS the biggest gate I’ve ever seen so far in my life. No undergates, sorry 😦 This will require extremely careful cutting and sanding. I intend to keep the chrome on these two fenders as it can be hard to recreate such a finish (and even if you succeed in doing that, chances are the finish is untouchable (literally) – e.g., AK’s Super Chrome) – Molotow liquid chrome markers will be used for touching up on the contacting surface.
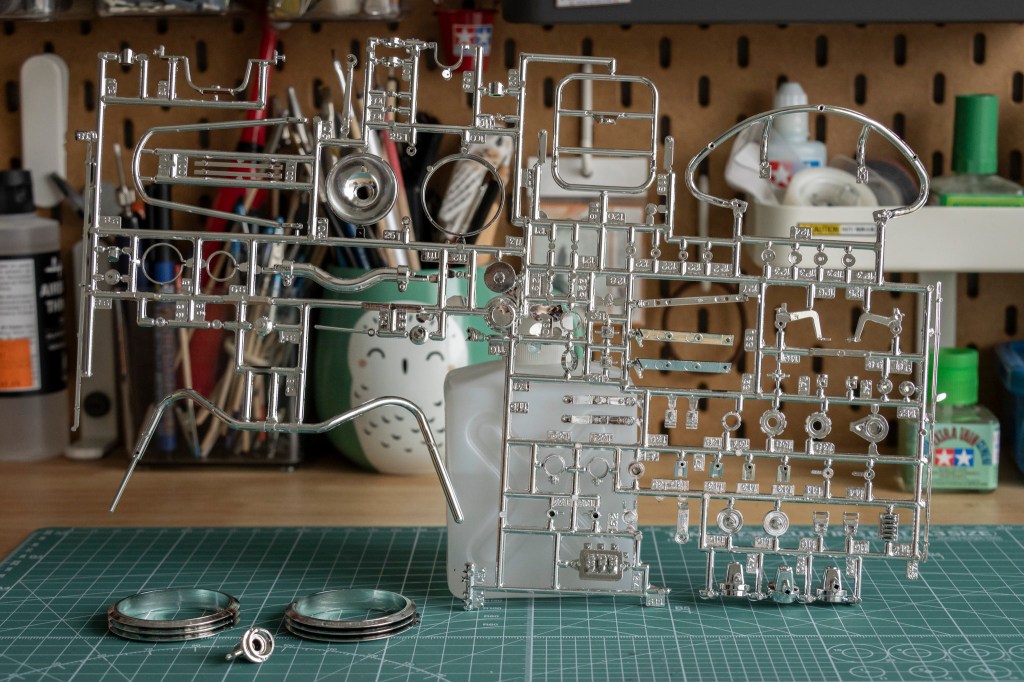
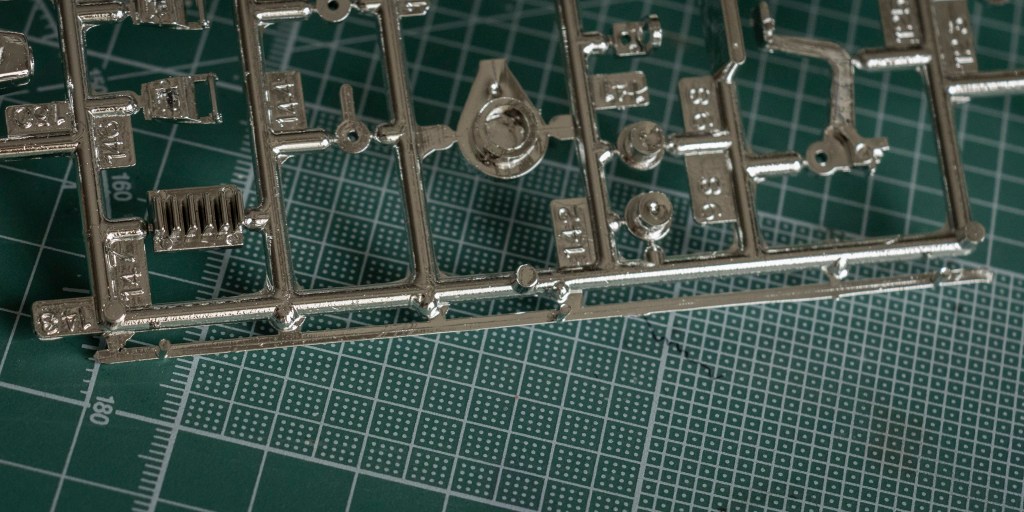
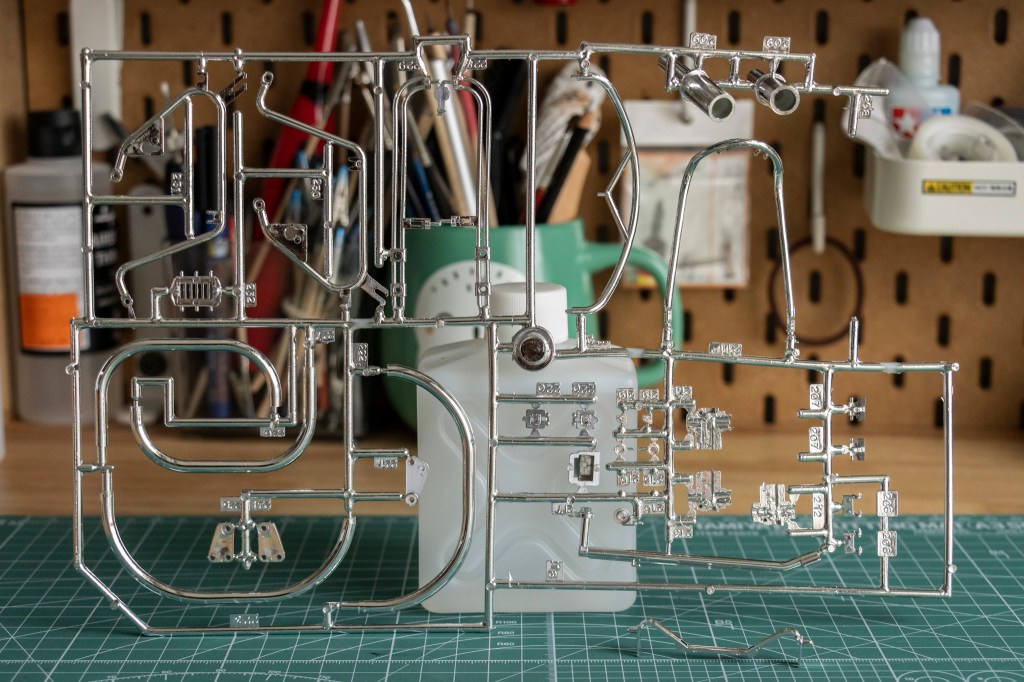
More chrome-plated sprues. One thing I’ve noticed about Protar kits is that the sprues are usually not closed—unlike Tamiya’s, which are typically rectangular and enclosed. I assume this design choice helps save costs? However, it also means some parts may lack sufficient support and protection, increasing the risk of distortion or even detachment from the runners.
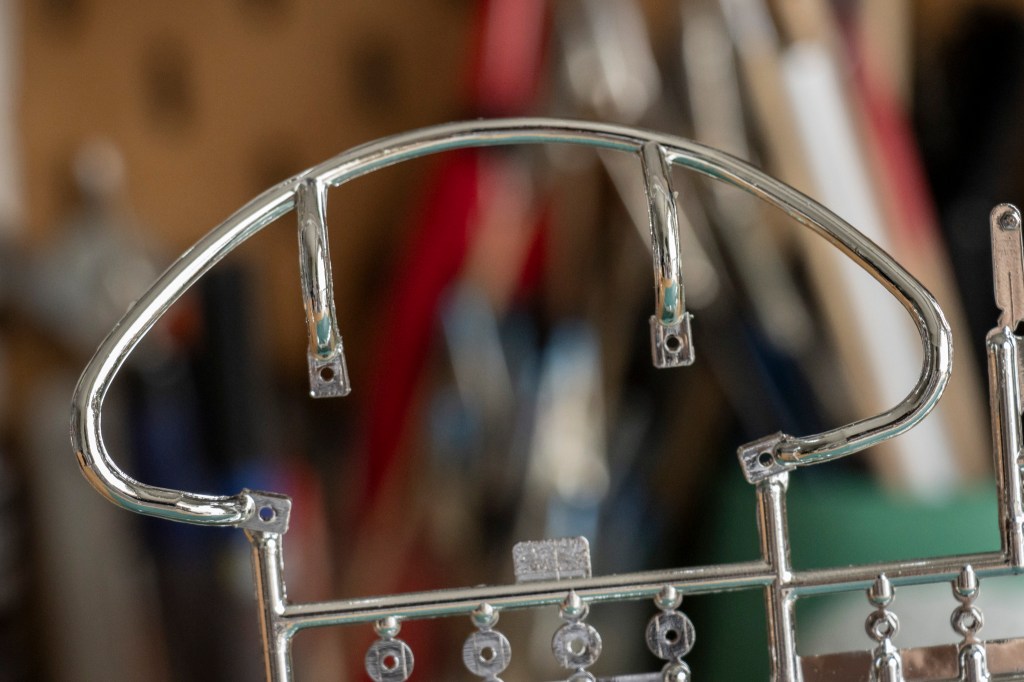
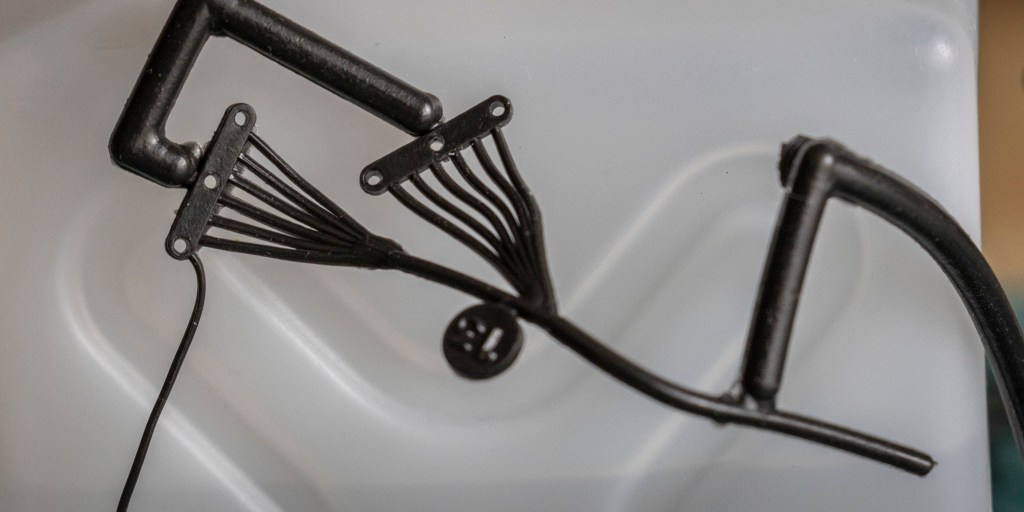
Classy behind-the-seat handles. Gotta love all the chrome on vintage bikes!
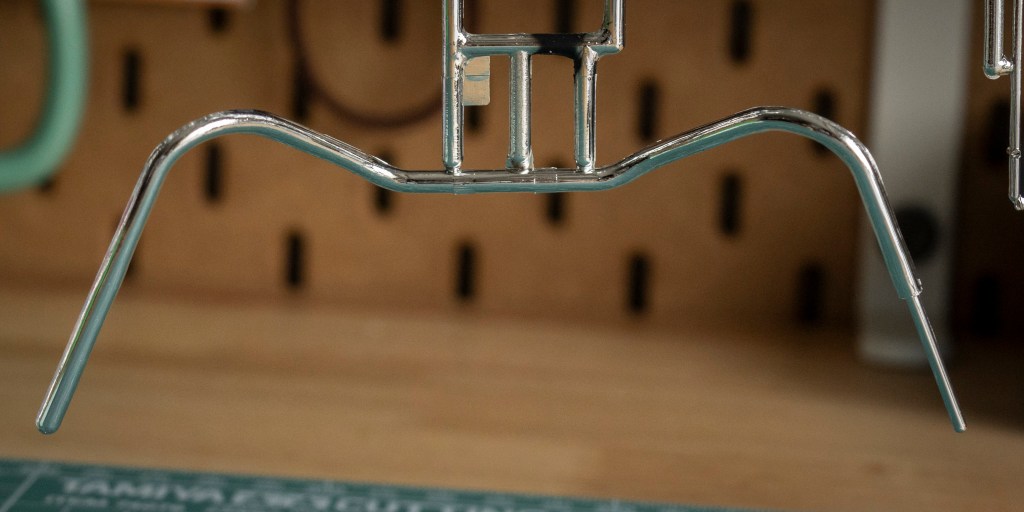
Do I miss those metal handlebars Tamiya usually provides? Yes, I do. I DO.
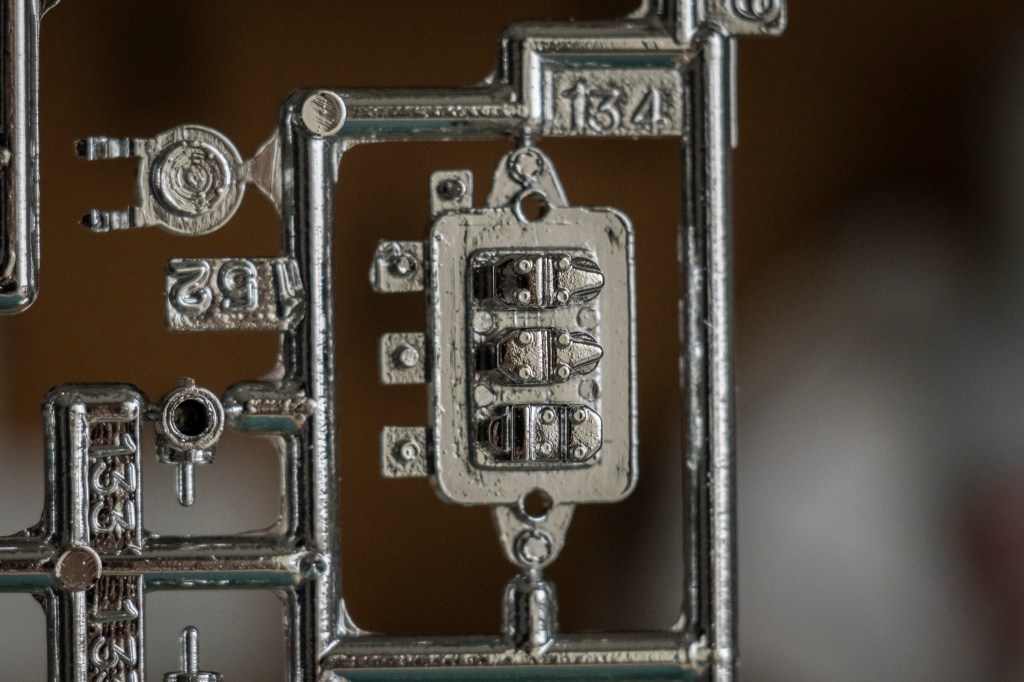
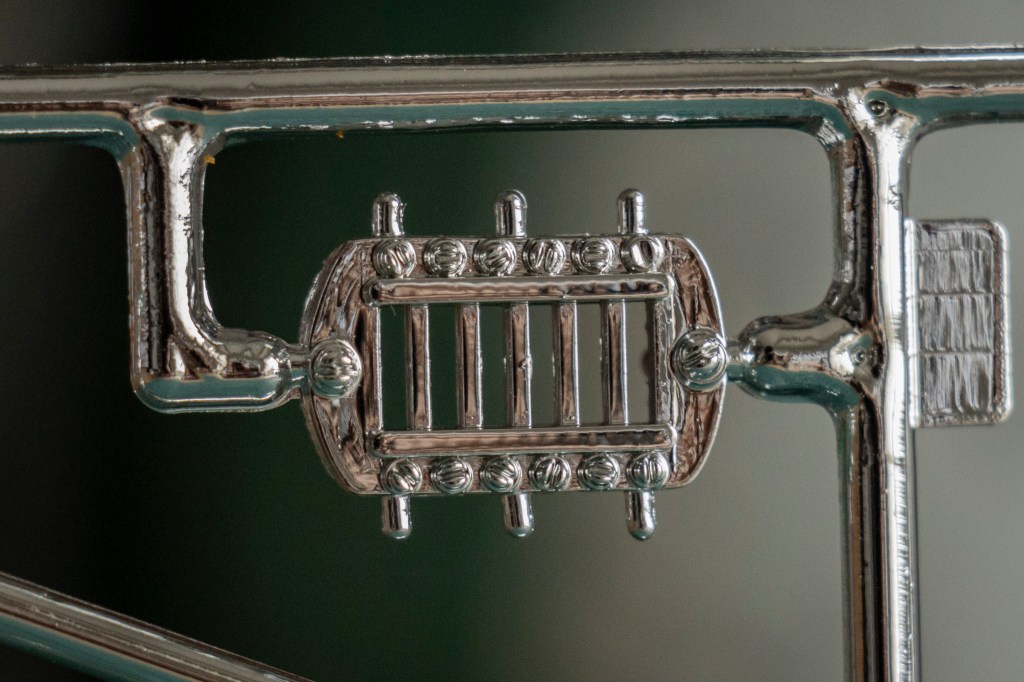
Smaller parts or parts with complicated details often don’t take well to chrome-plating. Take this regulator, for example—it ended up with a rough chrome finish that’s just begging to be stripped.
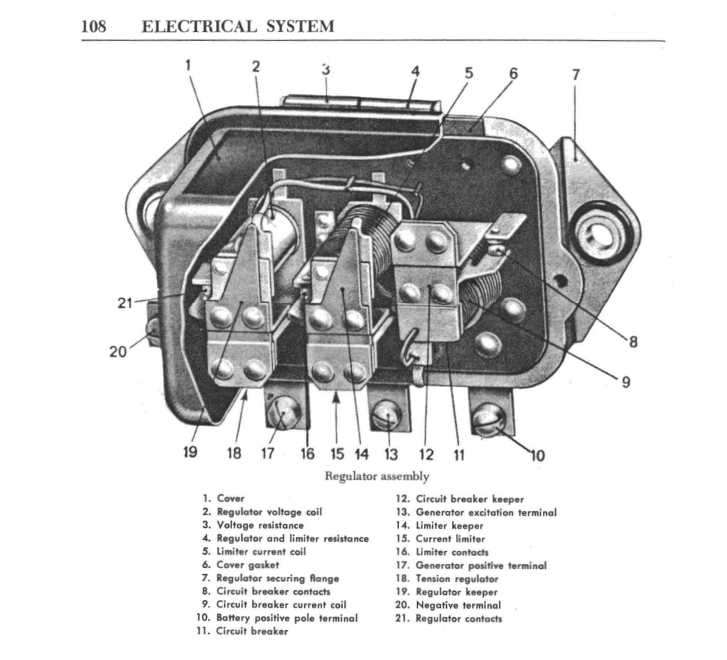
(Picture Credit: Moto Guzzi rider’s handbook – Police Supplement to the V850 Eldorado, downloaded from Gregory Bender, This Old Tractor)
Hope this helps anyone looking for a challenge. I’ll probably add a wire or two and swap out the three bottom screws for real ones.
The fuel tank cap looks authentic!
(Photo Credit: Moto Guzzi 850 GT California 1973 Restoration Project, BCI Motorbikes)
No?
Now you know why the part list is so important, right?
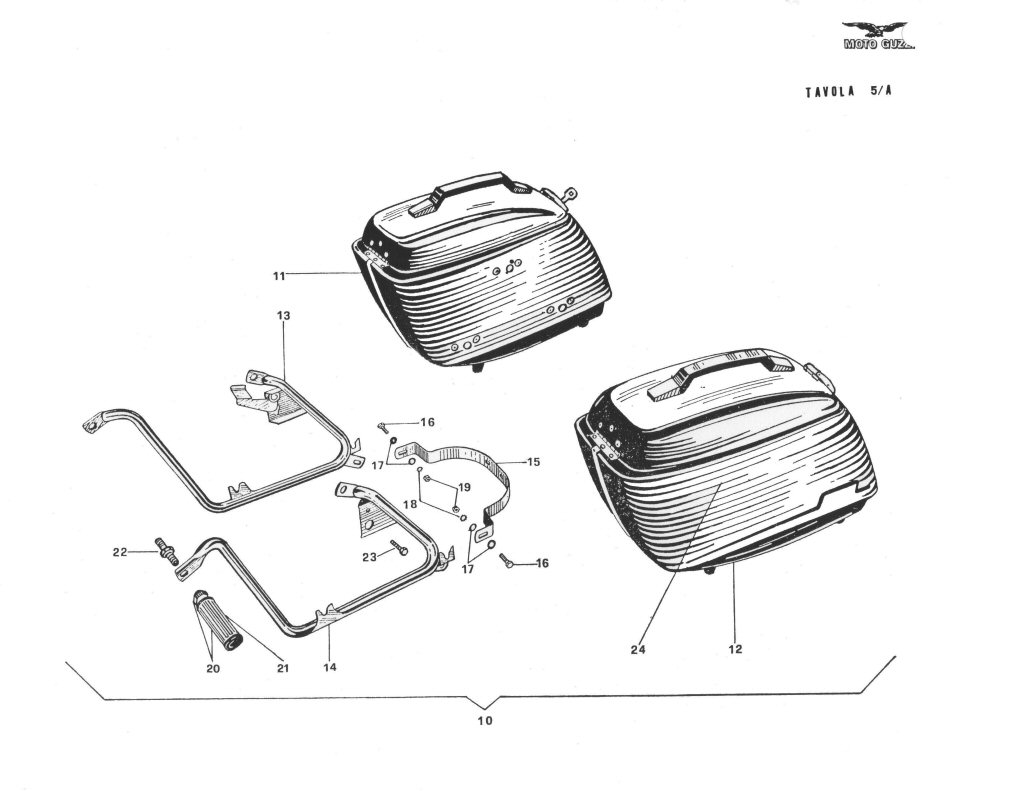
Part #148 – Saddle bag decoration frame.
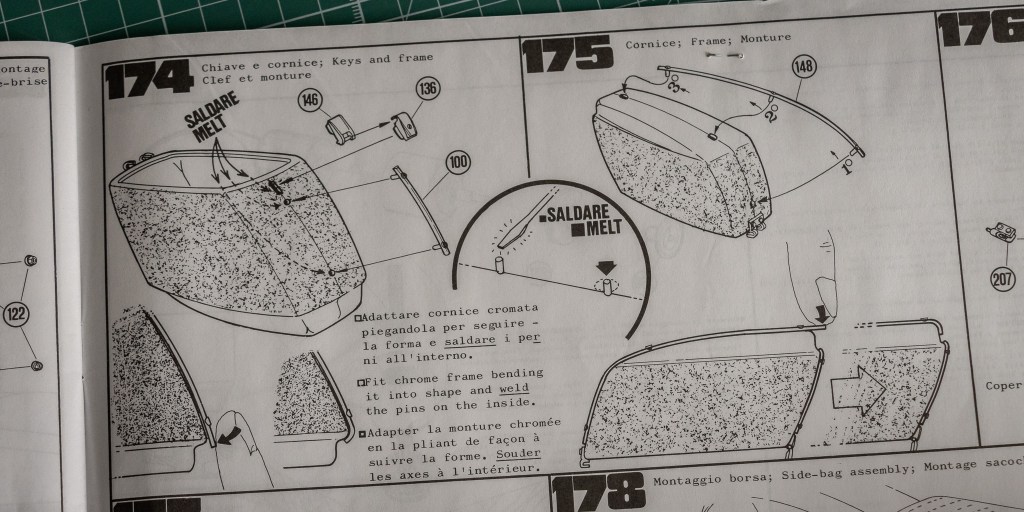
The installation method here looks risky. I’m almost certain it’ll snap in two—if you’re lucky. Otherwise, expect more pieces. Saddle bags are not required anyways.
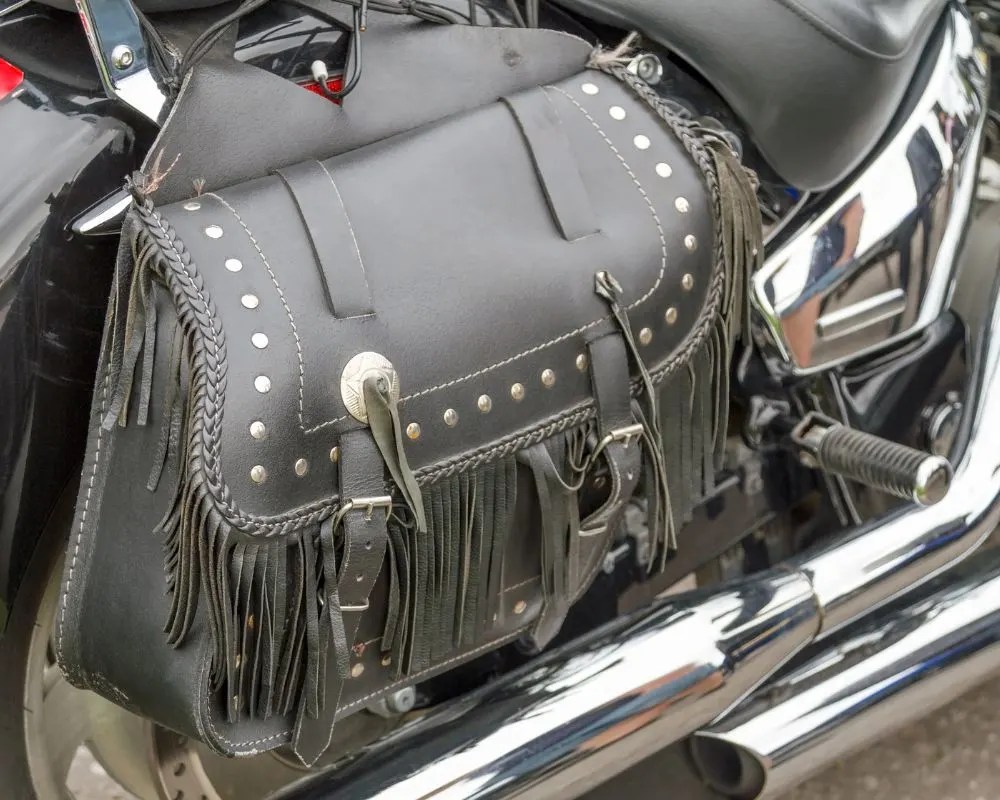
(Photo Credit: Dan Concord, Liberty Leather Goods)
Leather looks way cooler, no?
More chrome incoming!
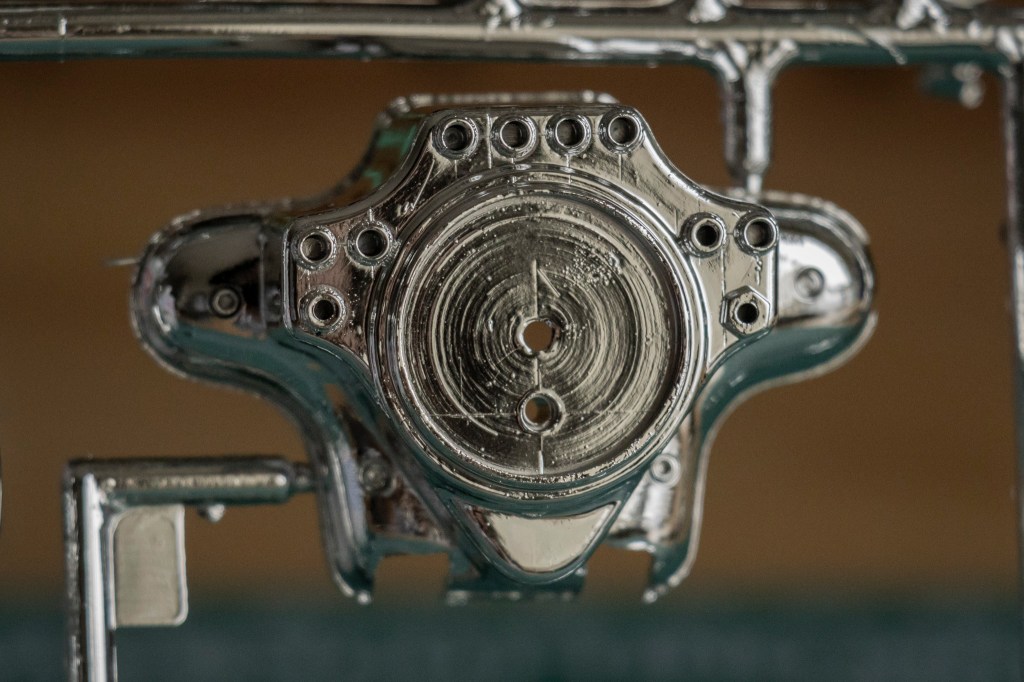
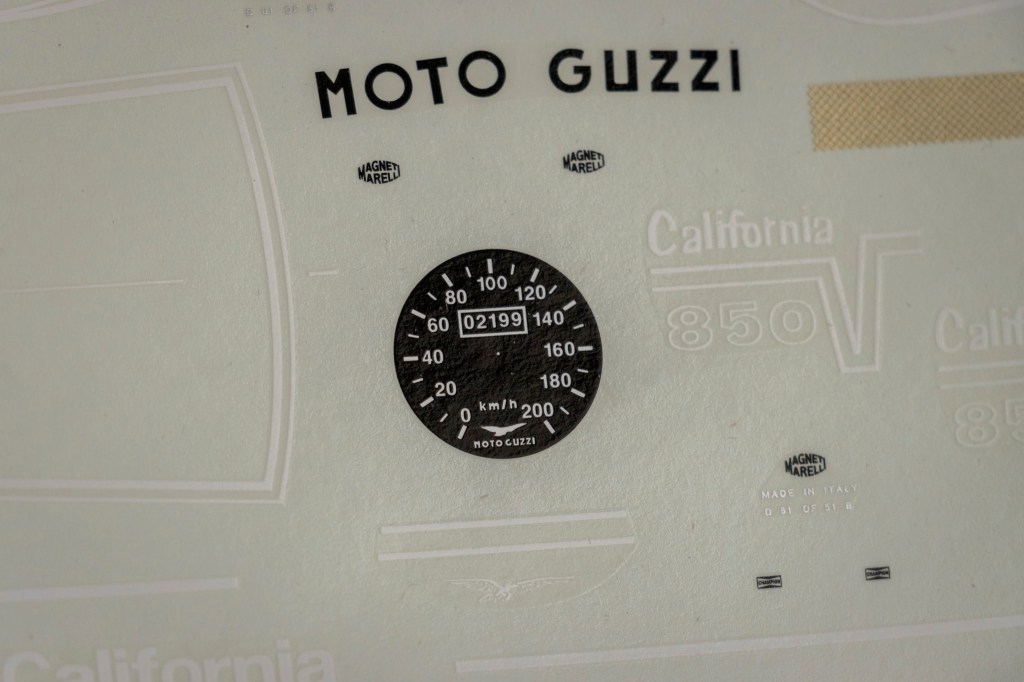
The finish on the instrumental panel is rough. Consider stripping the chrome and offering the surface some proper treatment.
The centre circular section needs a much smoother finish for proper decal adhesion.
(Photo Credit: CSI Ceros)
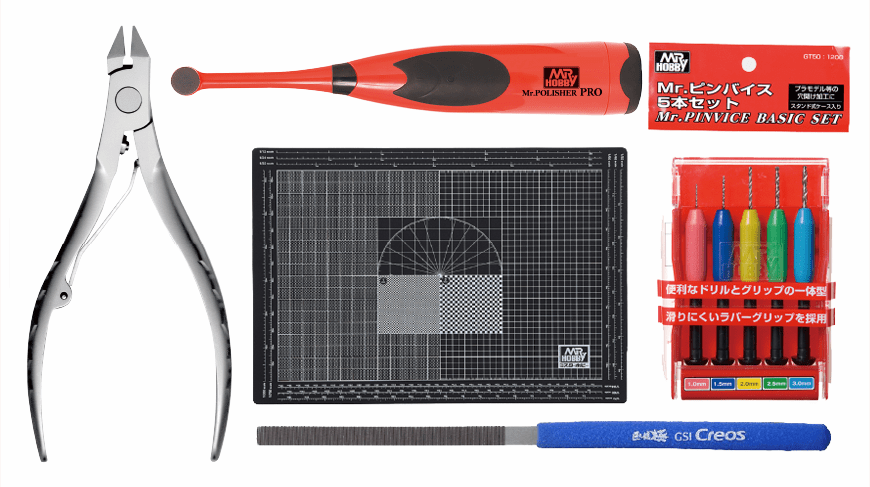
Use the right tool and save your energy – you need to get the red toothbrush from Mr. Hobby – my best friend – Mr. Polisher Pro GT07! It is also suprisingly cheap – go ahead and smash the “buy it now” button, right now!

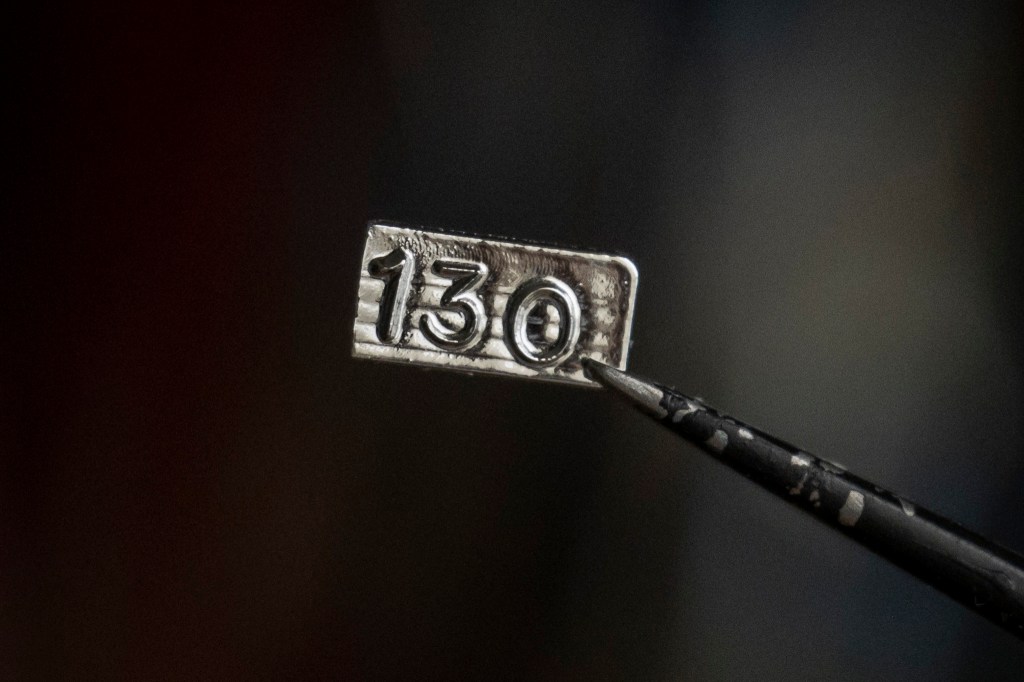
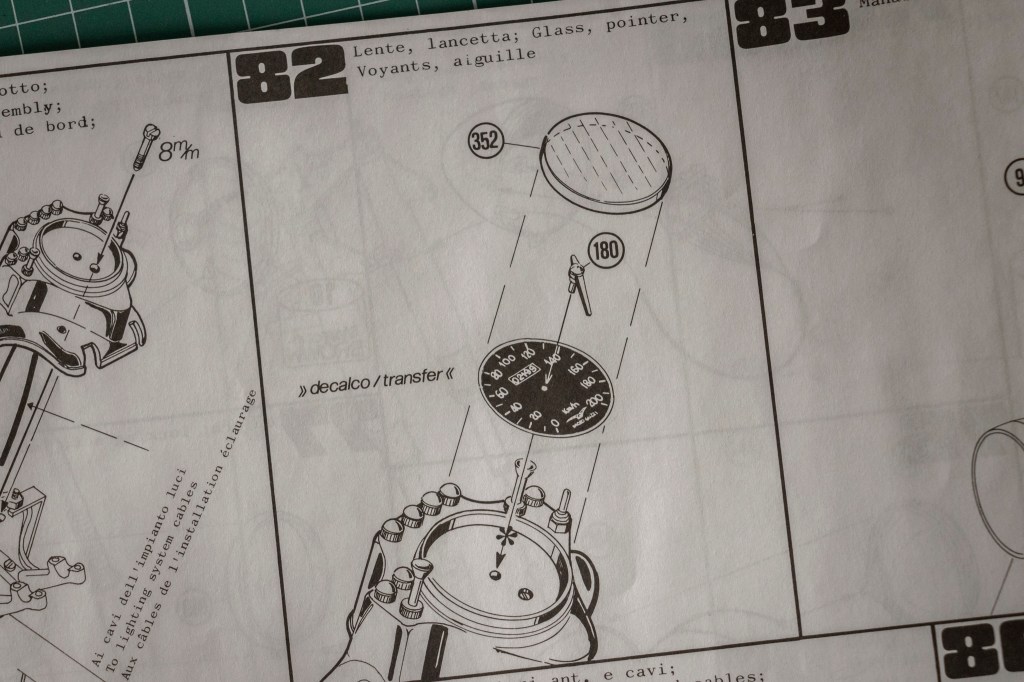
Yes, you did see a pointer in step 82. The two tips need to be sanded down a bit, as they look too thick and out of scale.
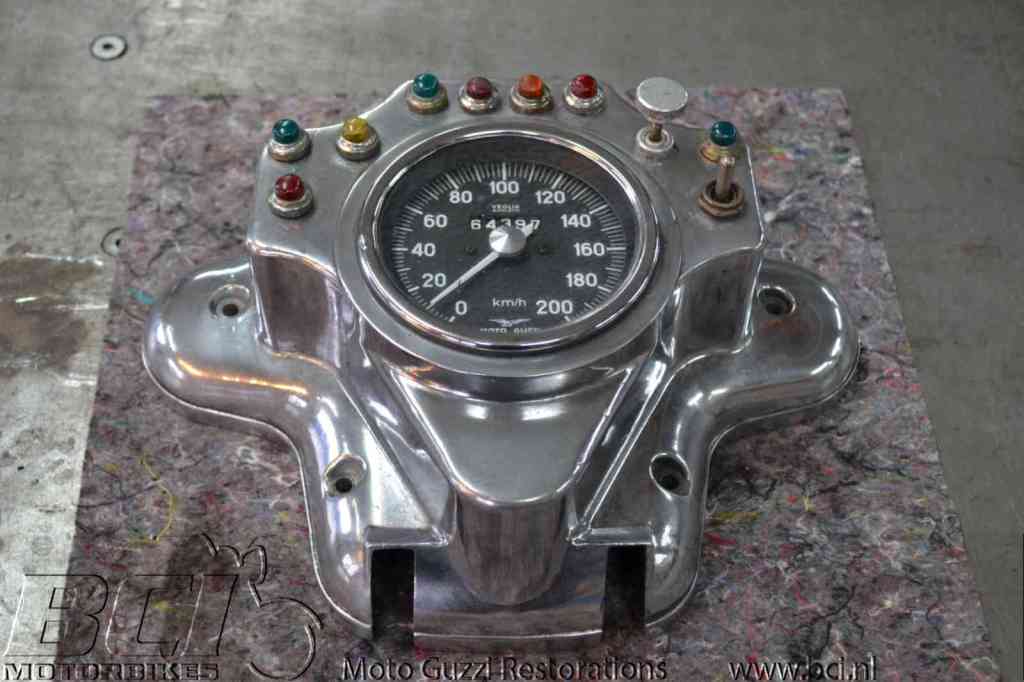
(Photo Credit: Moto Guzzi 850 GT California 1973 Restoration Project, BCI Motorbikes)
Photo from BCI Motorbikes as a reference.
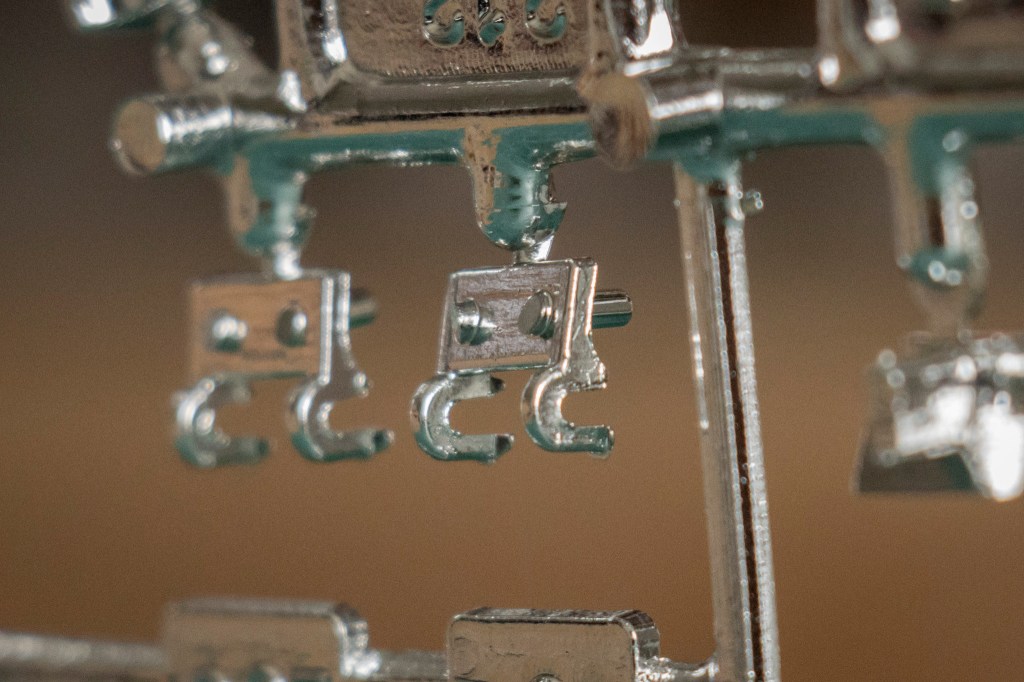
Front and rear brakeshoe discs – the other halves. The chrome here must be stripped, and AK’s Xtreme Metal paint will be applied.
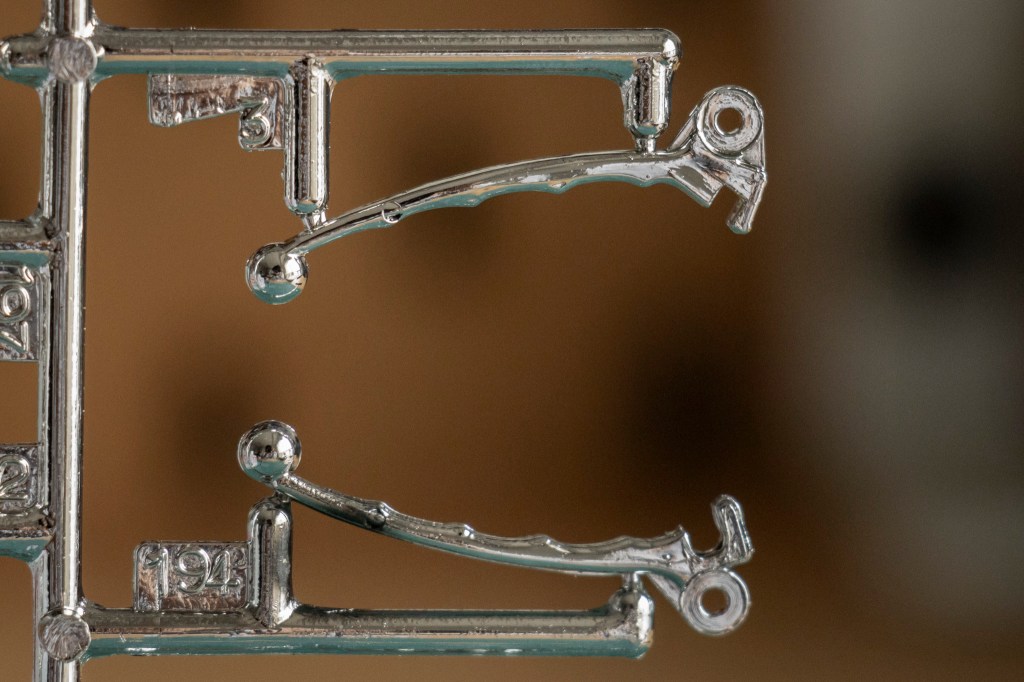
Front brake and clutch levers.
More chrome, more chrome, and even more chrome! Due to Protar’s open-sprue design, it is quite normal to find loose parts flying around in almost every bag.
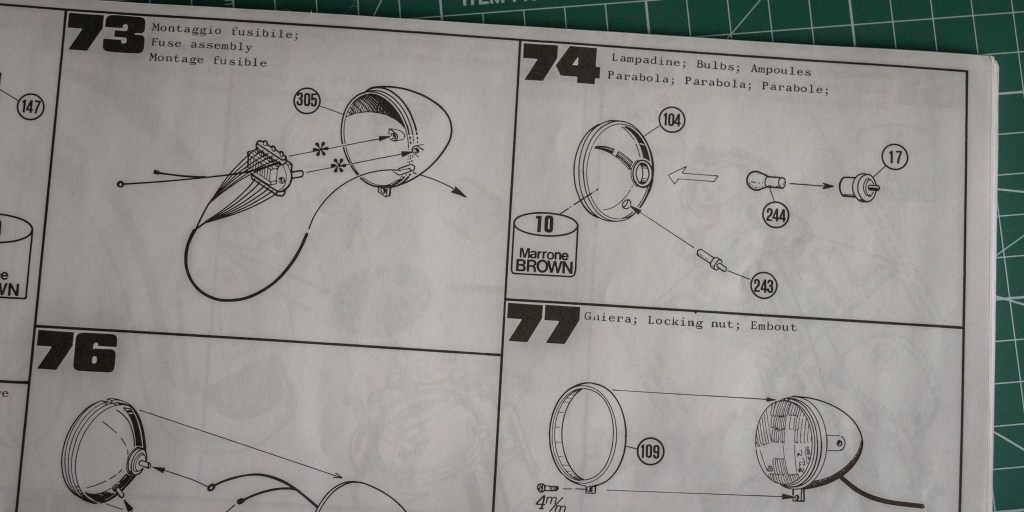
Fuse box. Installed inside the headlight unit. Chrome needs to be stripped here, but I love the detailing on those screws!
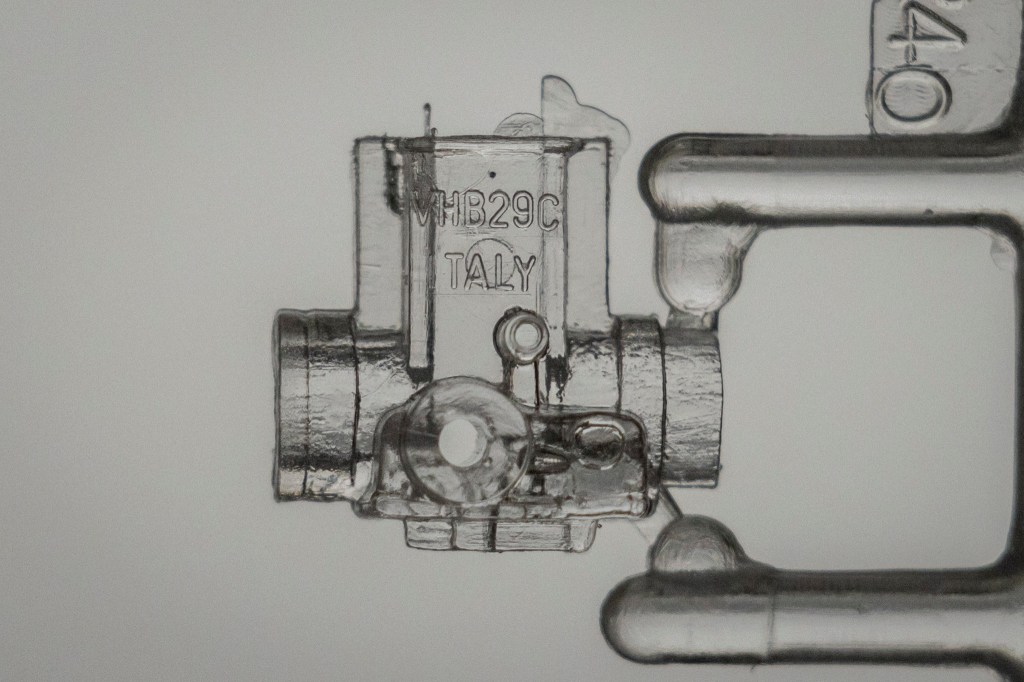
This kit includes one transparent carburettor and one chrome-plated carburettor. Either way, the chrome has to go. These carburettors were made by Dellorto, but I believe their logo was omitted due to copyright reasons.
Hinges for saddle bags.

The two saddle bags can be opened after assembly.
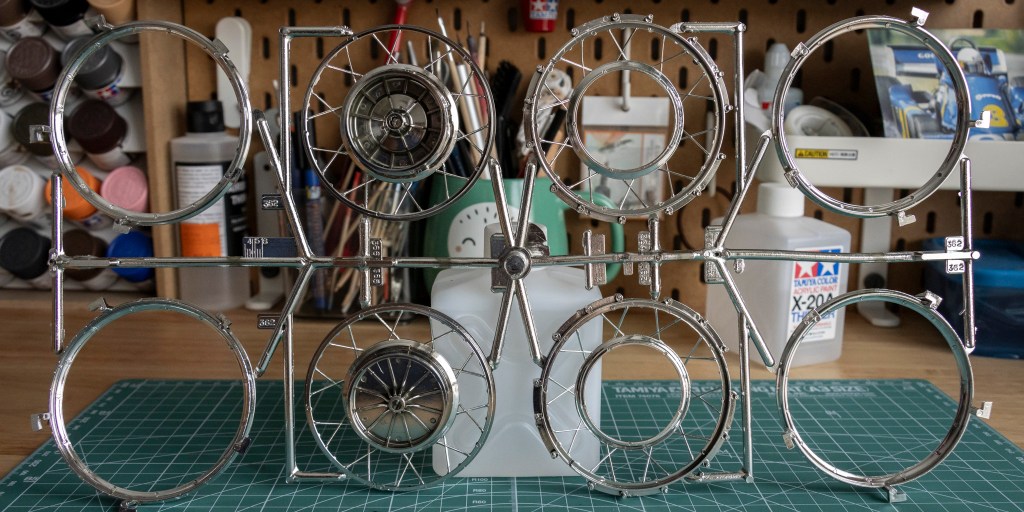
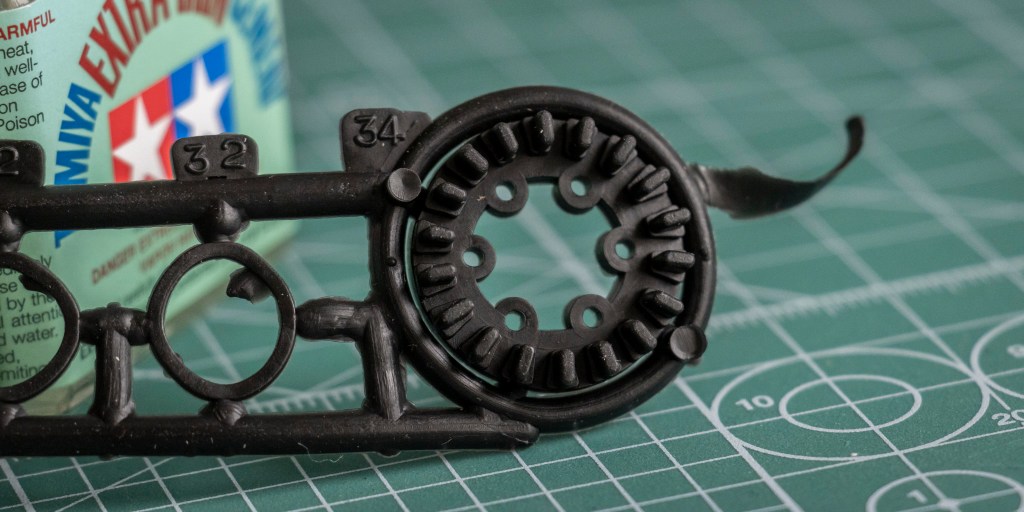
One last chrome sprue – for the front and rear wheels!
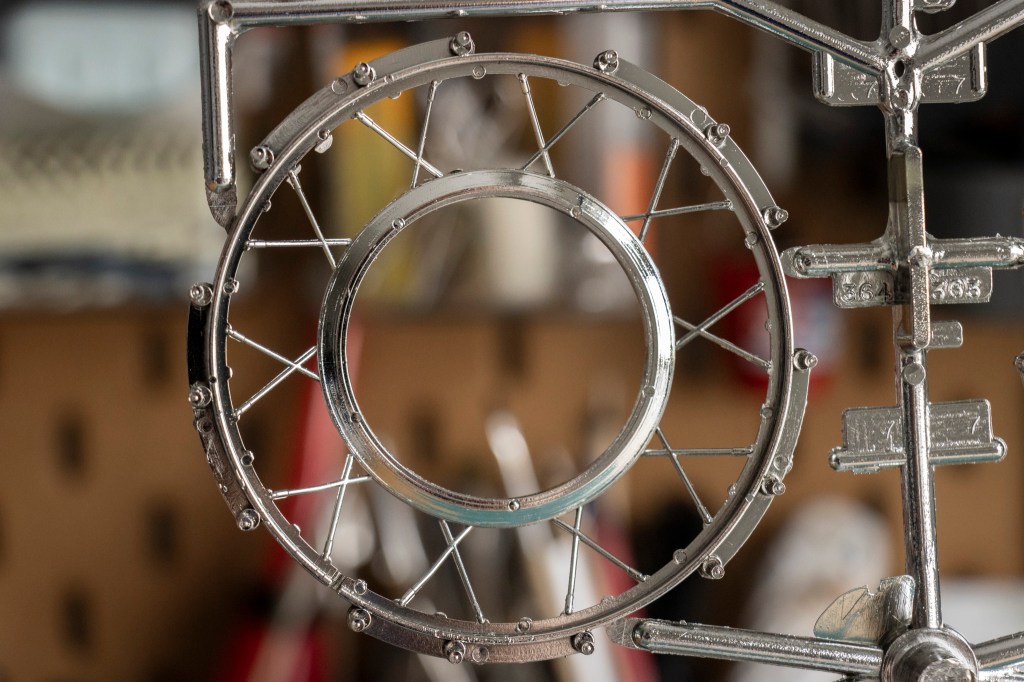
The spokes are too thick to my eyes. Will replace them with metal spokes – I am picky.
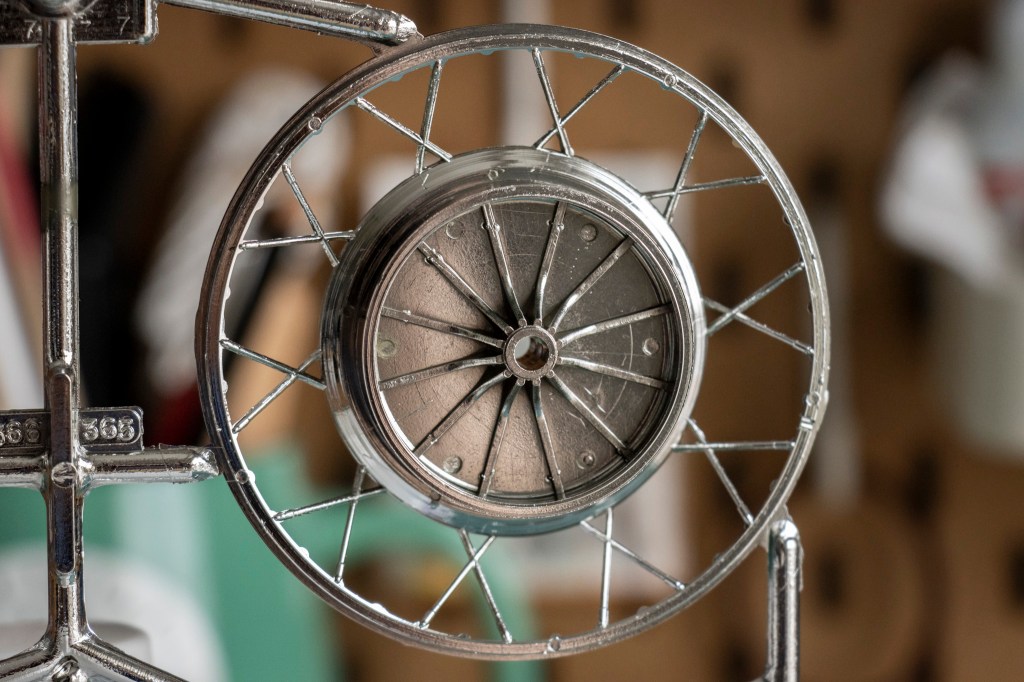
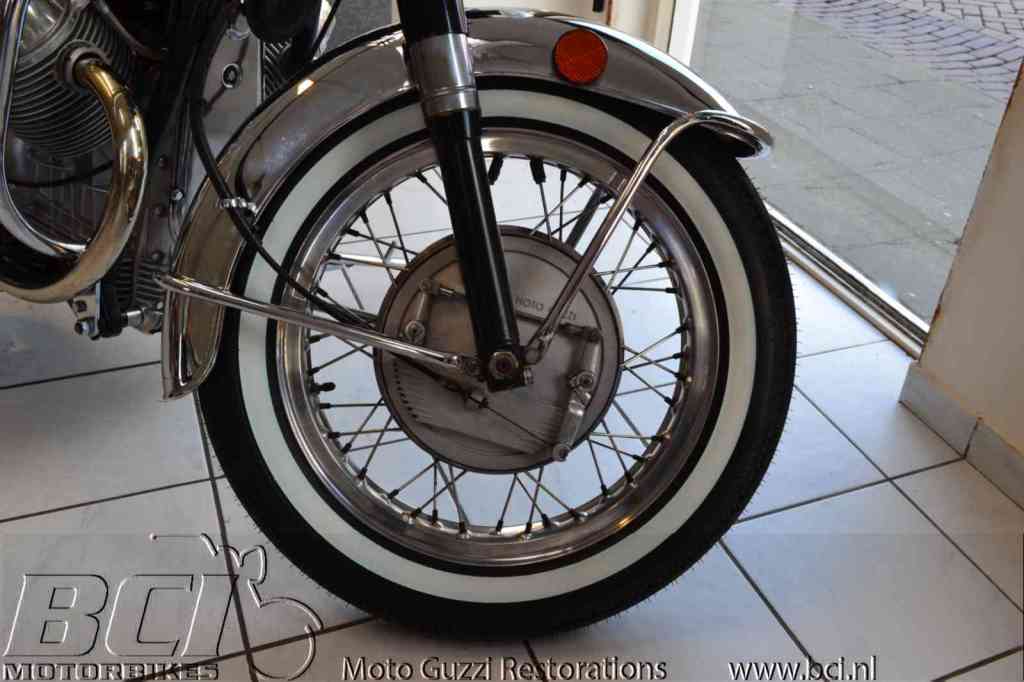
(Photo Credit: Moto Guzzi 850 GT California 1973 Restoration Project, BCI Motorbikes)
BCI’s photo as a reference.
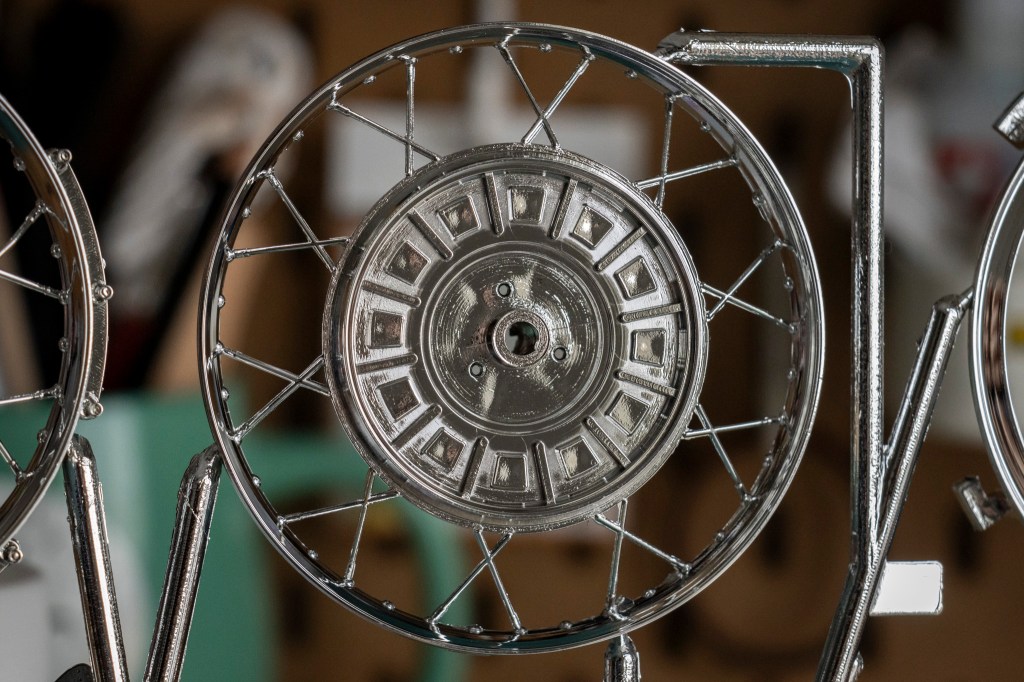
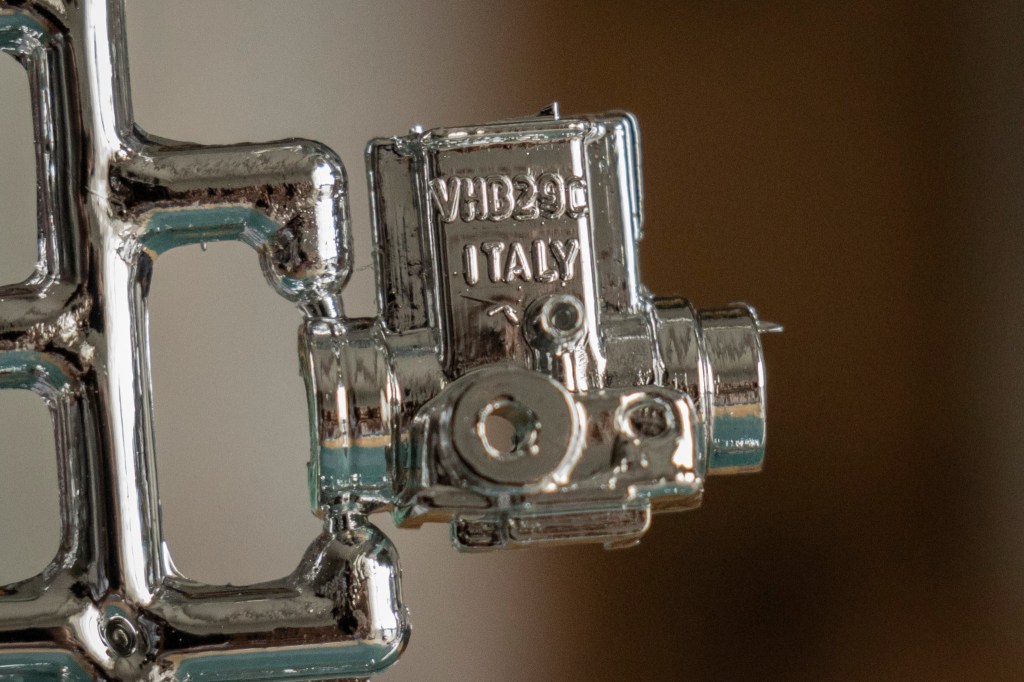
A high level of detail is maintained in each part.
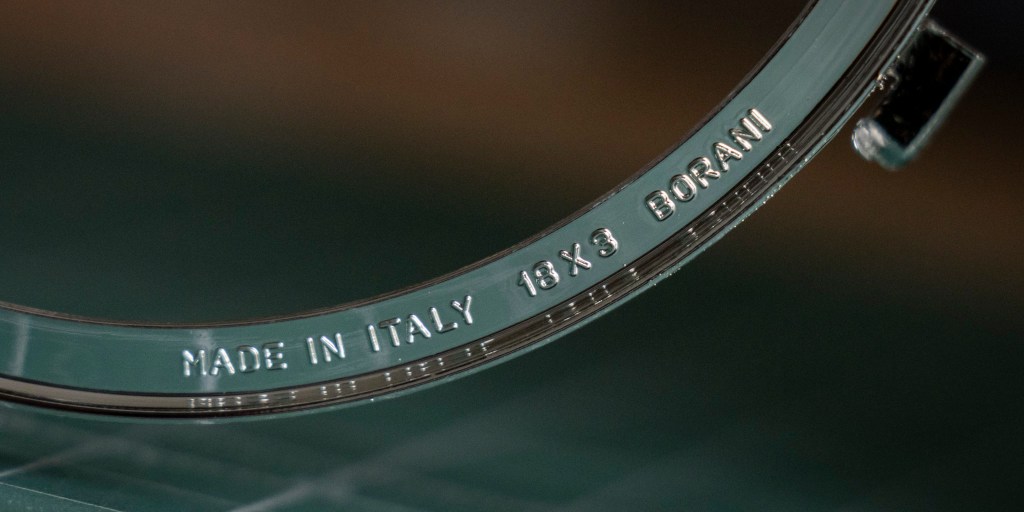
Not sure if this is intentional or a mistake, but “Borrani” with double Rs is a famous Italian wire wheel manufacturer who obviously made this bike’s two wheels. Another copyright omission?

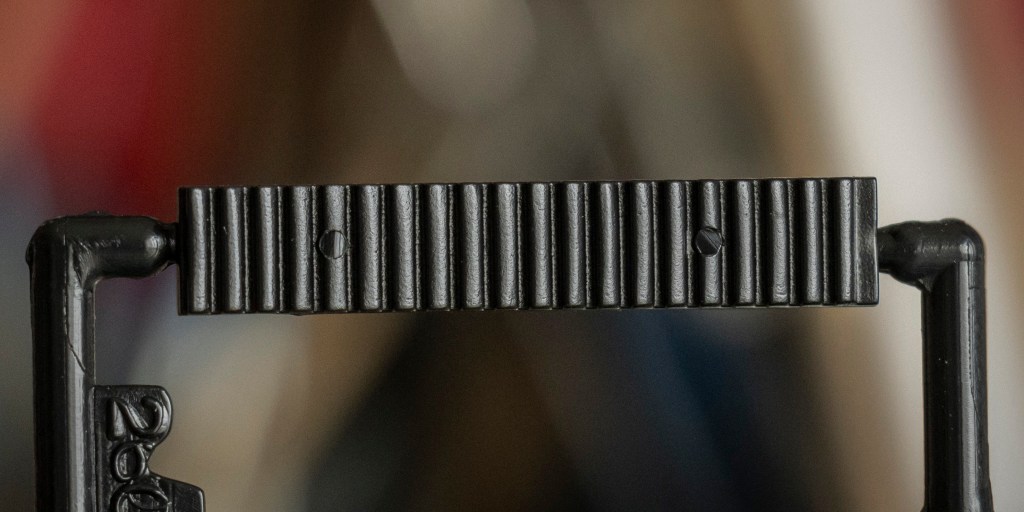
Air valve is a must for such a luxurious kit.
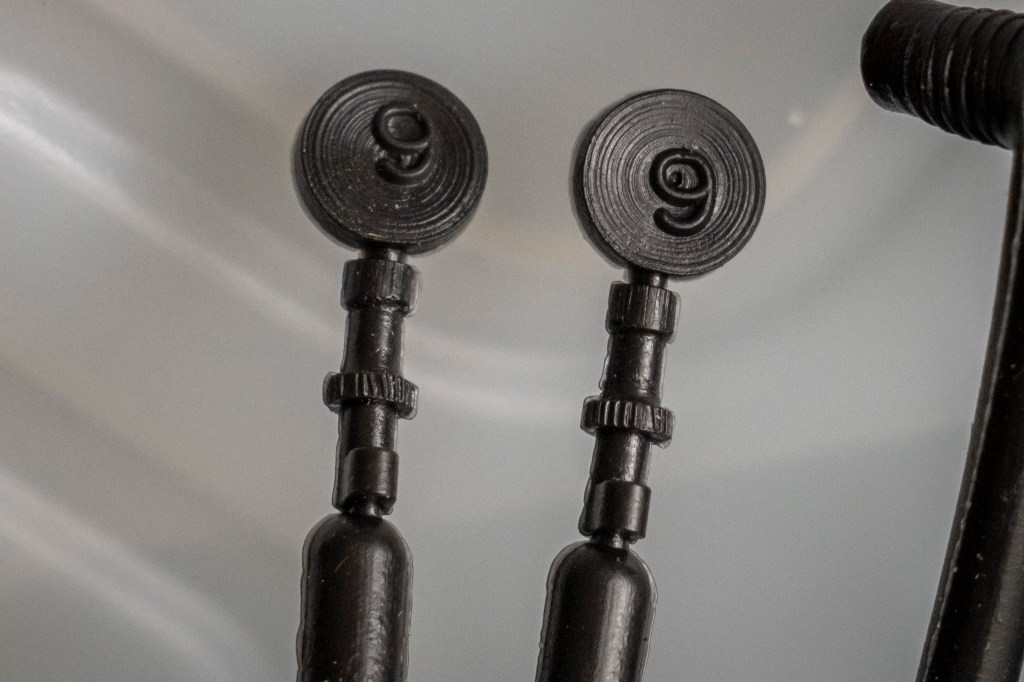
This time we got rubber air valves! The knurling here certainly is not as attractive as Provini and Okabe probably imagined it would be on rubber.
The rubber parts look wild – especially those rubber wires.
Ewww….
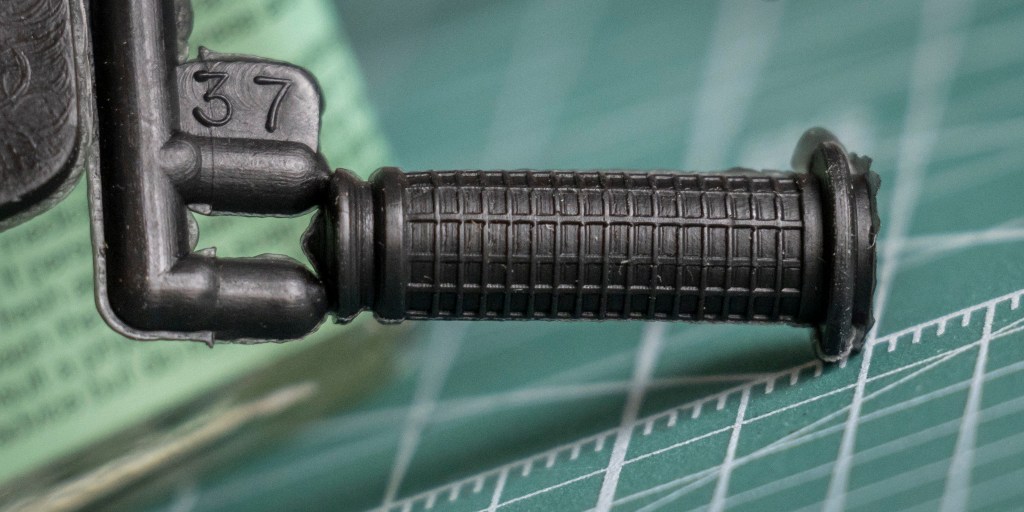
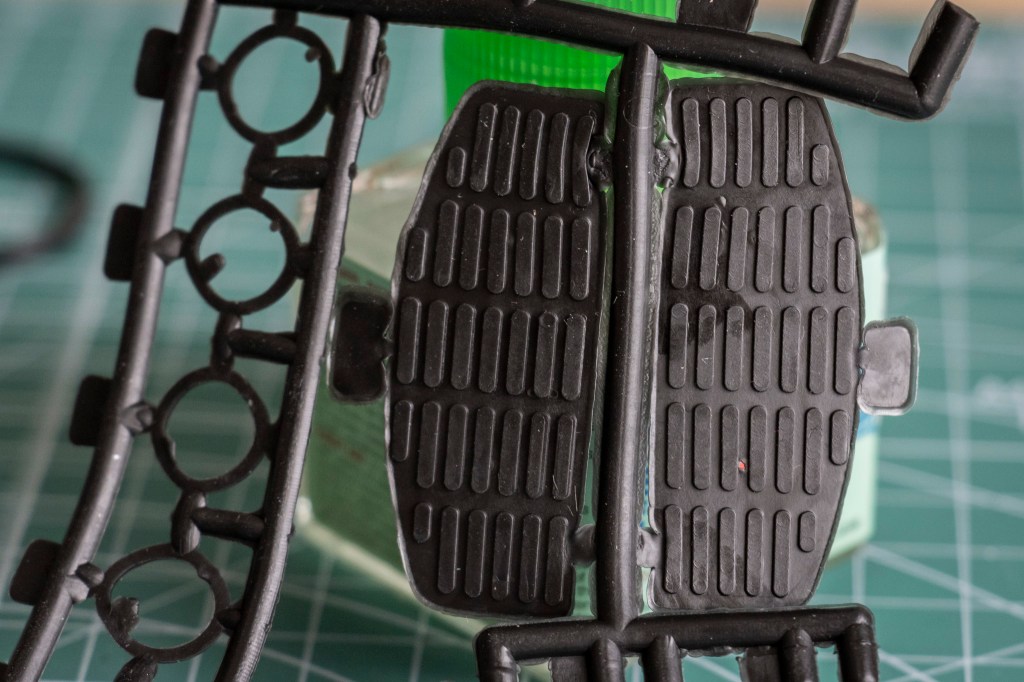
The hand grips are shockingly good, I must say.
Spring drive – installed in the rear wheel.
Fuse wires.
Wiring fixing band.
No, thanks. I’ll use my many zip ties I’ve collected from RC kits.
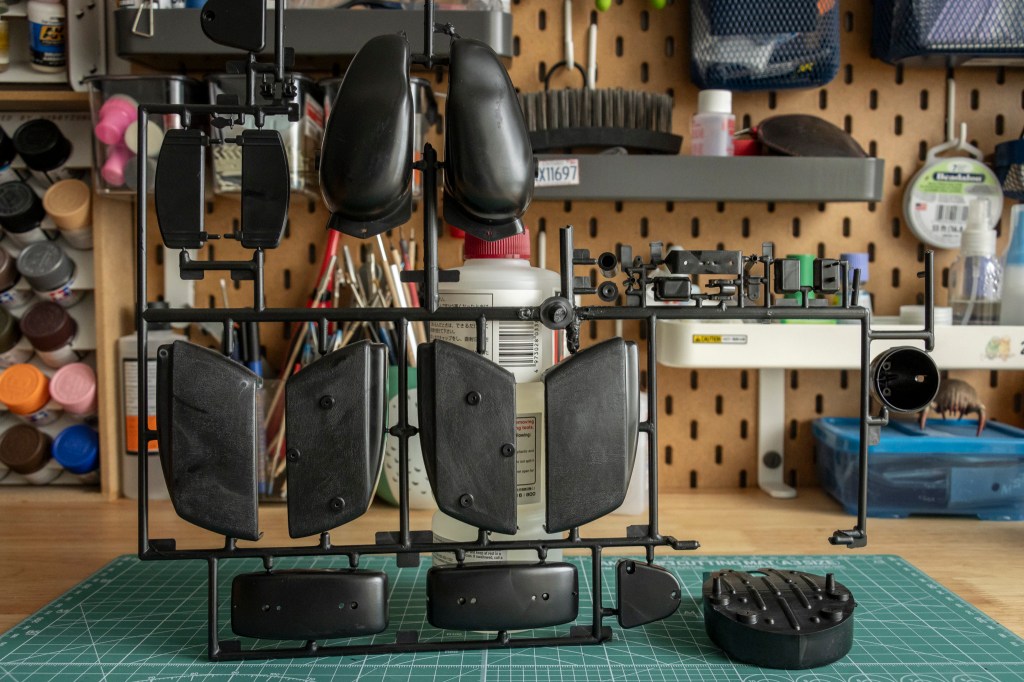
Finnaly, a regular plastic sprue.
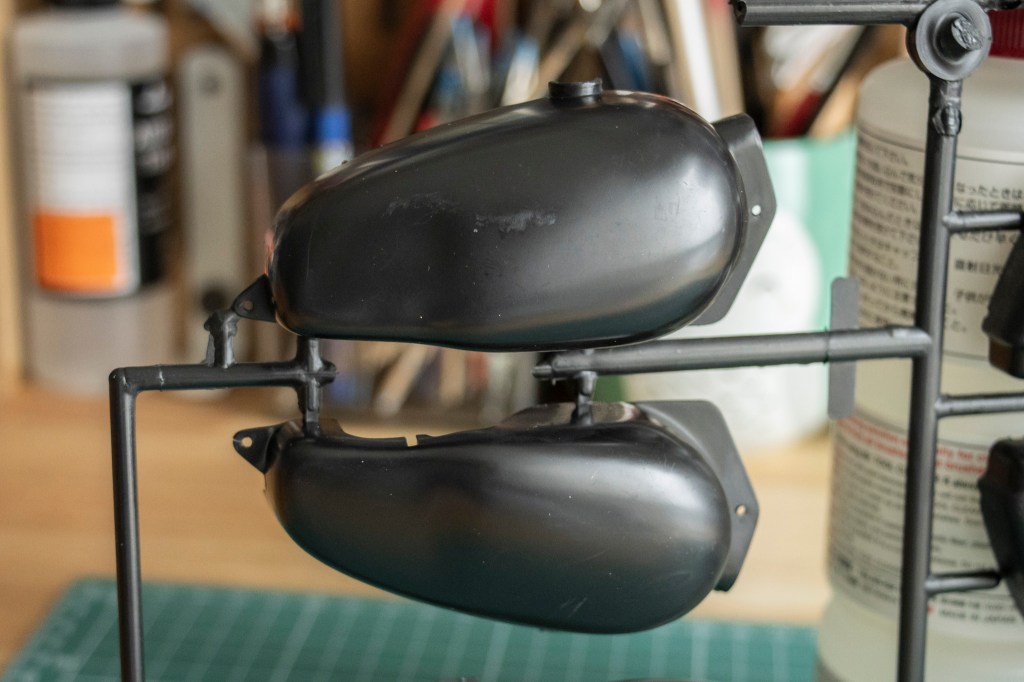
An traditional way to mould the fuel tank.
Headlight shell. The two holes are for mounting the fuse box.
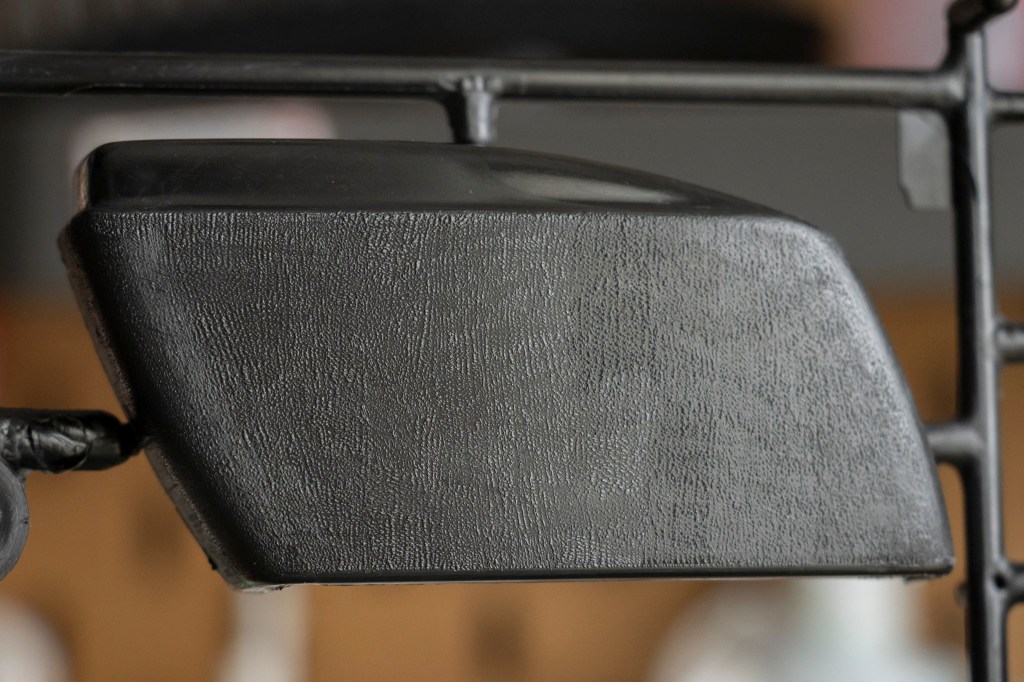
The saddle bags have a finely grained surface texture that feels luxurious. Leather bags are better. Change my mind :-\
Seat base. A battery will be installed on it if you choose to install the micro motor.
As long as no parts are missng, I am okay with open-sprue design.
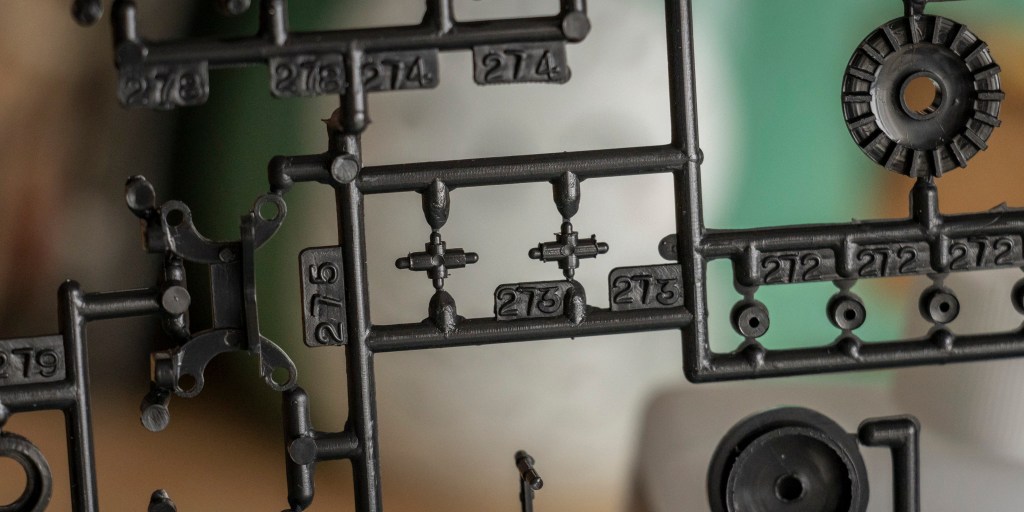
Stem joints to be used as part of the double joint, which is part of the transmission shaft. Don’t glue any of these – they need to be able to function properly.
Battery top.
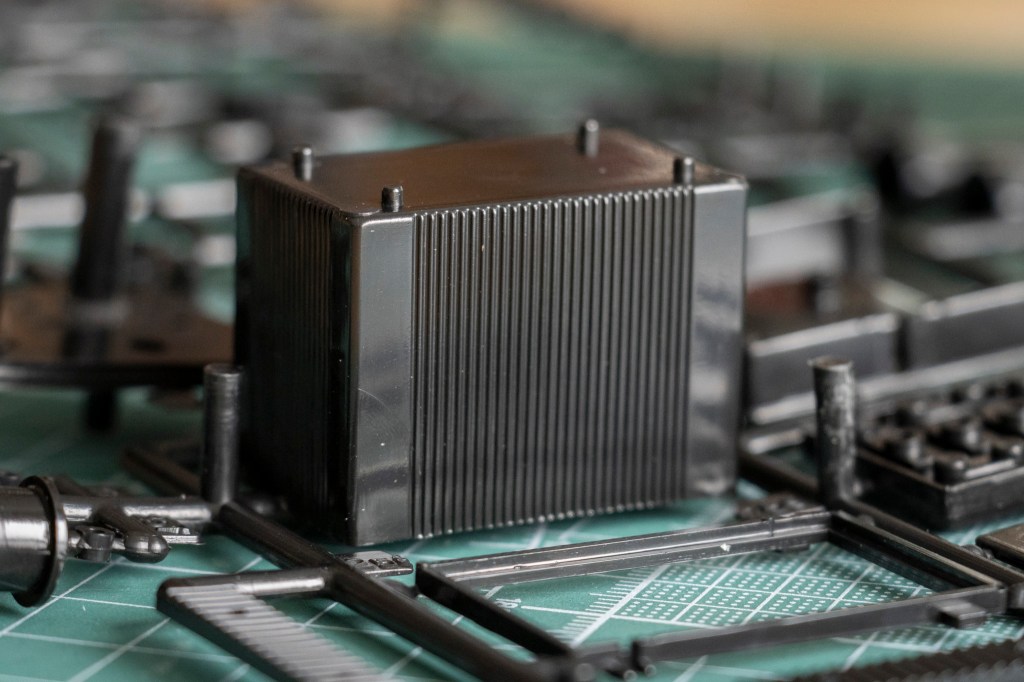
Battery case.
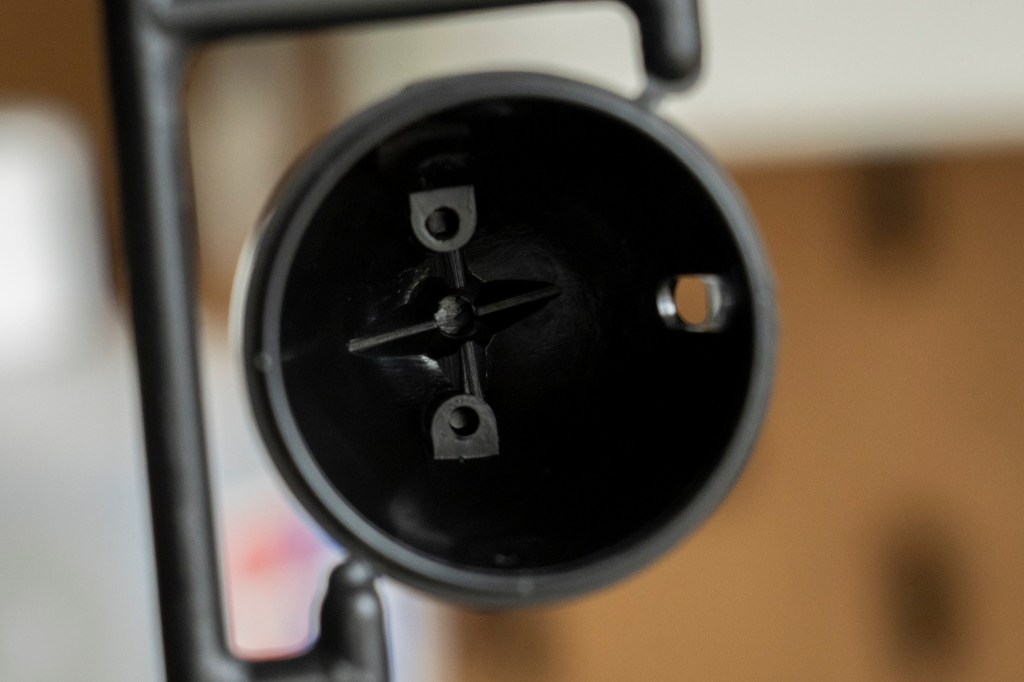
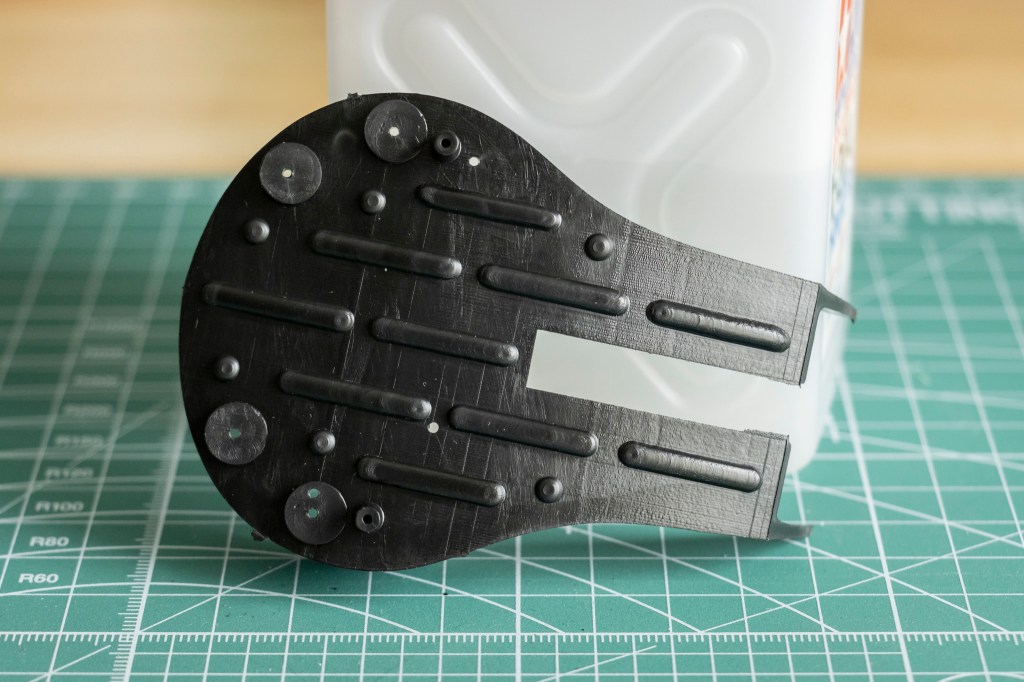
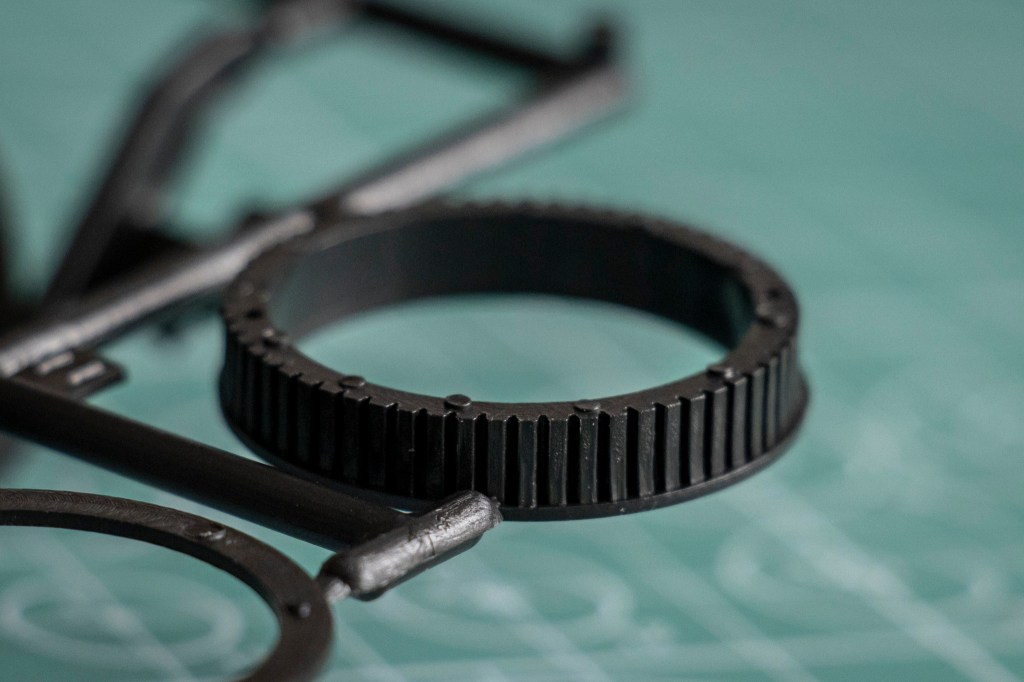
This is the air passage deflector – And there should be many openings.
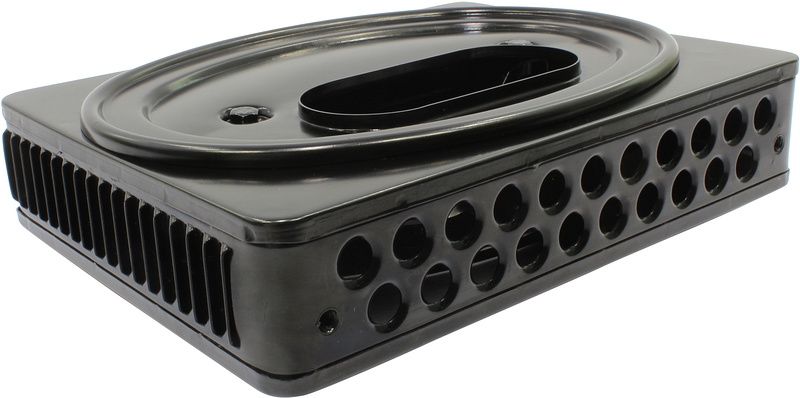
(Photo Credit: Stein Dinse)
To maximize the look of this air filter housing, you need a drill to make bottom holes and a saw to make side openings. Doesn’t seem too challenging – I hope!
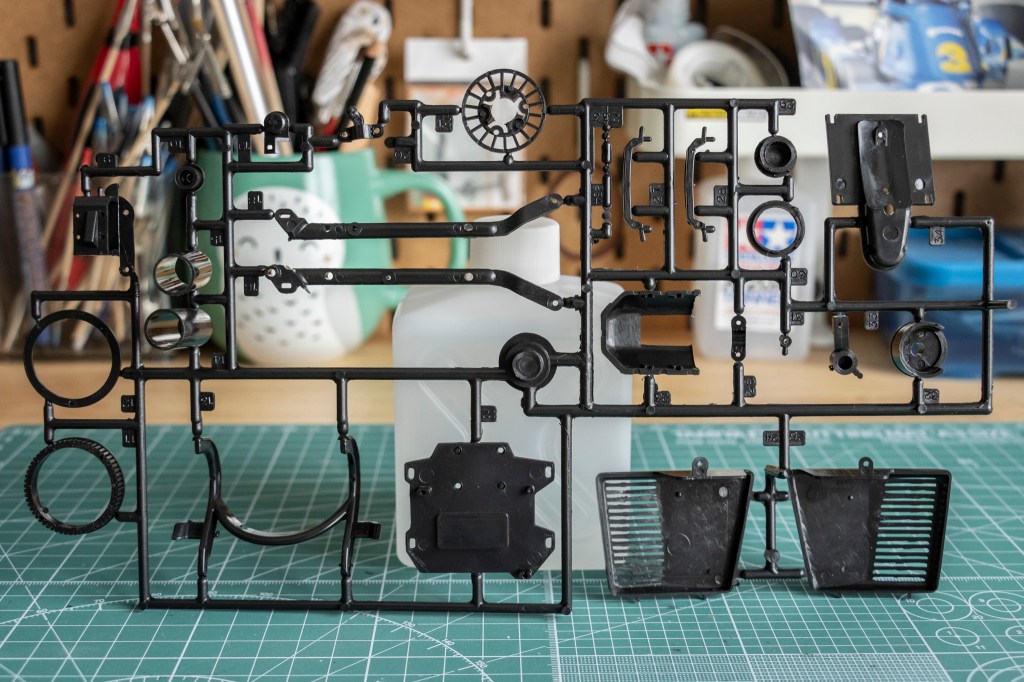
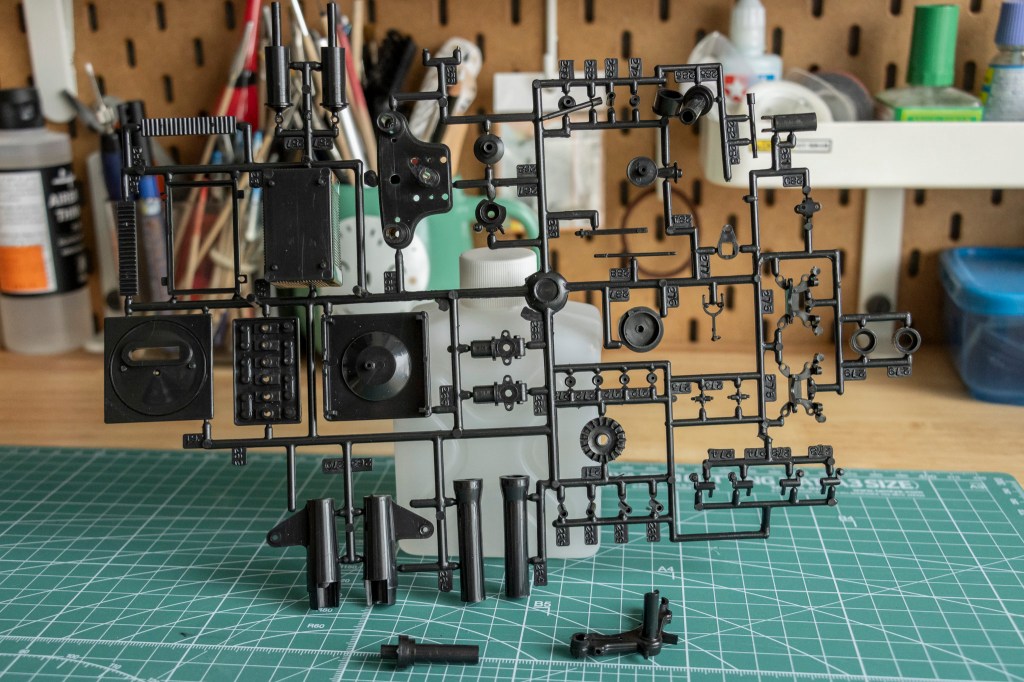
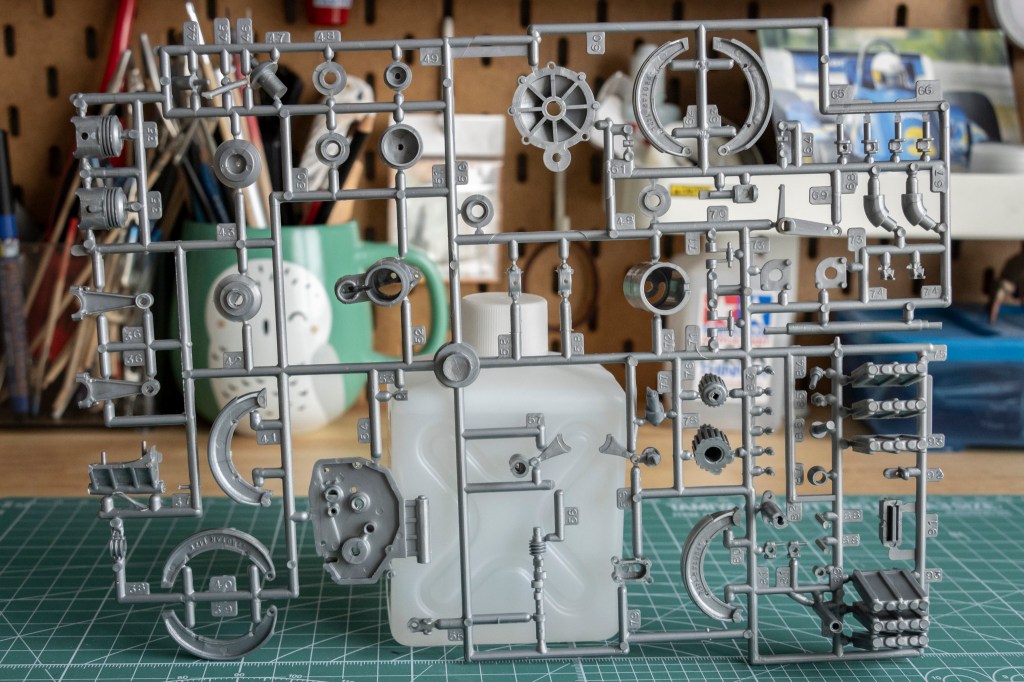
The last black sprue.
Air filter, to be installed in the air filter housing two pictures above.
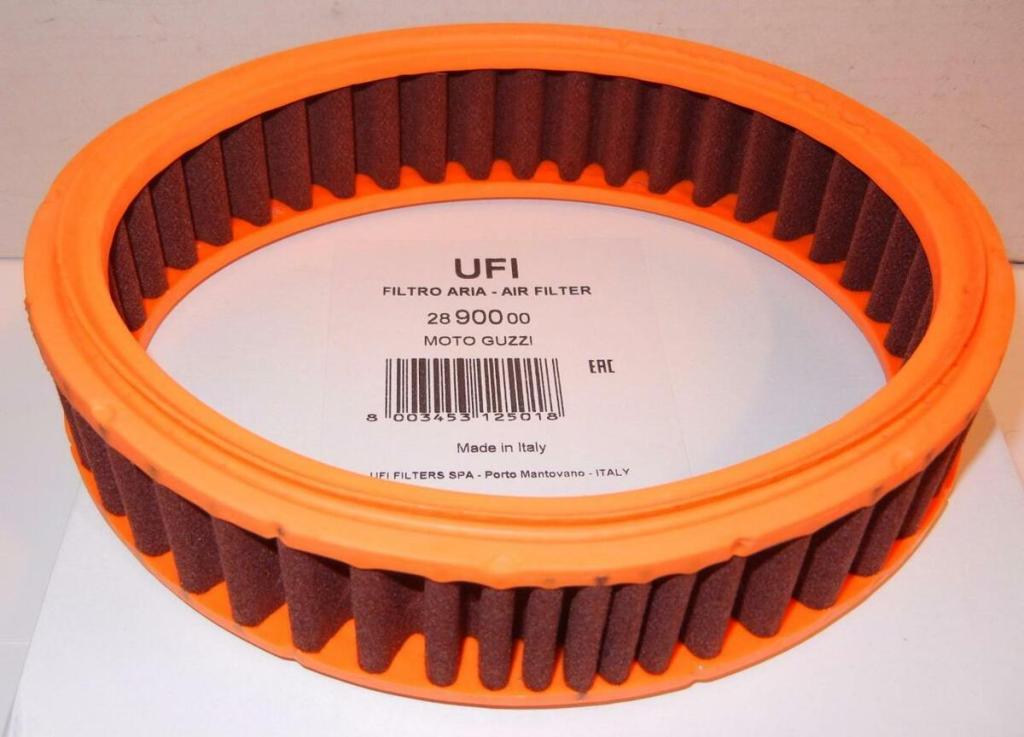
(Photo Credit: eBay)
A eBay photo for colour reference. Making all the modification to the housing mentioned above will make your efforts on painting this air filter visible.
You must be aware of the parts quality so far – these flashes are nothing.
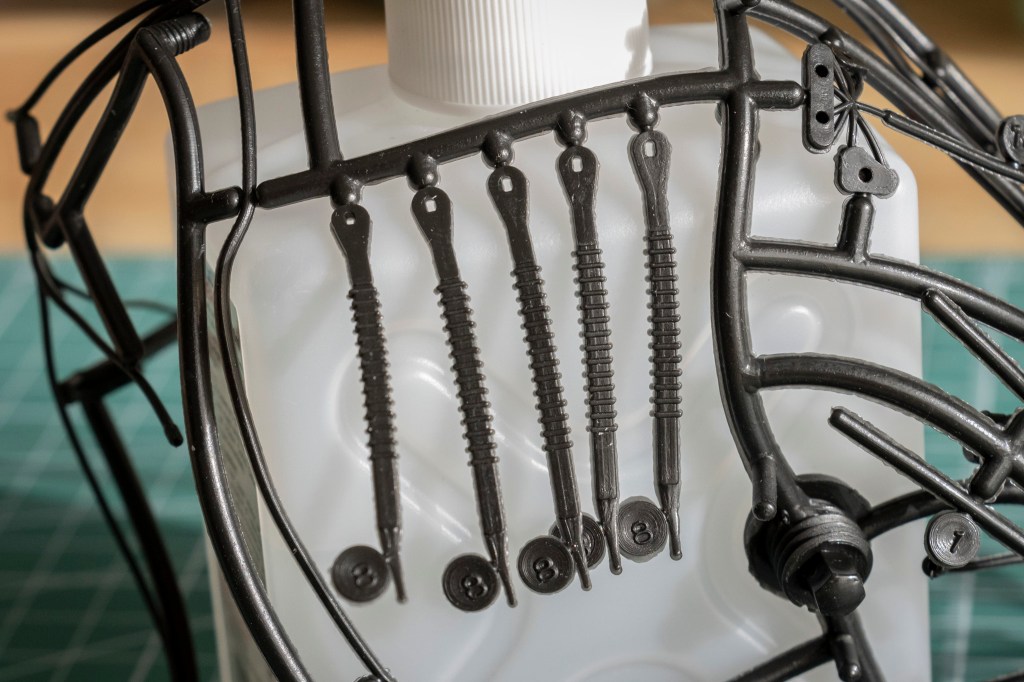
Next, the only gray sprue, containing mainly mechanical parts.
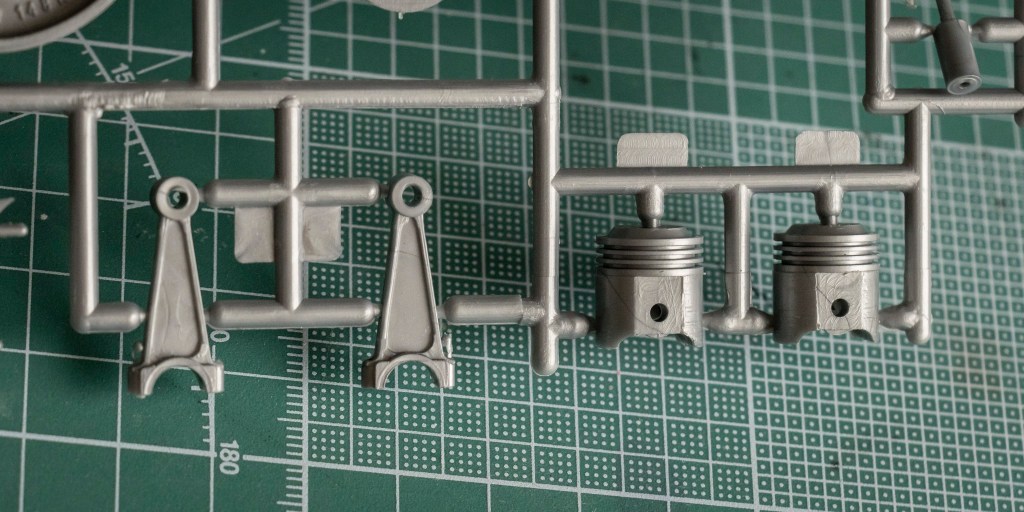
Two beautifully reproduced pistons.

Piston rings are also included using a different material (metal).
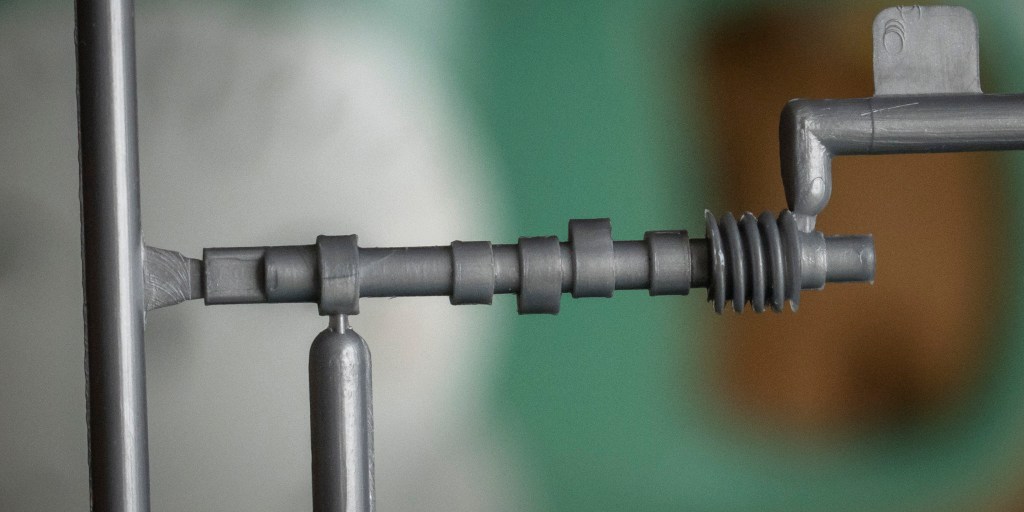
Camshaft.
Two rotors – the bigger one is for the dynamo. Not in use if you go for the electric motor.
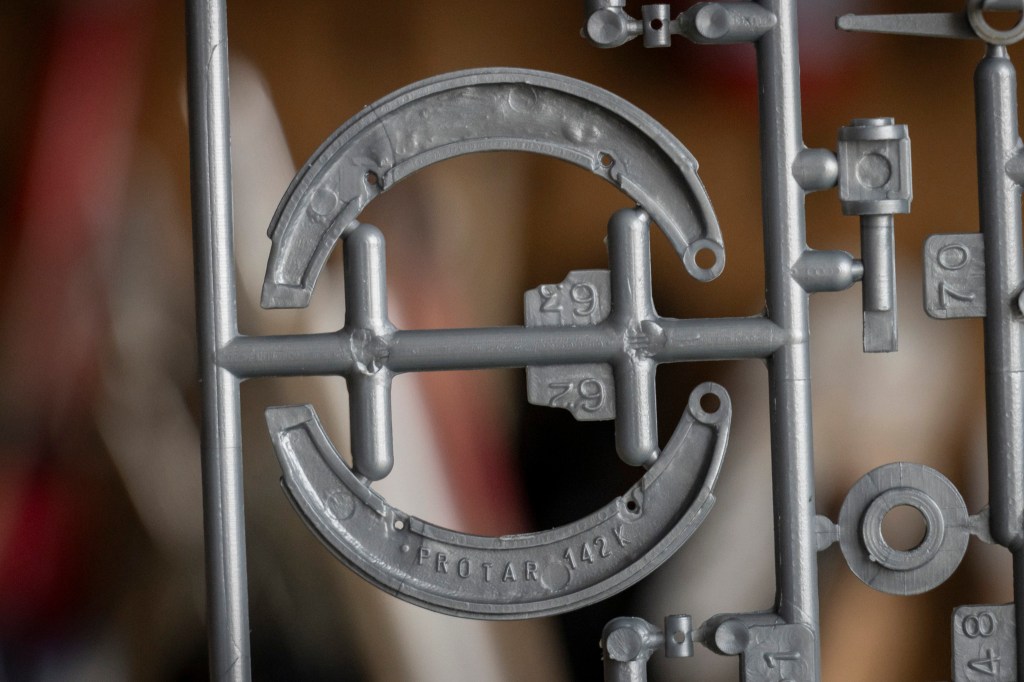
Brakeshoes. Parts need some cleaning.
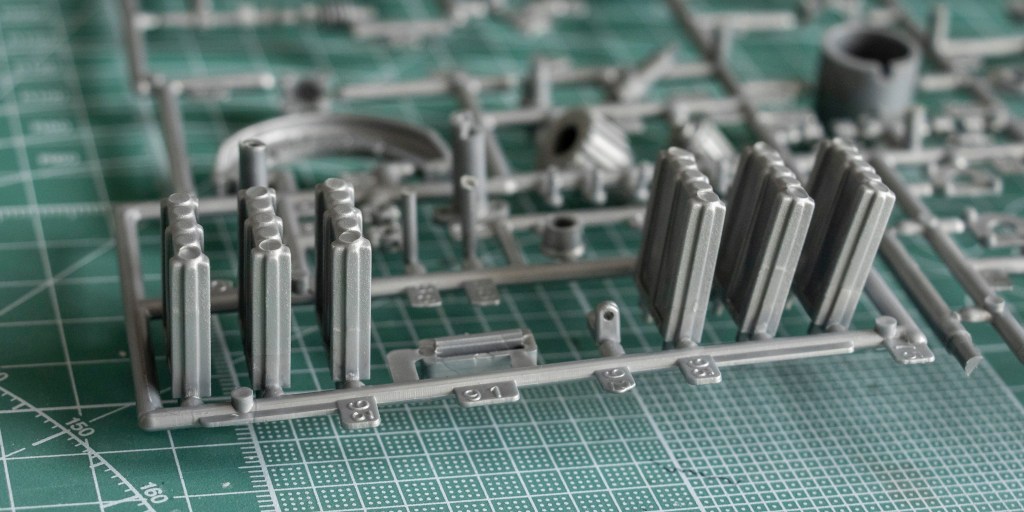
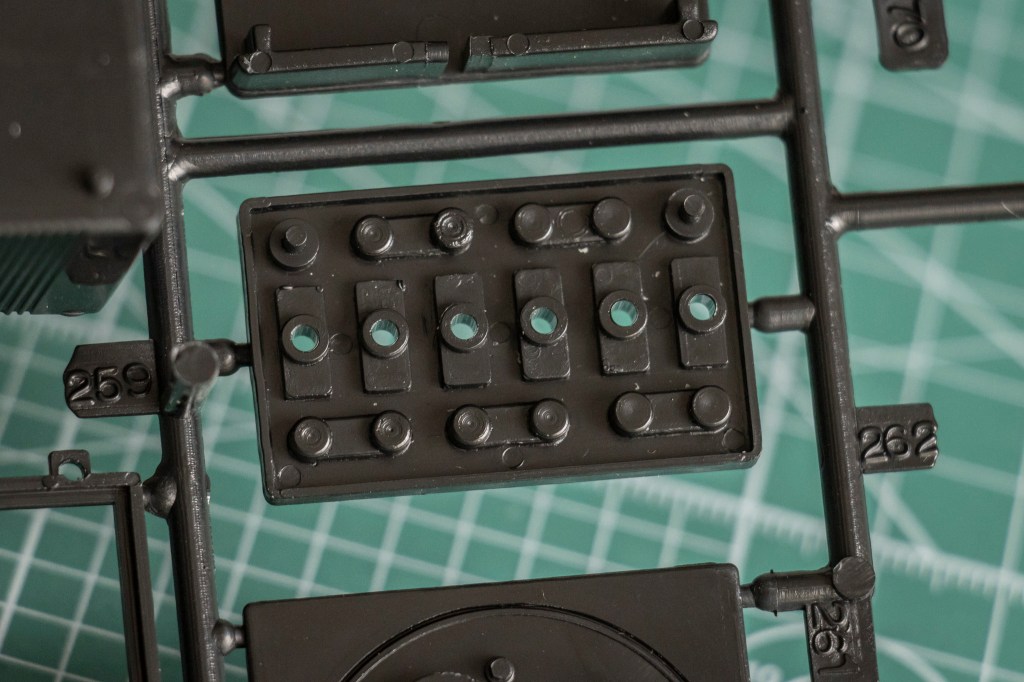
Battery cells.

Look how complicated the battery assembly is! But since you’ve learned that the designer – Kazuo Okabe – who did something simialr in Tamiya’s first 1/6 big scale motorcycle, it’s no surprise that this kit carries the same level of intricate detail. Even the battery caps and terminals are moulded as spearate parts, showcasing how far Provini and Okabe went with the design.
Okabe’s design of the battery used in the 1970-released 16001 Honda CB750 Four.
Gearbox cover.

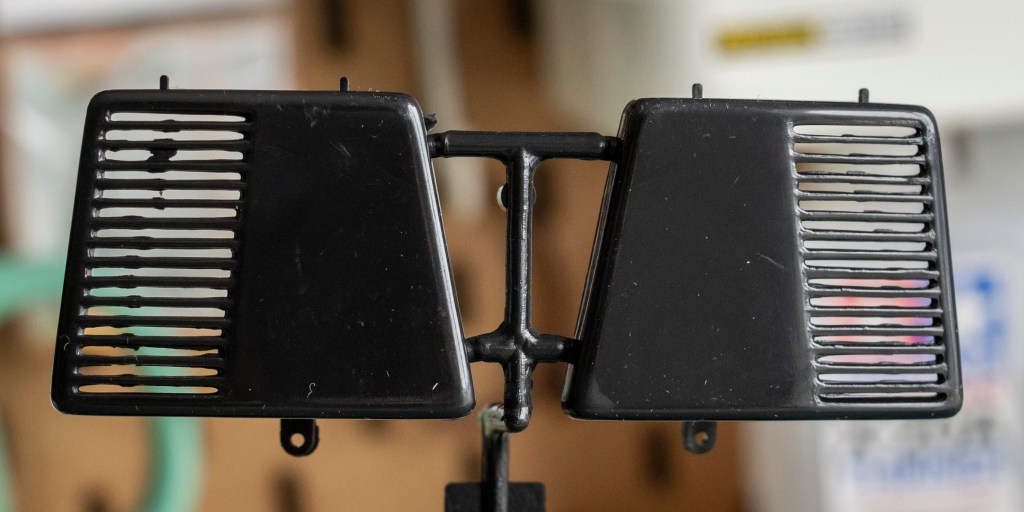
Switchgear cover (small) and starting motor cover.
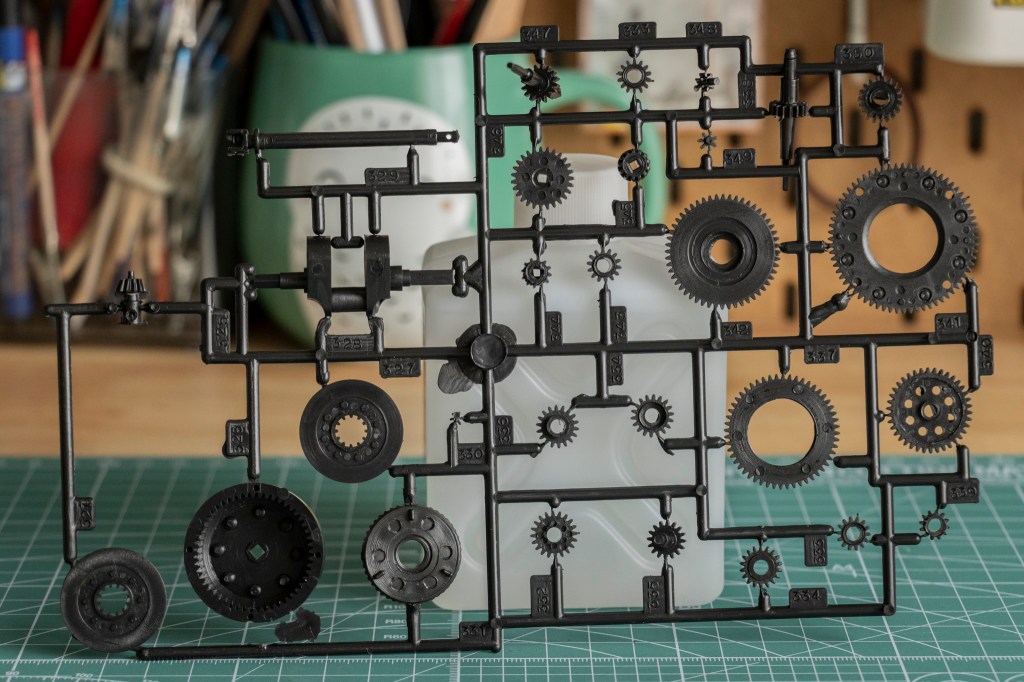
Thanks to all the moving parts, we got a sprue full of gears in this kit.
Thankfully, the instruction manual demonstrates the assembly from various angles so that even a big finger person like Larry can understand.

I’ve seen enough 1/6 scale motorcycles to act calmly to the gigantic frame of the V-850.
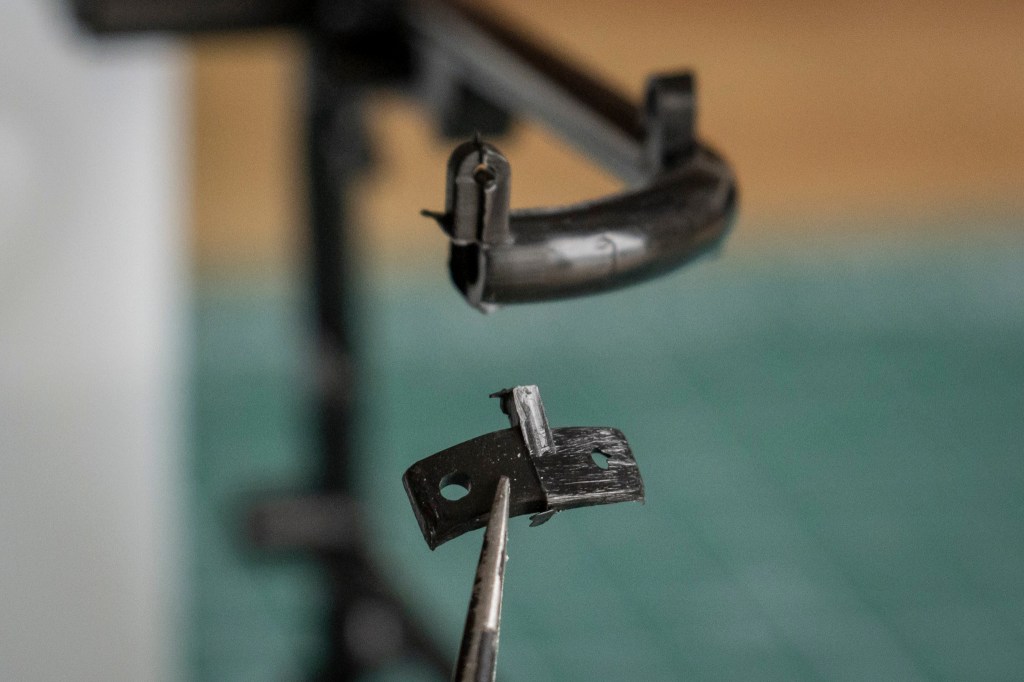
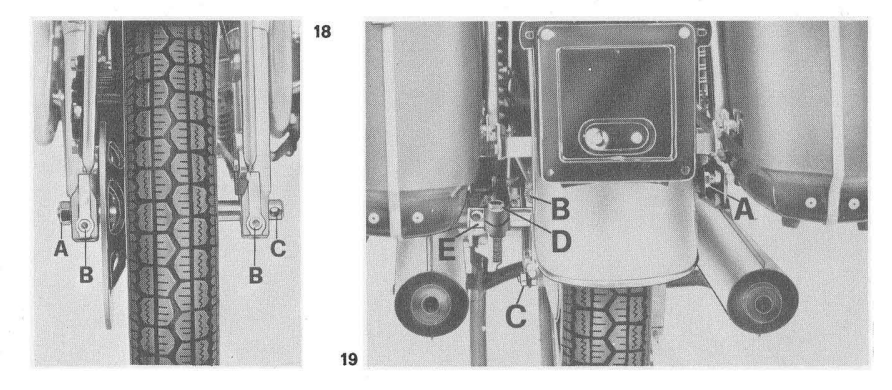
Please beware of this rear fender mount – it was detached from the frame on mine.
I wouldn’t be surprised to learn this is not uncommon, as the position of this fender mount is awakward, making the contact to the main frame weak and tend to break.
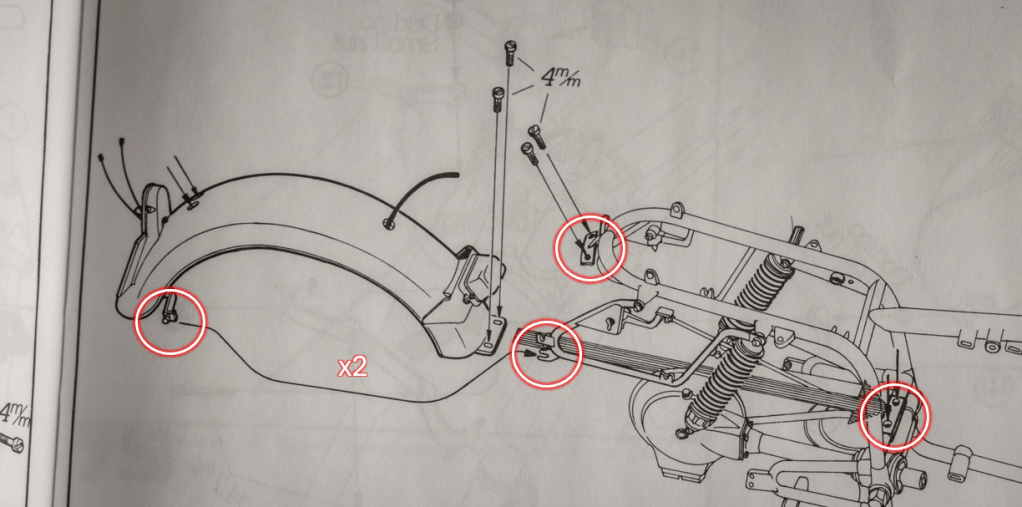
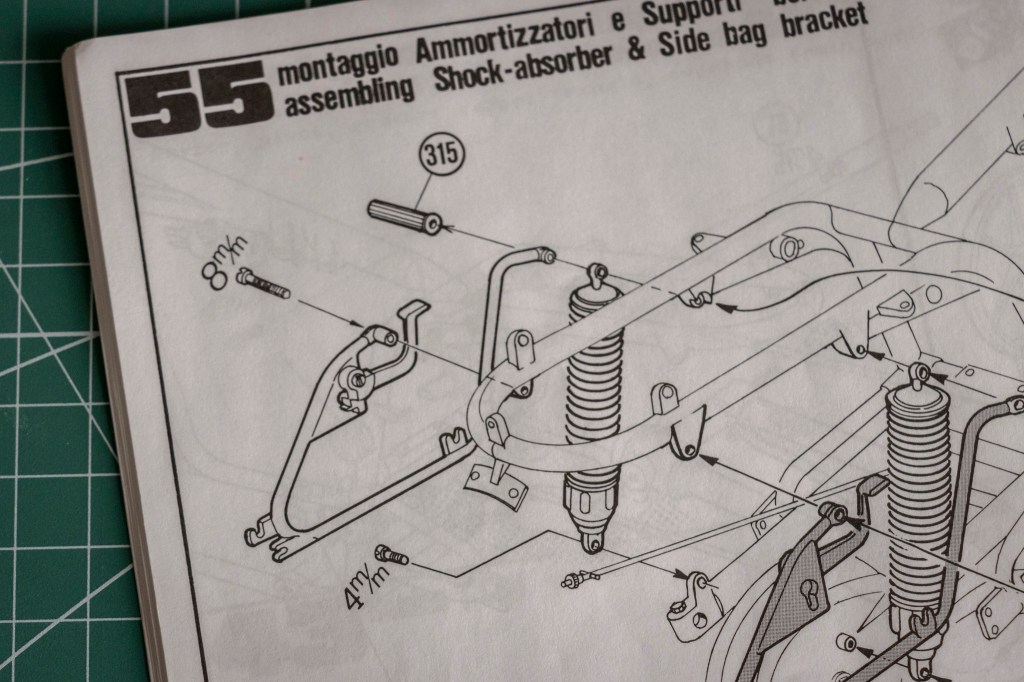
Fortunately, this is not the only place where the bulky rear fender is mounted, as you can see in the above illustration – The fender is securely screwed onto the central frame and is supported by the two saddle bag mounts on each side of the bike. In this case, the broken part can just be glued back to where it should be in the first place without worrying too much about the structural strength. Hopefully – you see, study the instruction manual is important!
(Photo Credit: Gregory Bender, This Old Tractor)
Okabe and Provini really focused on the fidelity of the saddle bag mounting racks here!
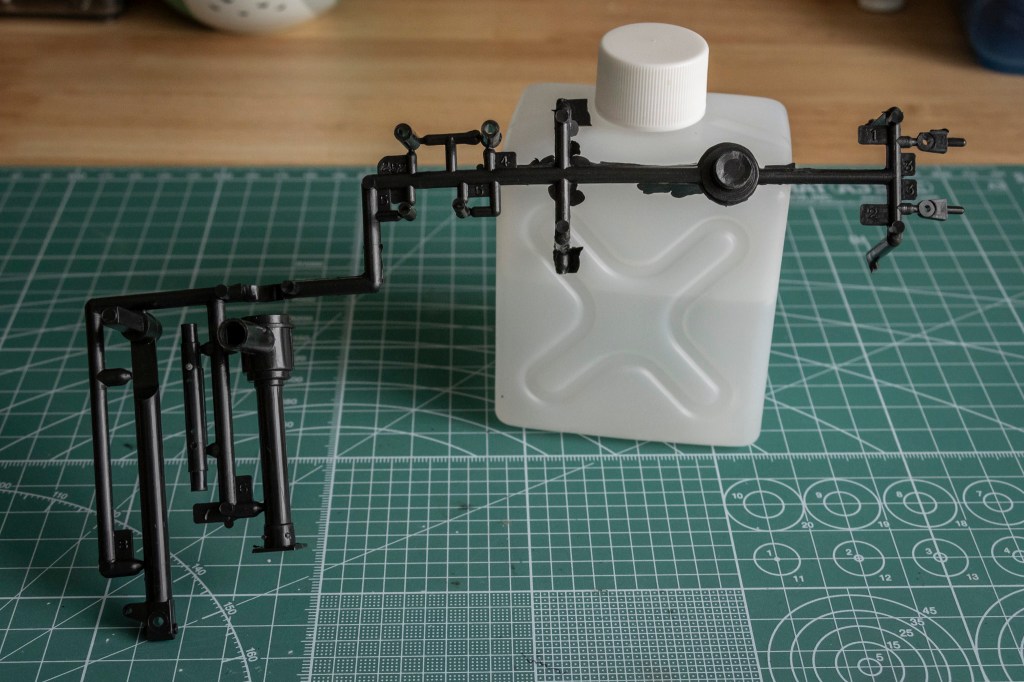
These are the parts left on the sprue after the left and right bike frames have been removed.
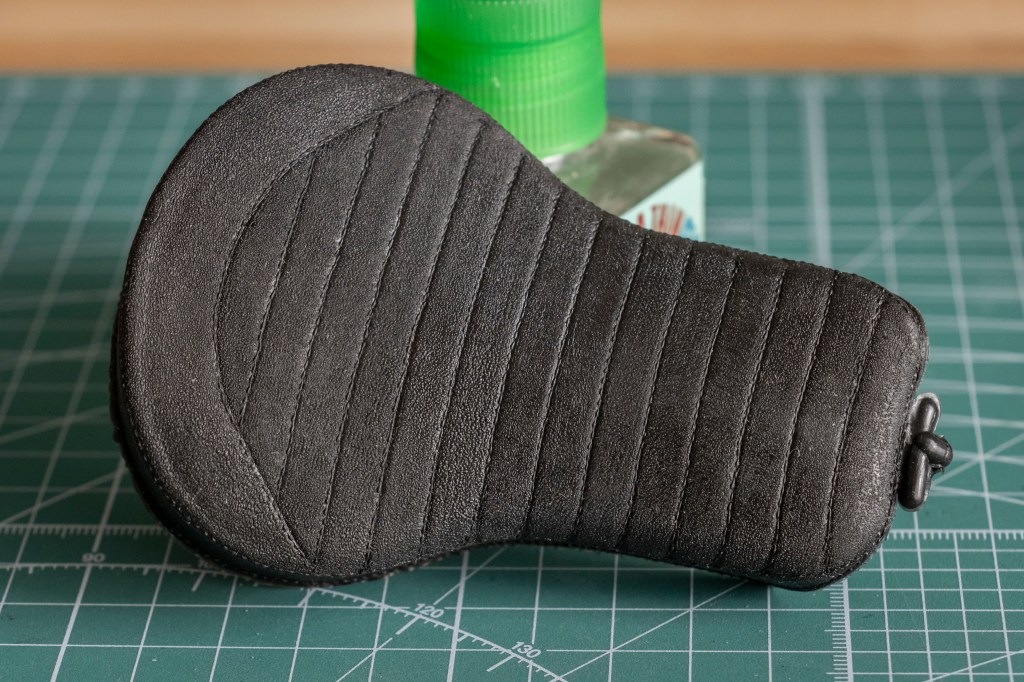
We almost got everything in this kit, except the seat and the tires. Let’s start with the seat.
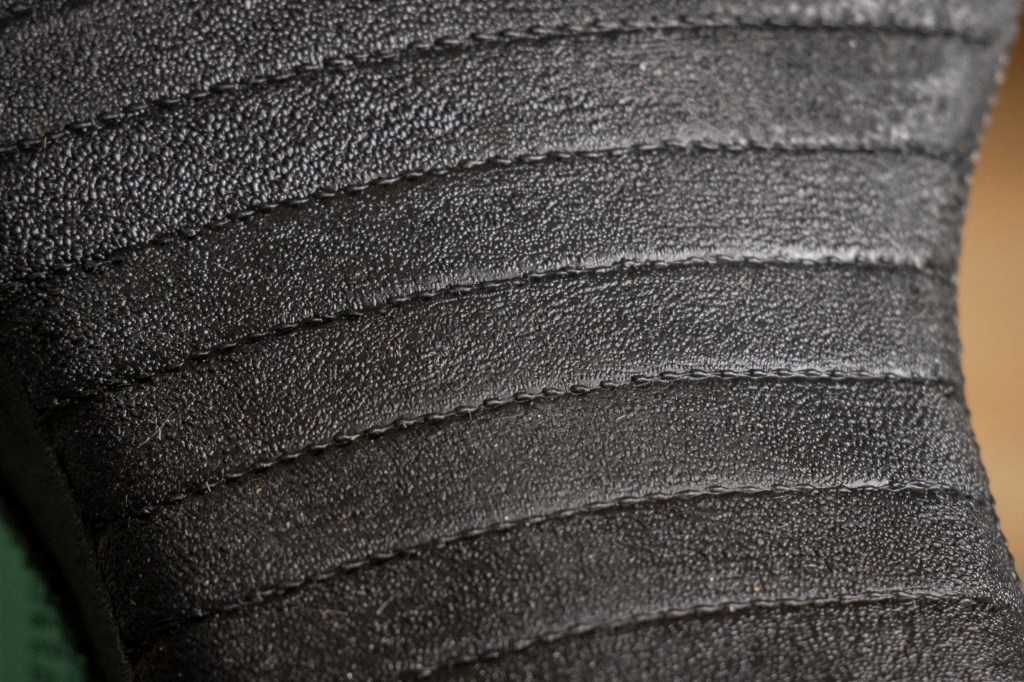
Including the stitching lines is such an impressive and authentic touch. I am fine with the grained texture, although it is far from what I see in most photos I found online.
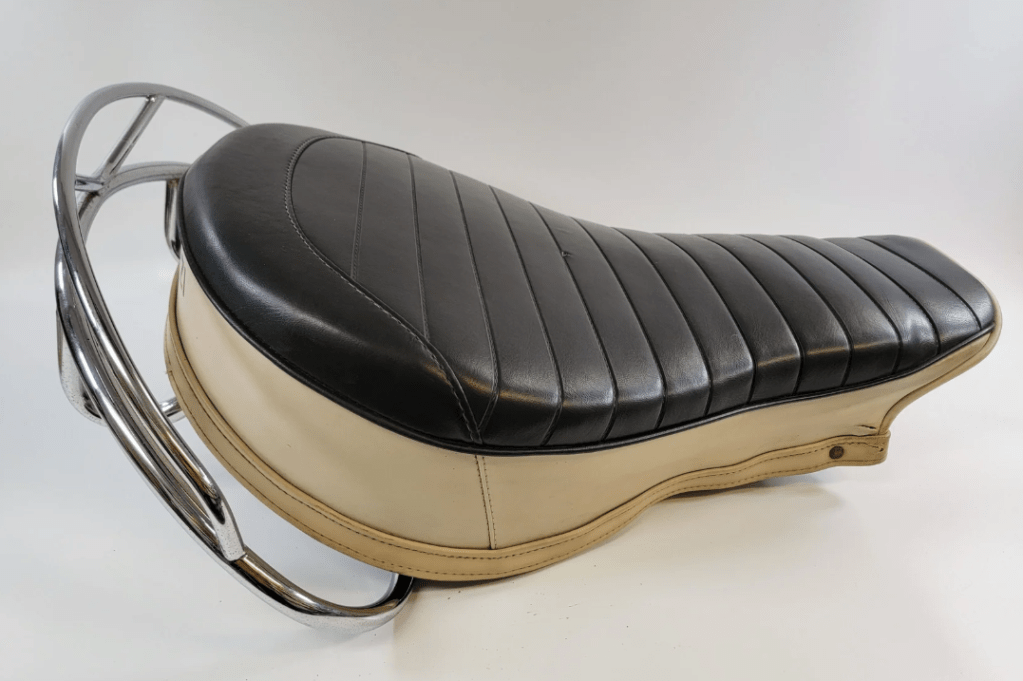
(Photo Credit: Crusty Cycle)
The side of the seat needs to be painted white. The bottom stripe might be added since it was omitted in the Protar kit.
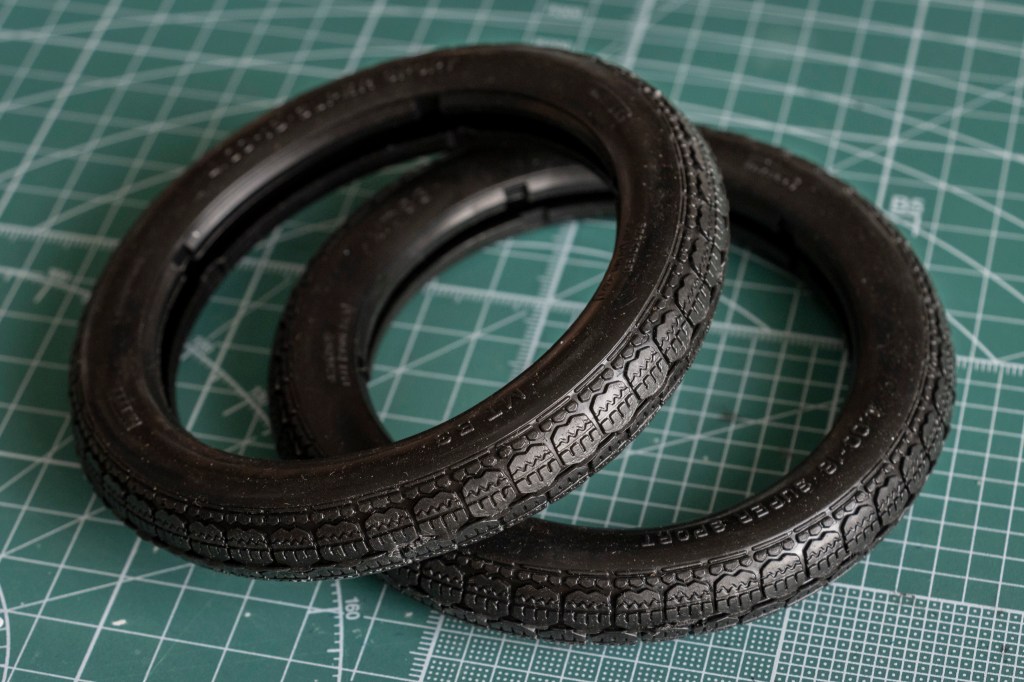
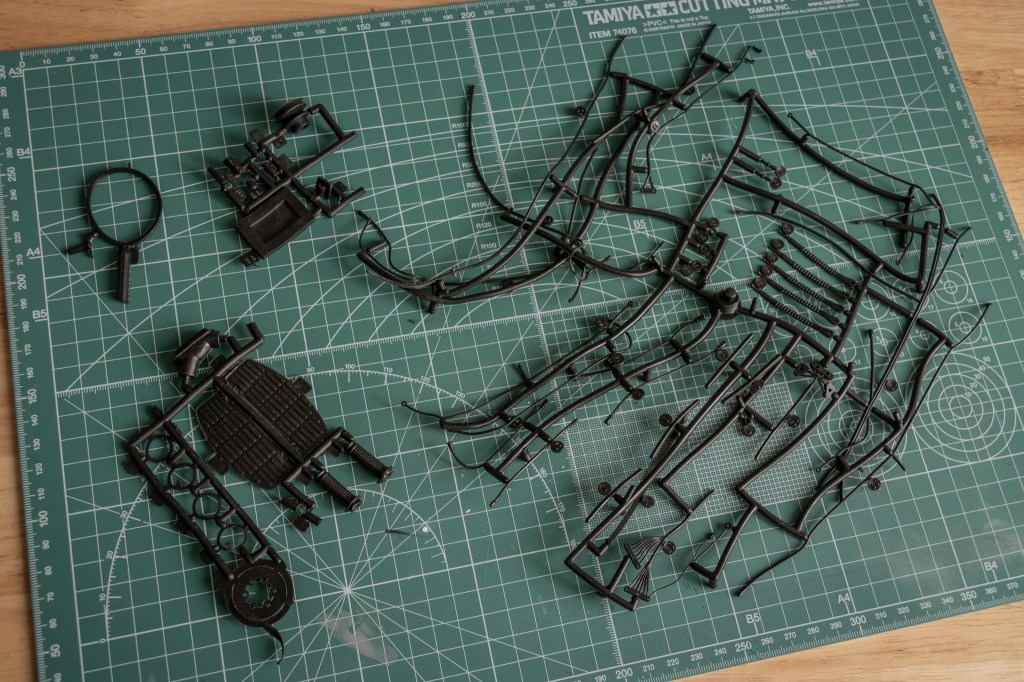
You’ve seen the tires in my Protar 1/24 Lancia LC2 (Ewwwww) – but the two big, round tires in the 1/6 Guzzi v-850 have a matching quality of Tamiya tires, if not better.
(Picture Credit: Moto Guzzi rider’s handbook – Police Supplement to the V850 Eldorado, downloaded from Gregory Bender, This Old Tractor)
Accurate tread pattern!
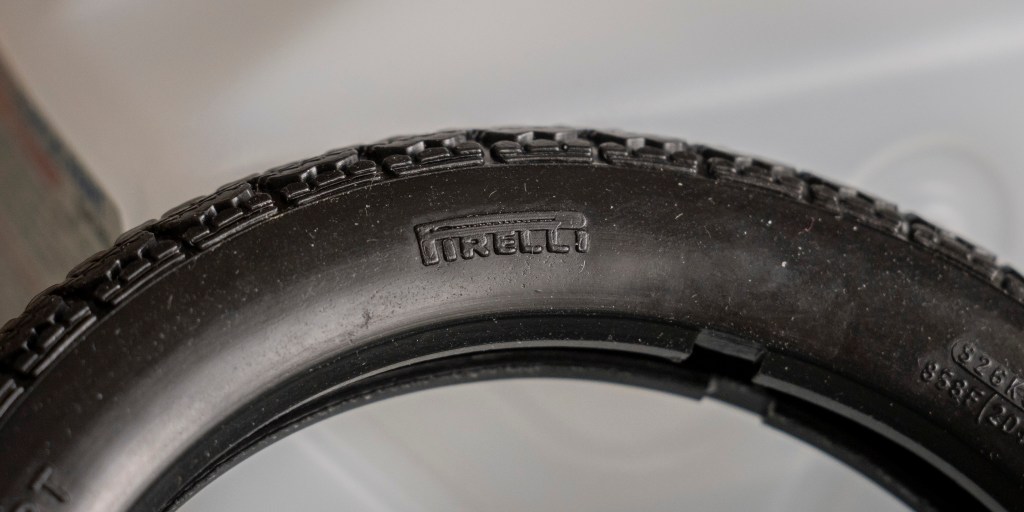
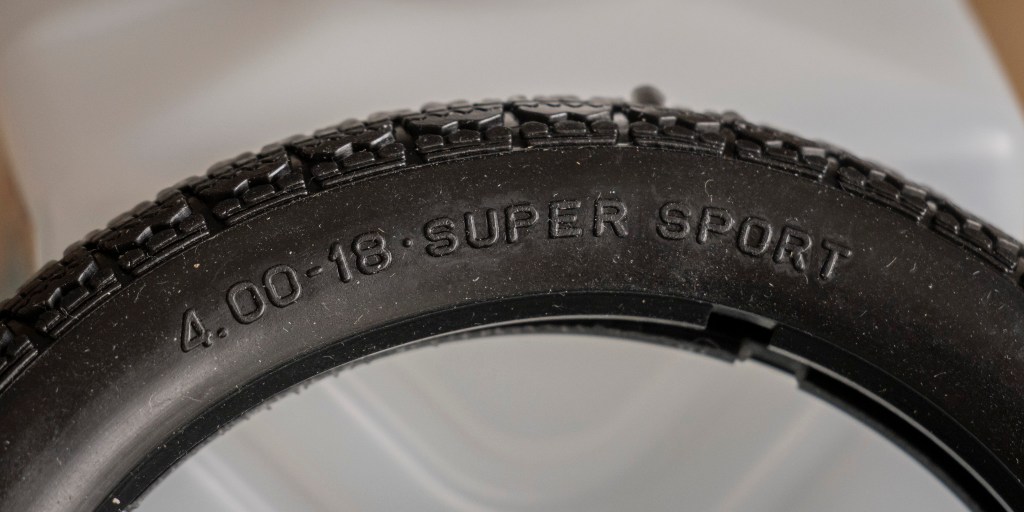
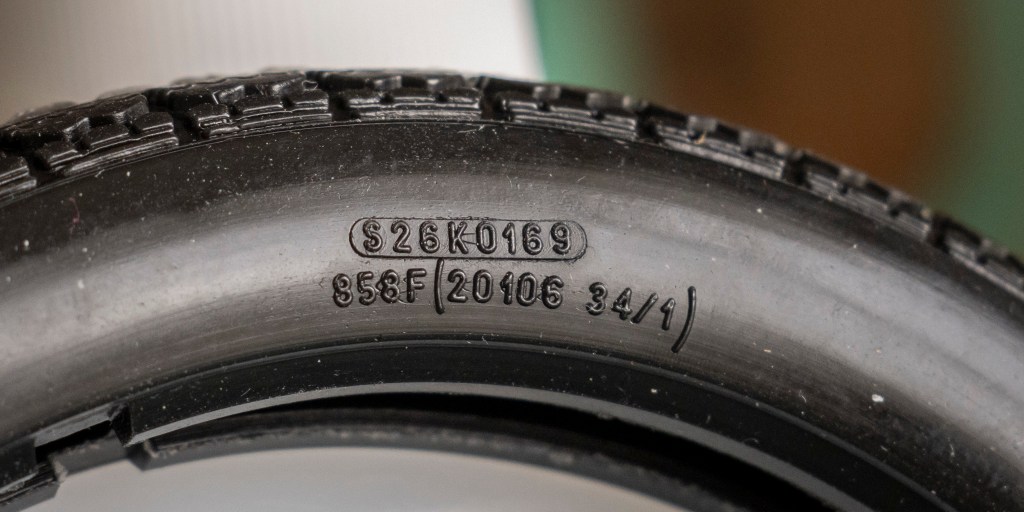
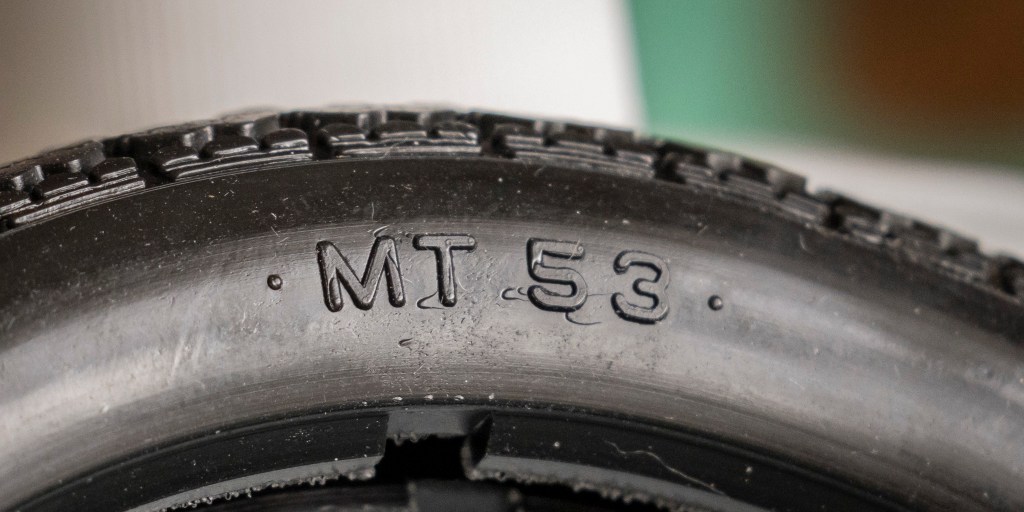
The logos and information codes on the tire sidewalls are crisp and clear.
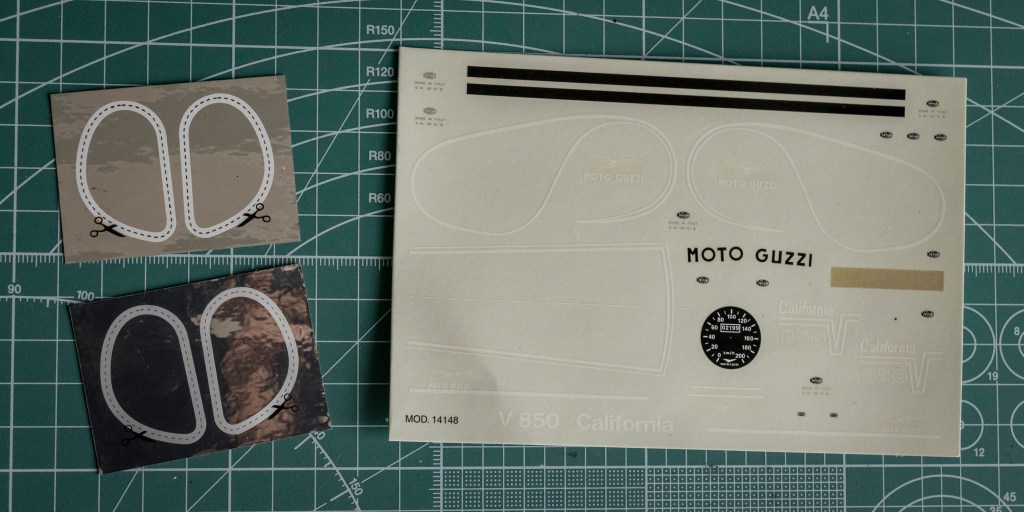
Not sure if this decal sheet was printed by Cartograf, but there is no visible yellowish after 20 years – a major problem when buying vintage kits. The same decal (different layout, of course) in Italeri’s 2013 re-release was printed by Zanchetti Buccinasco, a Milan-based printing company. Never heard of them before – interestingly, they have an unclaimed LinkedIn page. Also, not one, but two reflective sticker sets for the fuel tank are included, how considerate! You just know I’d mess one up, eh?
These are some of the best quality decals.
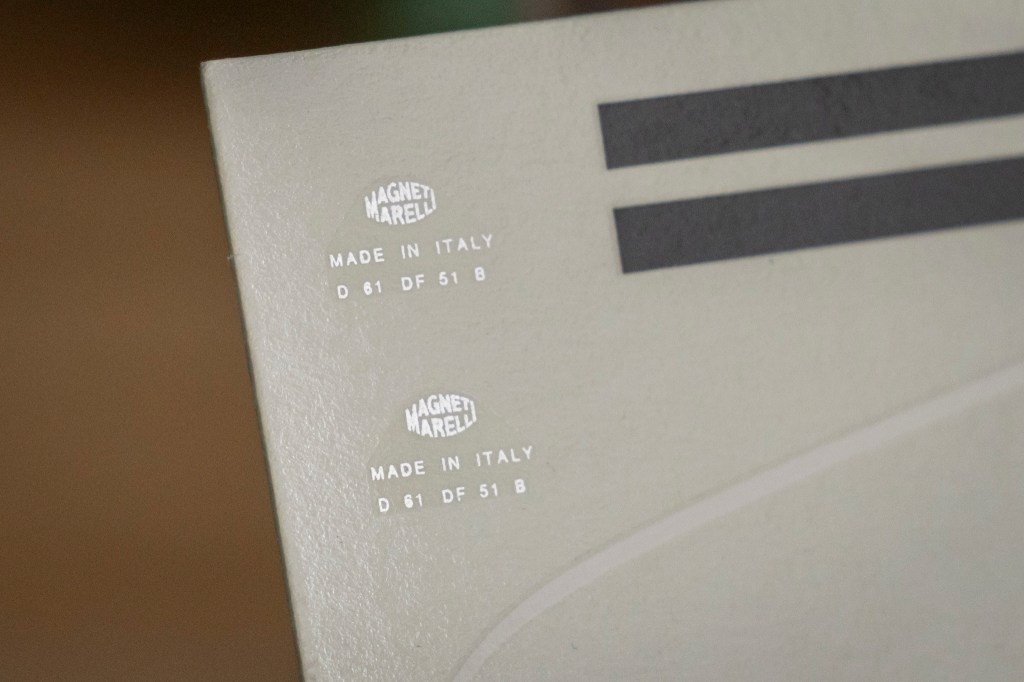
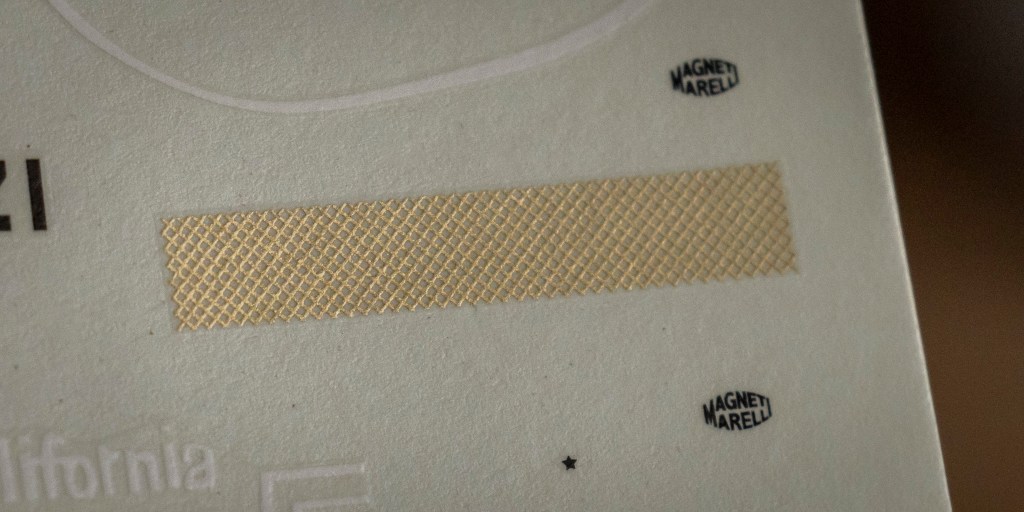
Some are even metallic coloured. Very cool!
Phew…that’s pretty much everything from this 1/6 Moto Guzzi V-850 California. There is more to talk about, though.
Following the bike assembly instructions is a tutorial on “how to make your big Guzzi more presentable.” You see, the kit offers so many transparent parts, so the internal mechanisms are visible – but what about the other components? What about the air filter, for example? The fuse box inside the headlight shell? No need to panic!
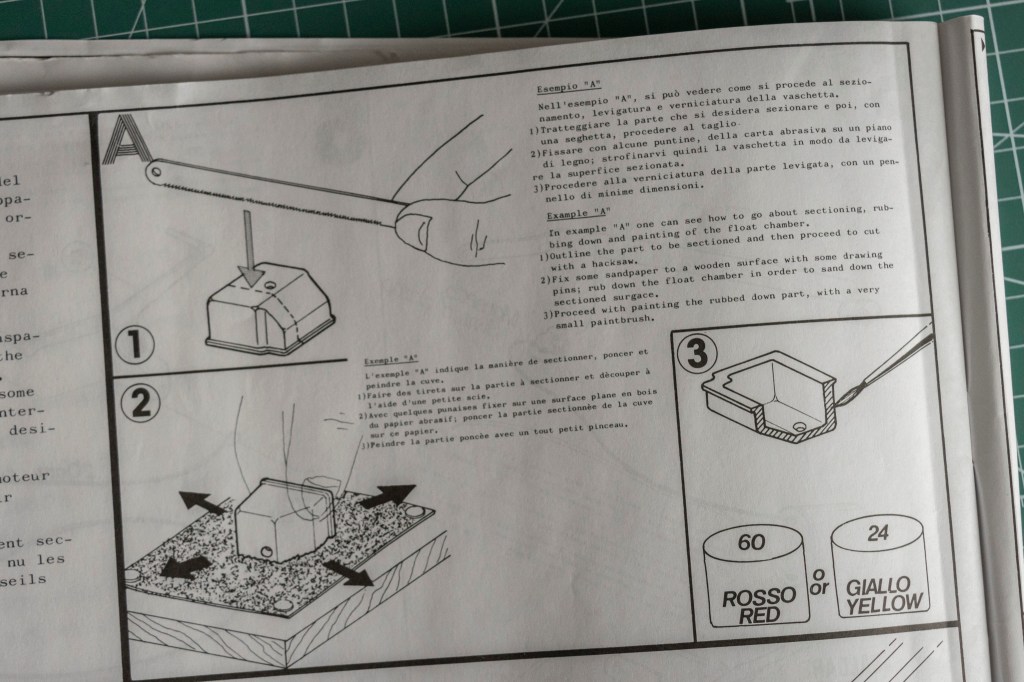
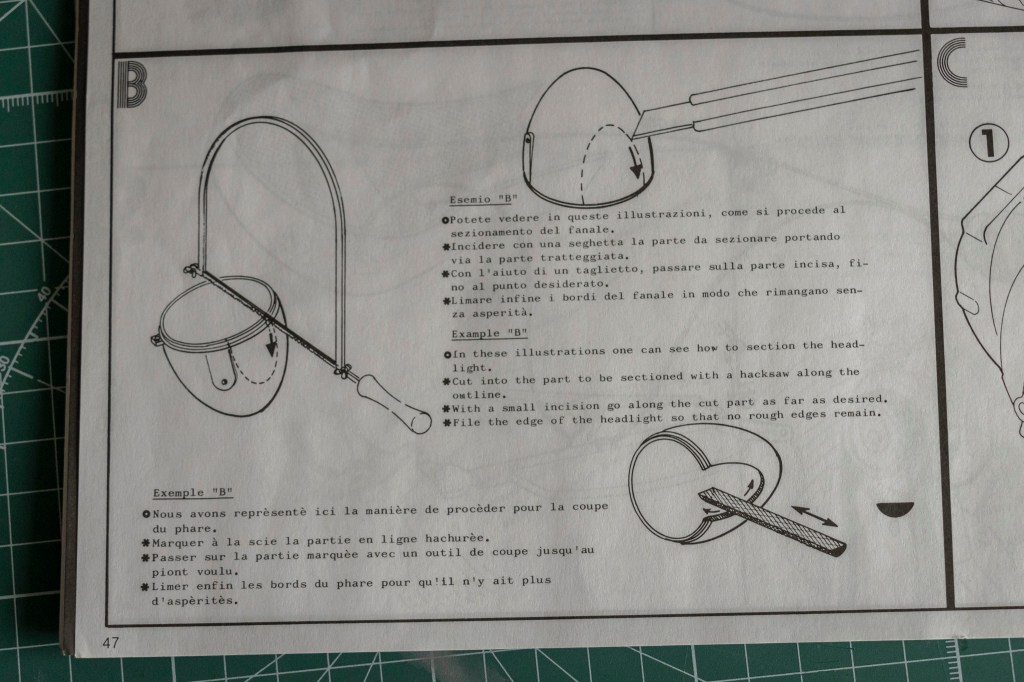
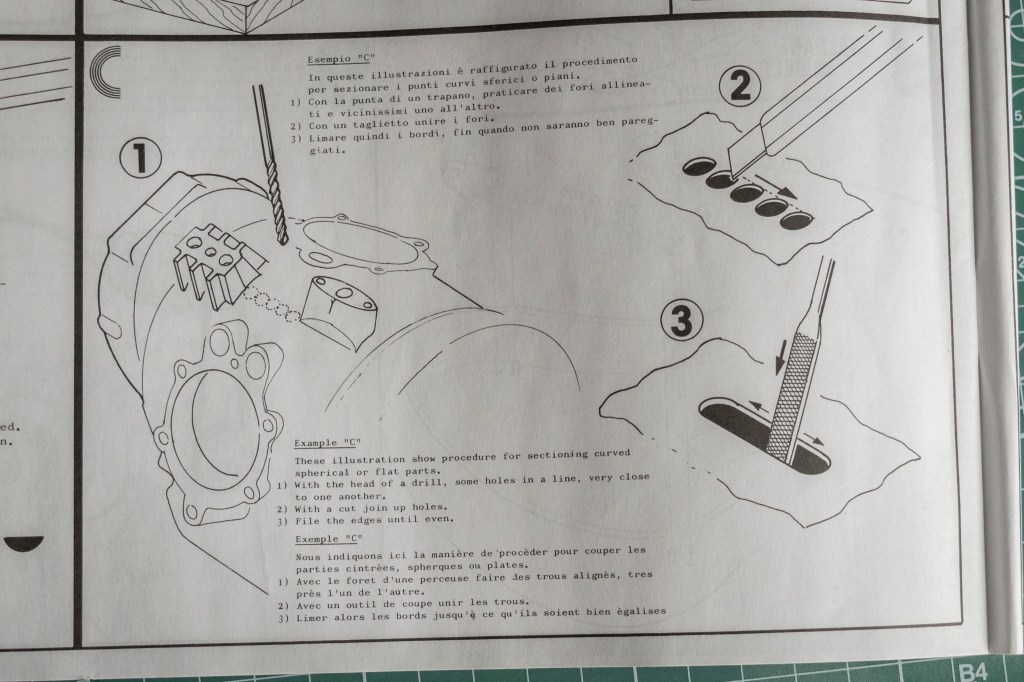
You gotta be imaginative to be a modeller. I’ve known all these methods over my many years of immersing in the scale model world. However, this is the first time I have seen the kit company actively encourage modellers to cut their precious kit (even 20 years ago) open to showcase what deserves to be seen and praised. This is a BOLD move. This is also educational. They not only teach you to cut and sand but also guide you on colours to paint the exposed surface. I see pure enthusiasm for scale modelling here. For experienced modellers only – Provini and Okabe must have been incredibly proud of their design!

You will find examples all around the box.
As for being educational, you really should read the next serval pages – a series of eight illustrations accompaied by text explainations, detailing the movements of the heart of this big Guzzi – the four stroke V-twin engine!
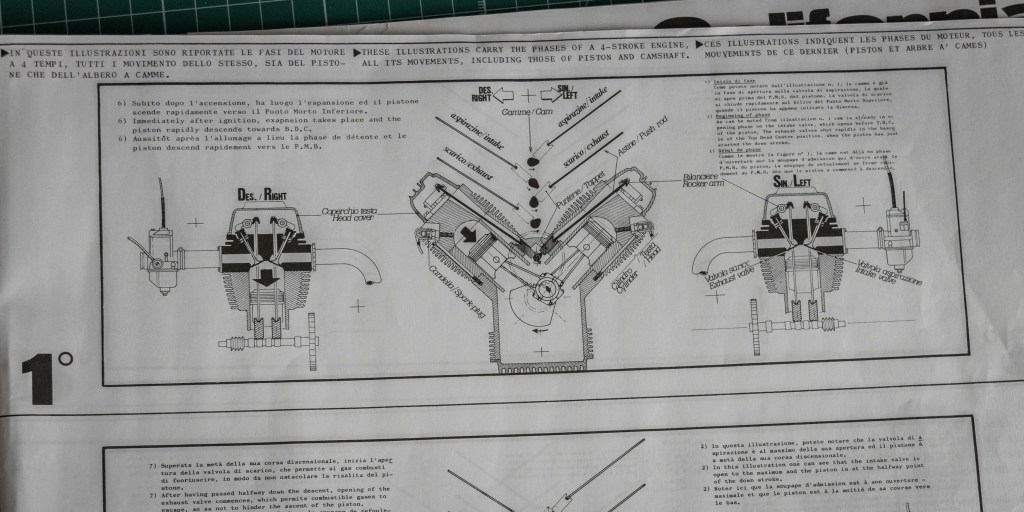
Step 1 – you also get to learn how carburretors work.
I made this GIF from the eight steps – this is what happens inside the engine when it’s running. Cool, eh?
We are now so blessed to live in a digital world where you can easily learn technical knowledge through videos – which are usually way friendlier for visual learners. See this one –
(Video Source: ahong karepe, YouTube)
Yes, I know this is claimed to be a Harley engine, but it is similar. Quite charming just to watch the video and see how the magic happens inside the engine.
(Video Source: Italeri Official Account, YouTube)
Better yet, you get to witness all these movements in action on this big Guzzi made by Protar! The video above, published by Italeri for their re-release, demonstrates all the magic that Provini and Okabe proudly produced 50 years ago.
That’s everything I have to say about this kit. Just looking at it, you can feel the passion and effort Provini and Okabe poured into its design back in the ’70s – creating an innovative kit that was ahead of its time. This level of craftsmanship is almost missing nowadays, even though modern design and production have become much easier with computers. What can I say? Big brands like Tamiya rarely take on new projects anymore; instead, they just keep re-releasing their past glories. I miss the old days!
A journalist (sorry, I couldn’t find what your name is) from a trial motorcycle game magazine, トライアル自然山通信/Shizenyama Tsuushin, documented this in his blog:
それで声をかけられたのが、浅草のホテルで開催された、プロター社長を囲む会だった。プロター社長は、すでに息子に代替わりしていて、プロター愛の強い日本人モデラーのみなさまは、新社長は先代の築いたプロターの独特かつ高貴な味わいをどう維持していくのか、なんてことを聞きたかったみたいだけど、若いビジネスマンの彼は、プロターは今も昔も、精密で正確なプロモデルをつくっていて、それは今後も変わらない、みたいなことを答えていたと思う。えー? プロターは精密でも正確でもないじゃん、だからおもしろいじゃん、とみんな思っていたと思う。で、イタリアと日本の友情の出会いは、なんとなくかみ合わないで進んでいった覚えがある。
(GPTed) (This was happened in 1989) So, the invitation I received was for a gathering held at a hotel in Asakusa, a meeting centered around President Protar. By that time, President Protar had already passed the reins to his son, and the Japanese modelers—ardent fans of Protar—seemed eager to ask the new president how he was going to maintain the unique and noble character that the former president had established for Protar. However, the young businessman simply responded that Protar has always produced precise and accurate professional models, and that won’t change in the future. I think everyone was thinking, “Huh? Protar isn’t precise or accurate at all—that’s what makes it interesting.” And so, I recall that the budding friendship between Italy and Japan moved forward in a somewhat mismatched way.
This is somewhat hard to read, but kind of expected. Nothing last forever -especially when relationships are involved.
(Photo Credit: Paolo Cecchini, Facebook)
Provini and his sons Marzio and Tullio in the Protar factory. Unpacked boxes can be seen behind them in the photo.
I did not find much about what has happened after between Provini and Okabe or Protar and Protar Japan. Nothing much to be found about Kazuo Okabe, either (he seemed has retired after Protar’s closure). All I know is Provini passed away on Jan 6, 2005, and Protar’s fate was sealed around the same time. From 1962 to 2005 (approximately), Protar has brought so many unique yet charming subjects to many’s workbenches. Their kit quality was never the best in the industry, but their creativity and passion for scale modelling were undeniable. Protar kits often required extra effort—cleaning up flash, adjusting fitment, and refining details—but in return, they offered subjects that no other manufacturer dared to tackle.
(Photo Credit: Paolo Cecchini, Facebook)
As a racer, Provini had a successful career; as a scale modeller and maker, his legacy lives on. I envy this man. The best way to send my tribute to this legend is to have his big Guzzi – alive and shining on my shelf!
References
Karube, K. (n.d.) Modeler’s Friendship 2002~2005. Kim’s House Garage Motorcycle Models. http://kimshouse7015.com/Profile_File/Friendship%20File/FriendShip.html
Zani, E. (2009, Feburary 10). Tarquinio Provini. Cesena Bikers. https://cesenabikers.blogspot.com/2009/02/tarquinio-provini.html
トライアル自然山通信. (2005, January 9). タルキニオ・プロヴィーニが亡くなった. トライアル自然山通信. https://www.shizenyama.com/shizenyama/7423/
トライアル自然山通信. (2020, March 31). プロターとの思い出、プロヴィーニさんとの思い出. トライアル自然山通信. https://www.shizenyama.com/shizenyama/32493/

Leave a comment